
#Mixed Reality #Passthrough #Hand Tracking #MetaQuest #Quest3 #Quest2 #QuestPro

To enable passthrough, follow these 3 steps:
- Enable Passthrough in OVRManager in OVRCameraRig
- Add OVRPassthroughLayer script
- Change the Camera’s clear flag and background
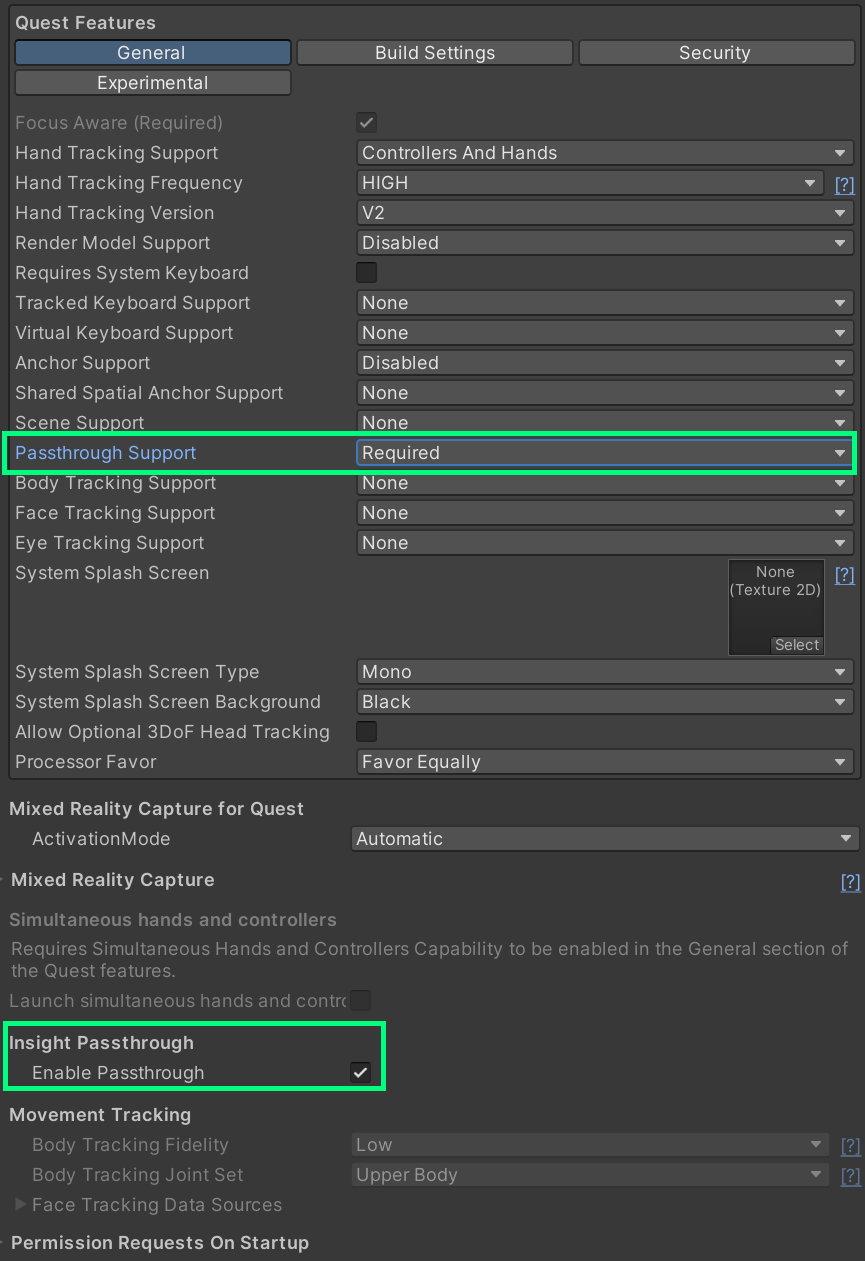
1. Enable Passthrough in OVRCameraRig > OVR Manager
Update Passthrough Support and Enable Passthrough
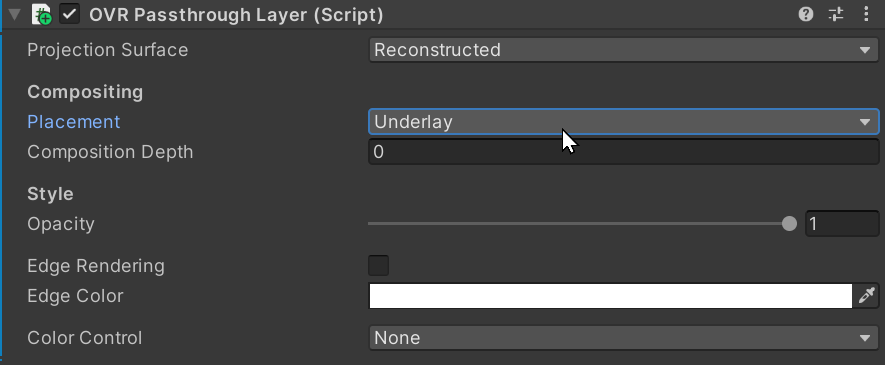
2. Add OVRPassthroughLayer script
Add OVRPassthroughLayer component to the OVRCameraRig. Select Underlay to use the passthrough as a background. This will create augmented reality experience by showing the physical environment.
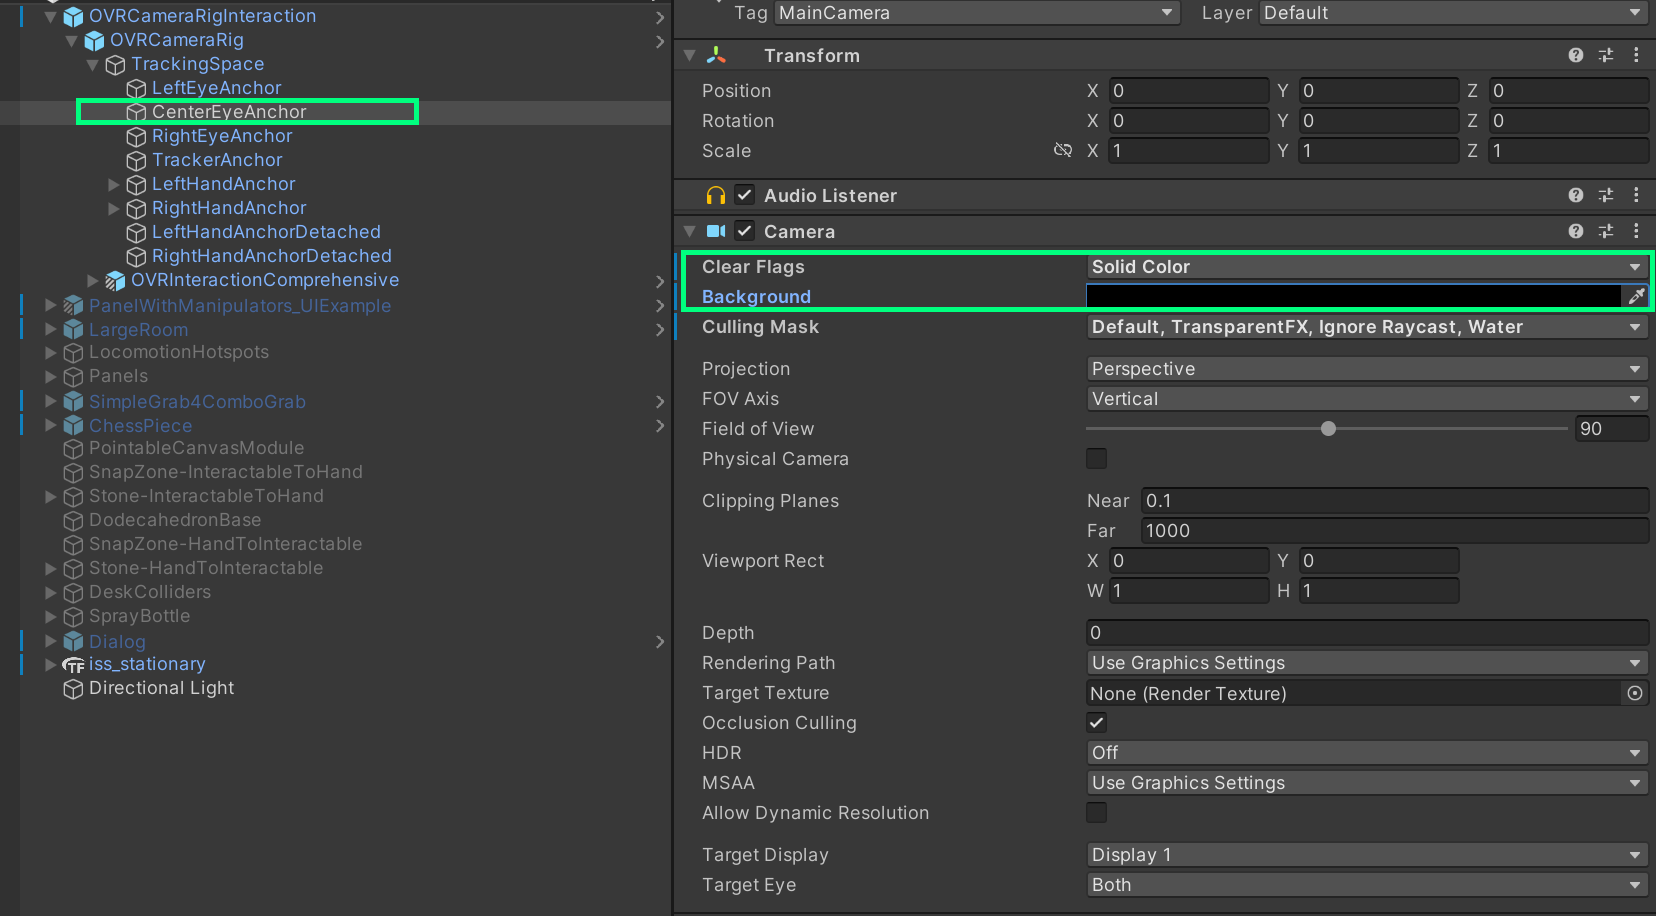
3. Change Camera Background
Under OVRCameraRig > TrackingSpace > CenterEyeAnchor > Camera
Update Clear Flags to Solid Color and the Background color to black and alpha to 0.0
Seeing the passthrough environment but bluish color mixed?
Make sure to change the Camera’s Clear Flags and Background’s opacity. (step 3)
Building Common Spatial Interactions with Hand and Controllers – Poke, Grab, Ray
To learn more about how to easily achieve crucial spatial interactions in Meta Quest using Meta XR Interaction SDK, check out this article: