
#Mixed Reality #Passthrough #Hand Tracking #MetaQuest #Quest3 #Quest2 #QuestPro
Meta’s XR Interaction SDK provides components for commonly used spatial interactions for various input methods such as Controllers and Hands that are available on Quest devices – Quest 3, Quest Pro, and Quest 2. With Interaction SDK, you can easily create spatial interactions such as grab, two-handed manipulation, poke, and distance grab.
This article is based on the version 65,
released on May 16, 2024
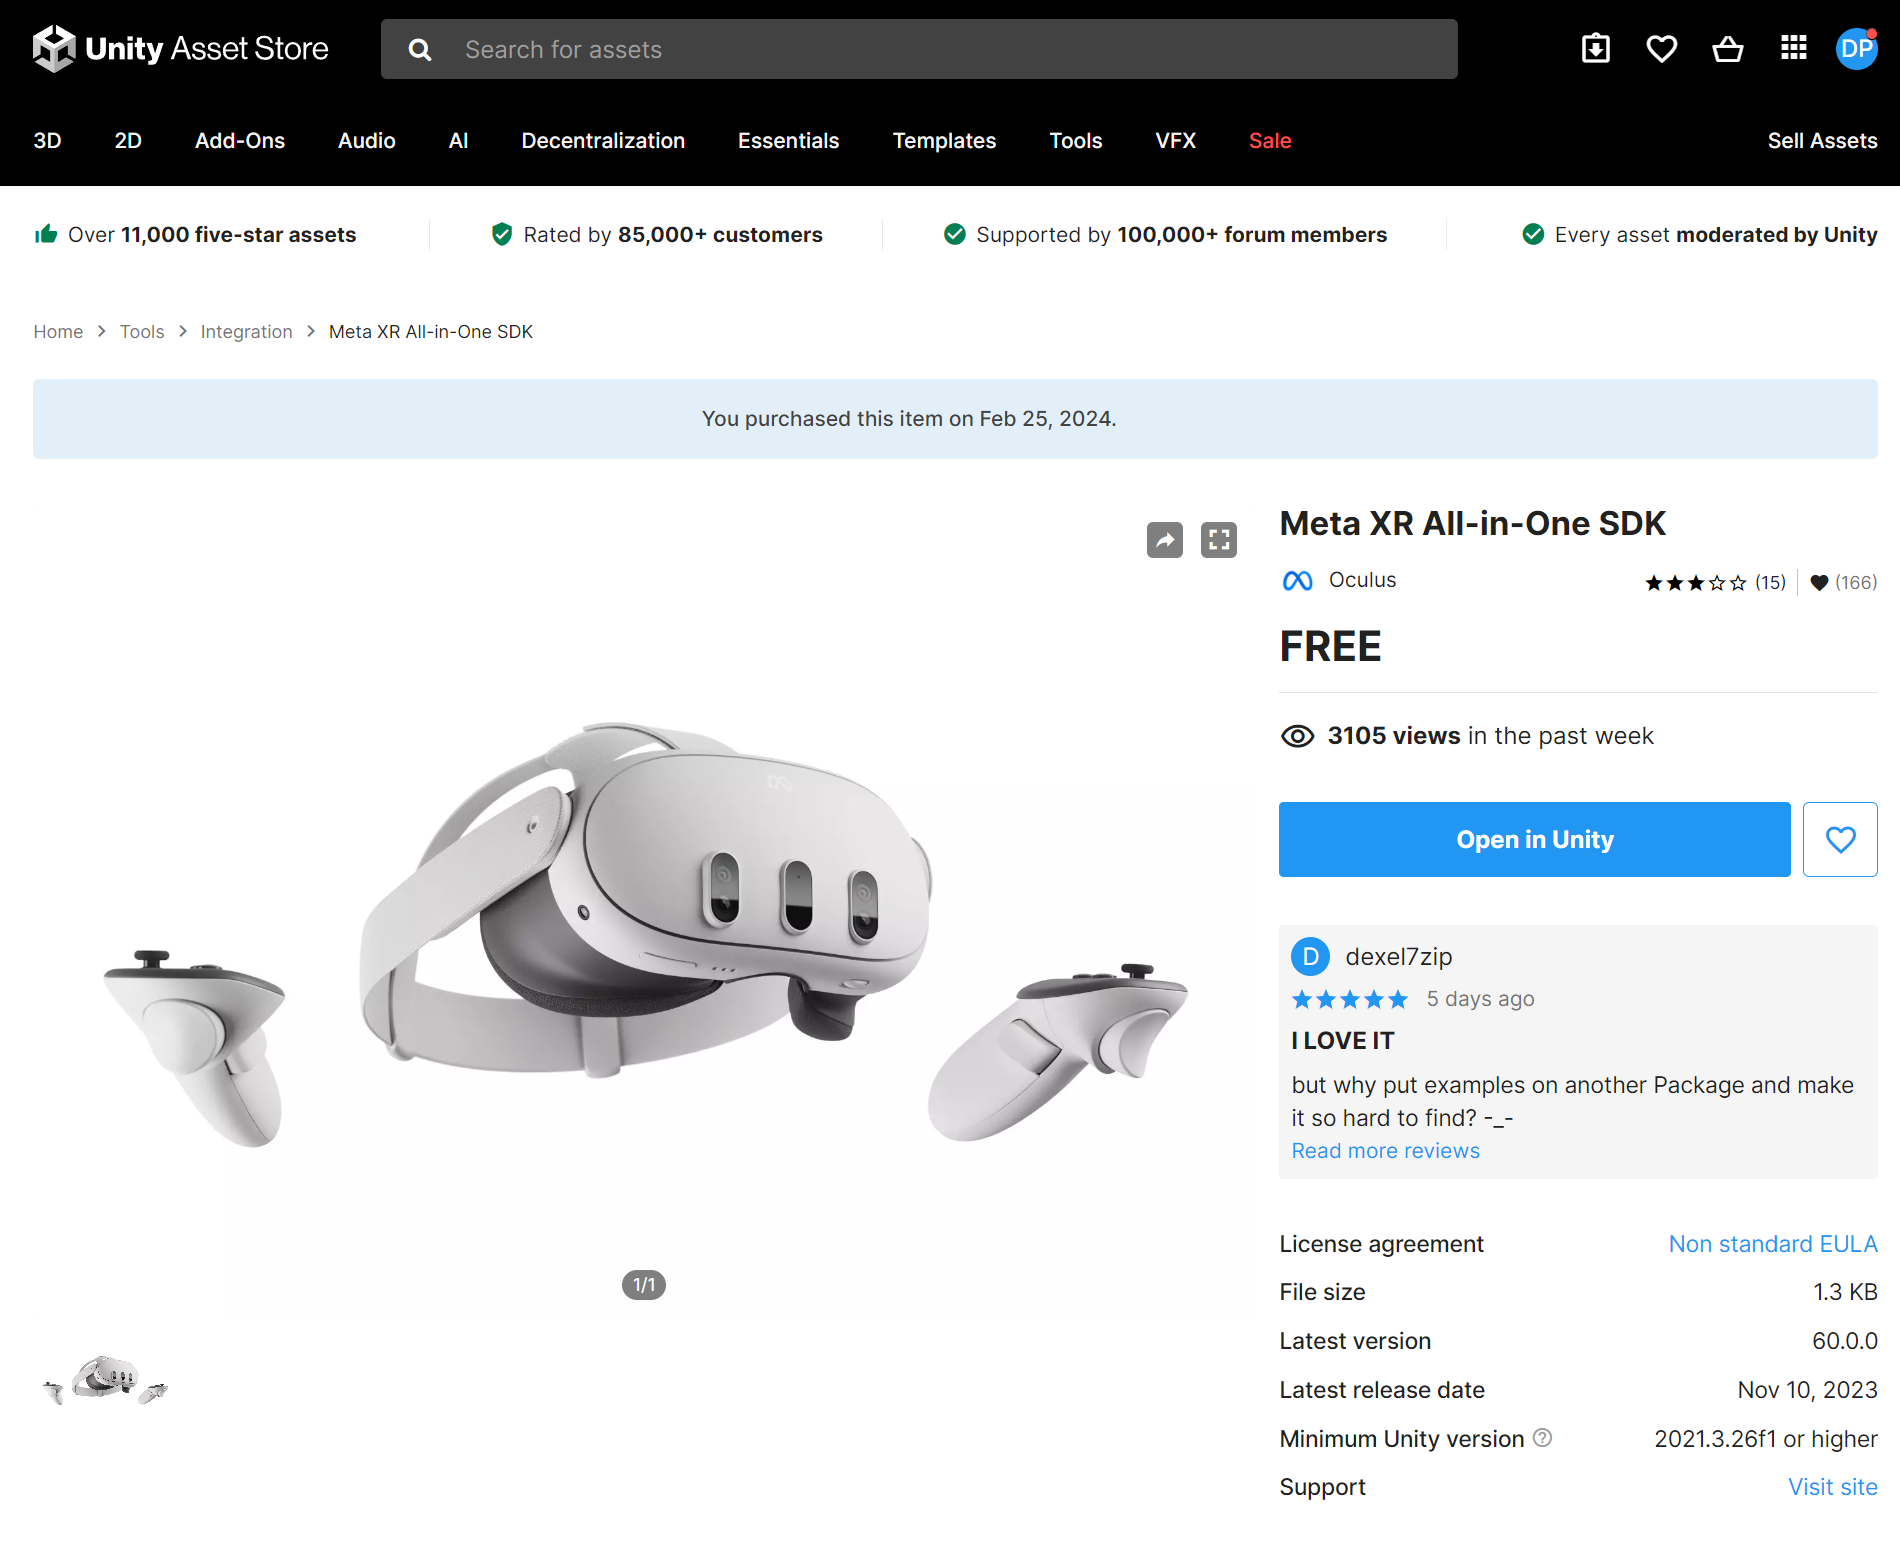
Download and Install SDK from the Unity Asset Store
Meta provides various features and capabilities through multiple SDKs. Interaction SDK is one of the Meta’s XR SDKs. Installing an All-In-One SDK that includes all SDKs is the easiest way to get started and learn exciting Meta’s rich capabilities. All SDKs are available on the Unity Asset Store.
- Meta XR All-in-One SDK Unity Asset Store page
- Meta XR All-in-One SDK description page
- More details on Meta XR SDKs

Import Sample Scenes (Separate Package)
Sample scenes provide great examples of using many building blocks available in SDKs. Rather than starting from scratch, it is highly recommended to download and see how things are wired together to achieve various types of interactions.
Interaction SDK’s sample scenes are in a separate package called Meta XR Interaction SDK OVR Samples.
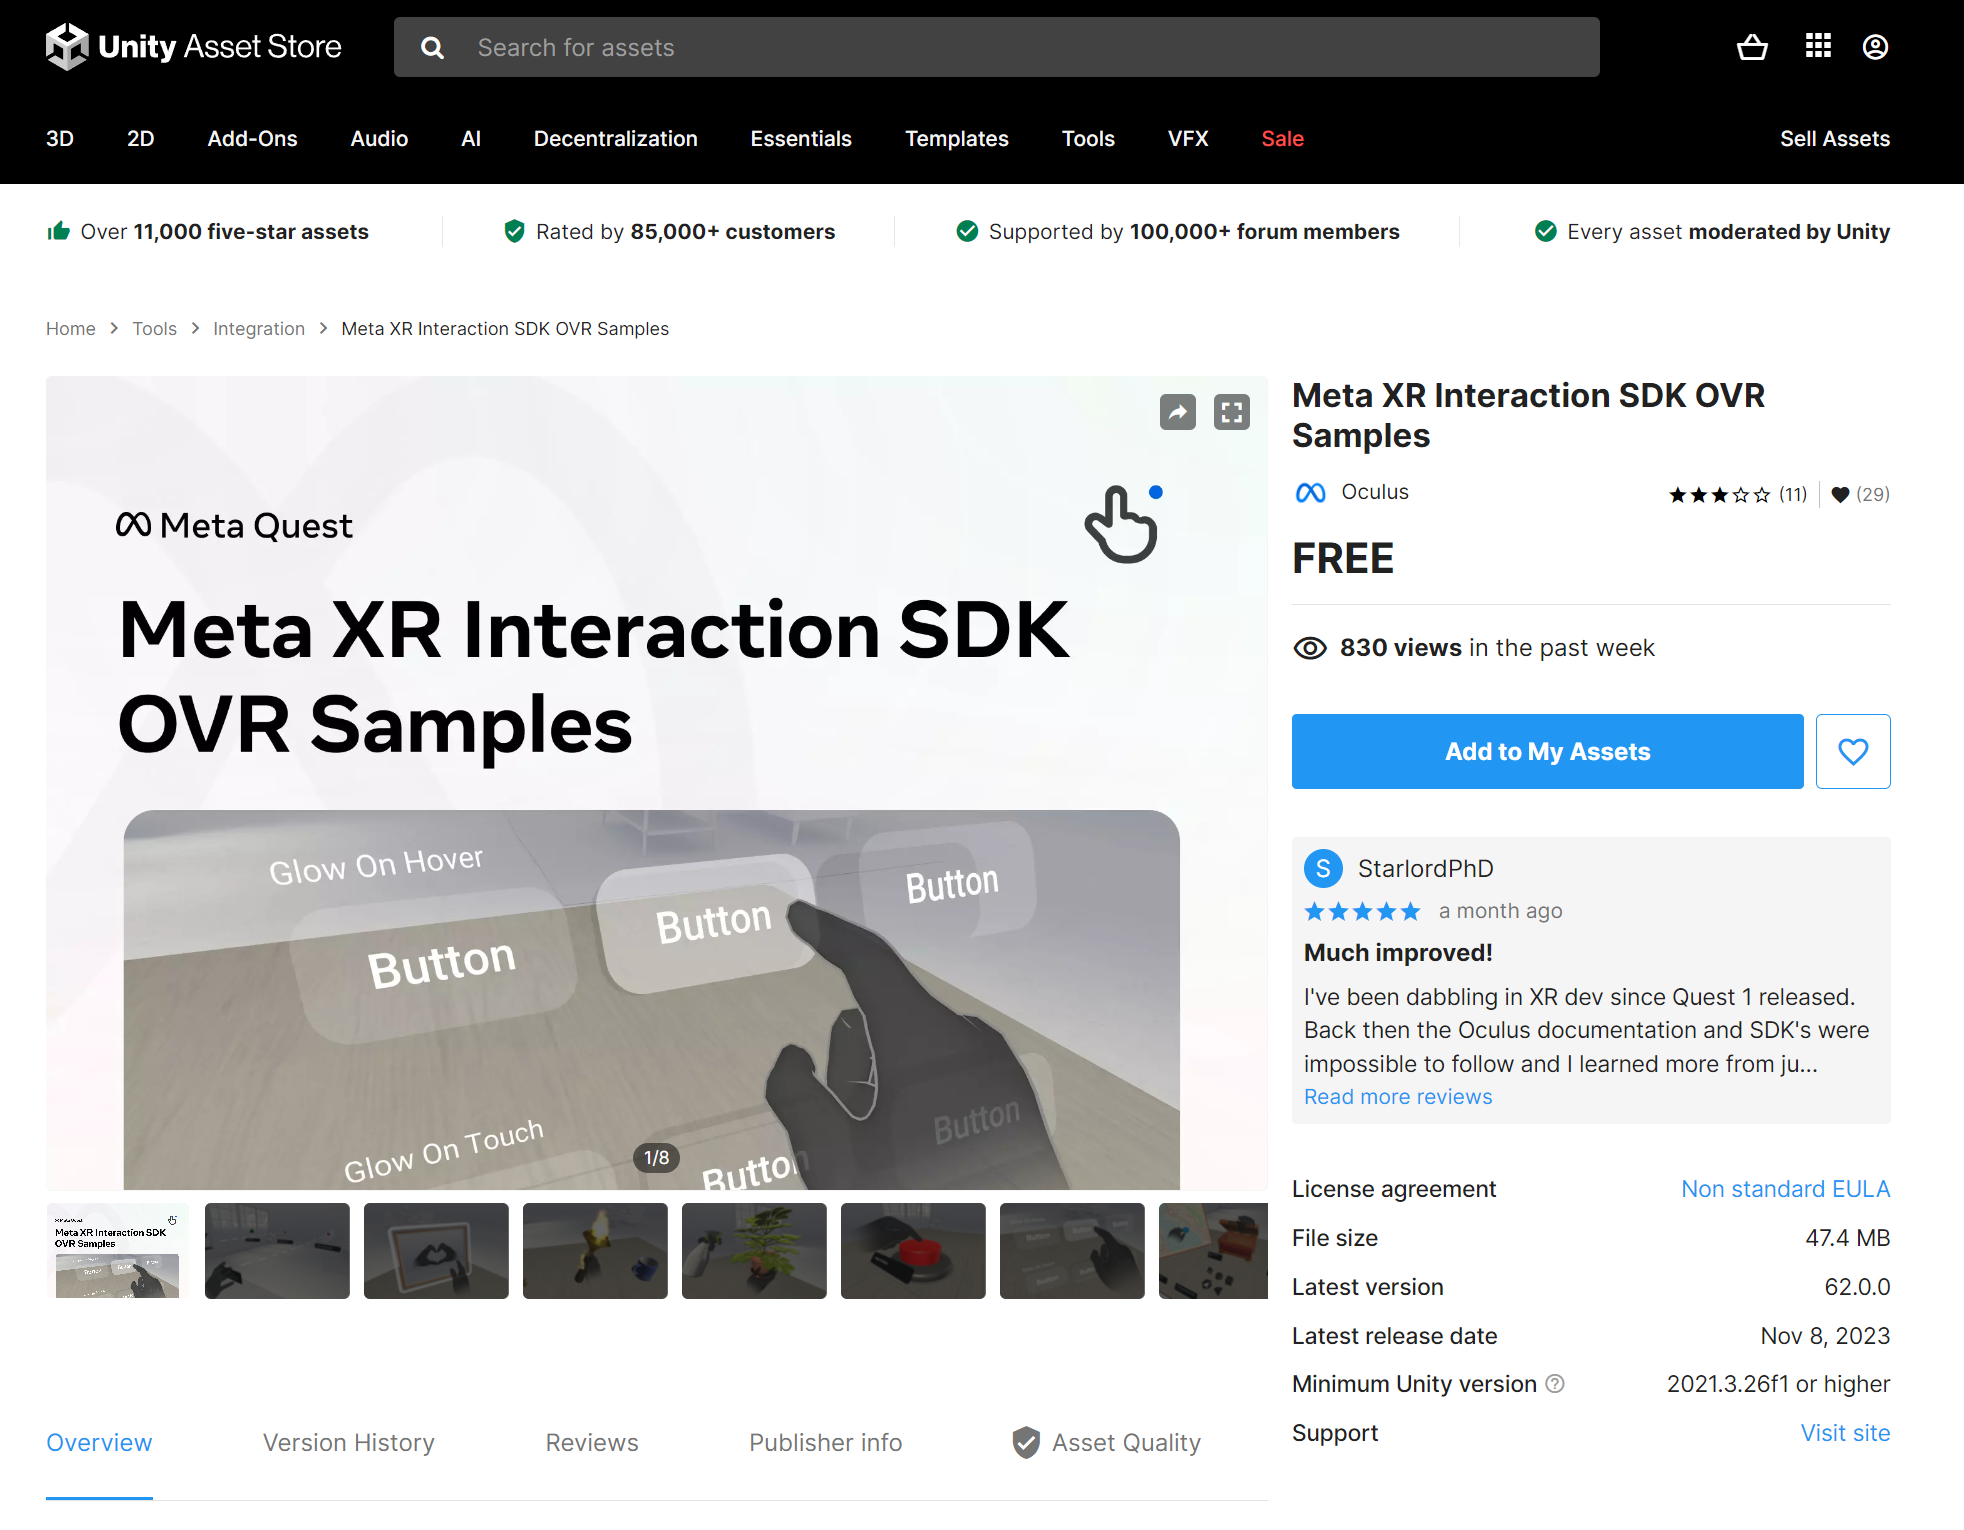
IMPORTANT: After installing the package, you need to go to Window > Package Manager > Meta XR Interaction SDK OVR Samples > Click the ‘Samples’ tab and ‘Import’ button on each item to import samples.

Once you finish importing the samples, you can find the scenes under Assets > Samples > Meta XR Interaction SDK OVR Samples > VERSION > Example Scenes folder.

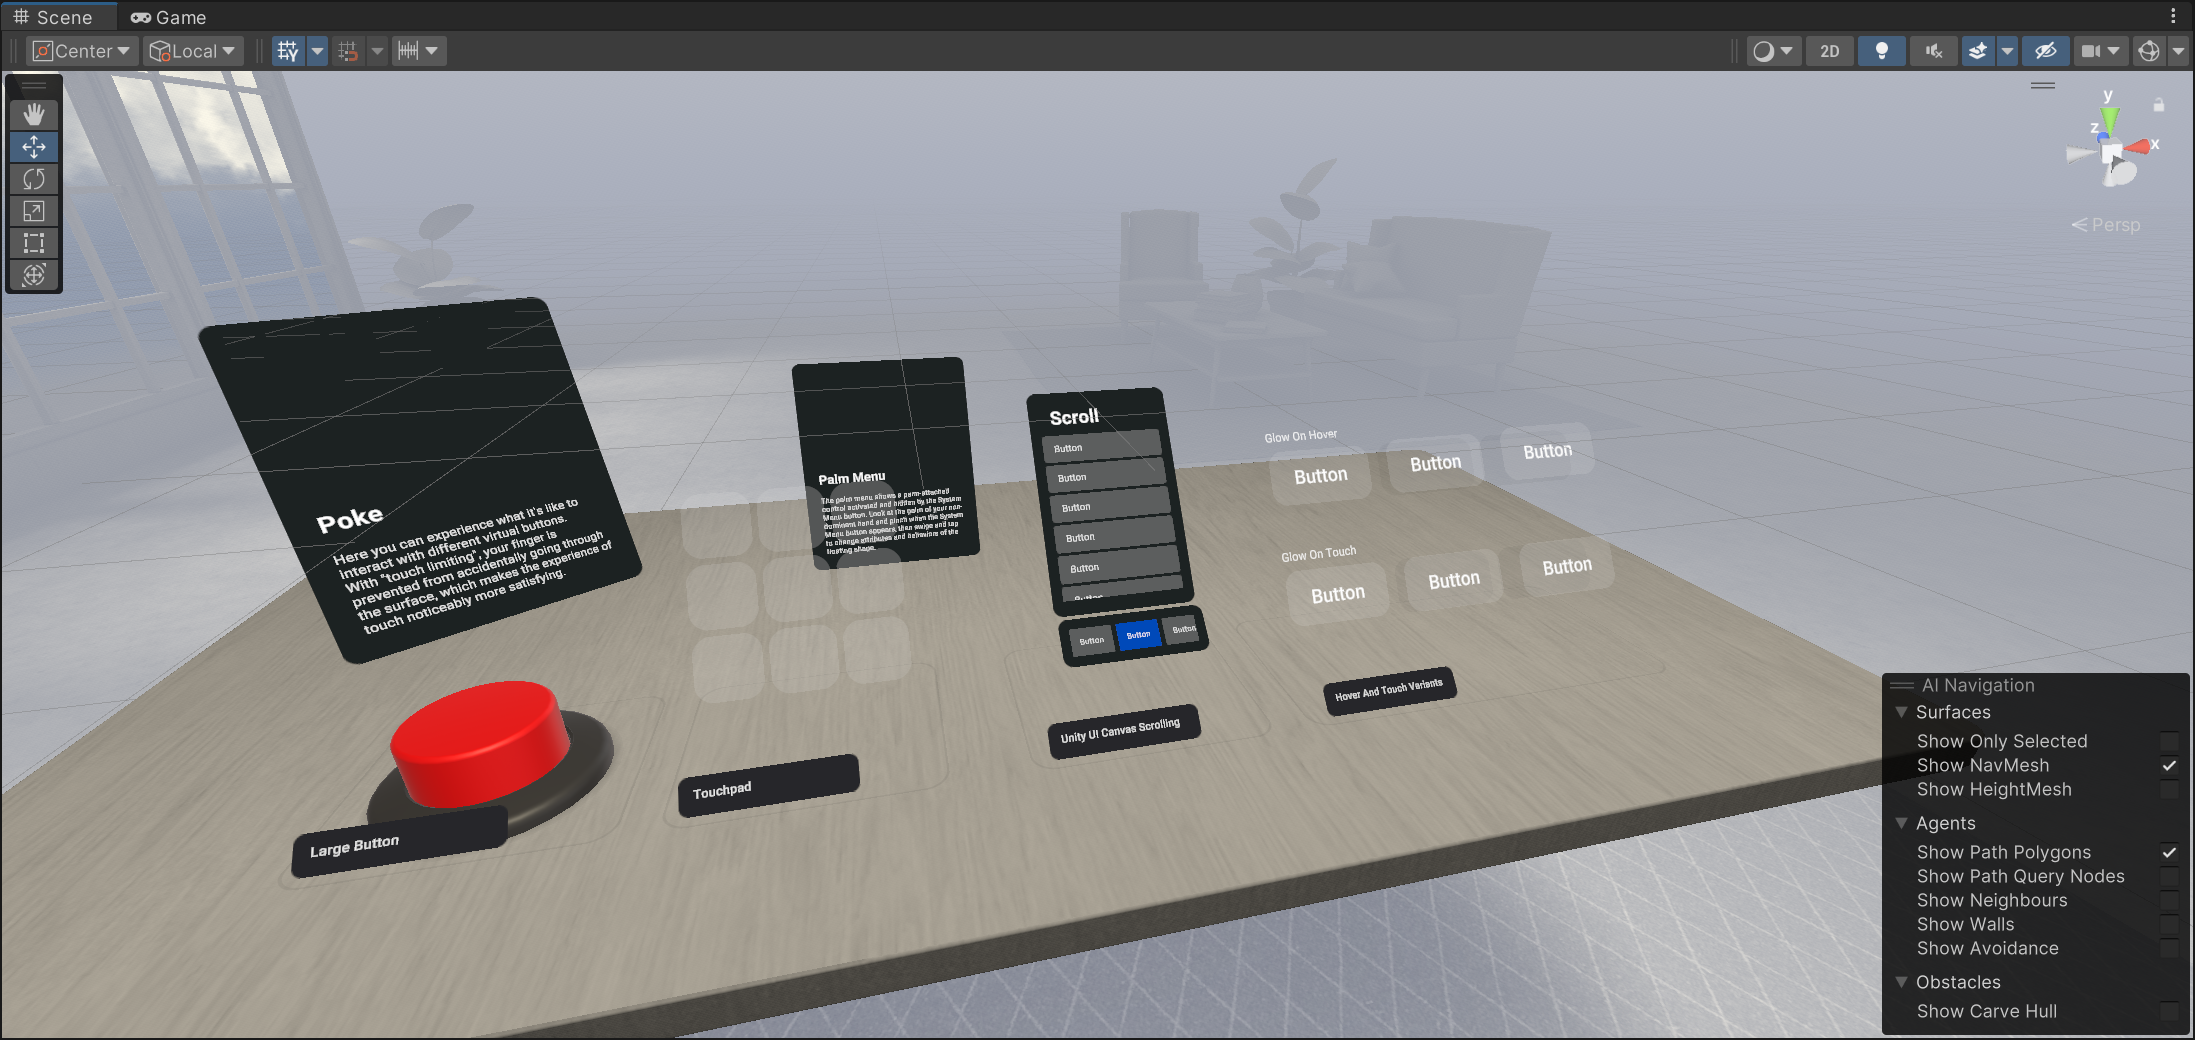
On this page, you can find detailed explanations about the example scenes that demonstrate these interactions:
https://developer.oculus.com/documentation/unity/unity-isdk-example-scenes/
- Grab
- Distance hand grab
- Touch hand grab
- Hand Ray
- Poke
- Locomotion
- Transform
- Snap
How to experience the Example Scenes on the Device
Option 1. Using Quest Link
You can directly run the Unity scene on the device using a USB-C cable in real-time. Follow the steps to configure Meta Quest Link for Unity.
Option 2. Build and Deploy
Follow the instructions on this page to build .apk app package and deploy to the device.
Option 3. Interaction SDK Samples app
To experience all example scenes on the device without building and deploying from Unity, you can also install the Interaction SDK Samples app available on App Lab.

Quick Overview: How Does Interaction Work in ISDK?
Before jumping into building, it is helpful to understand the concepts of core elements that make rich interactions possible in Interaction SDK.
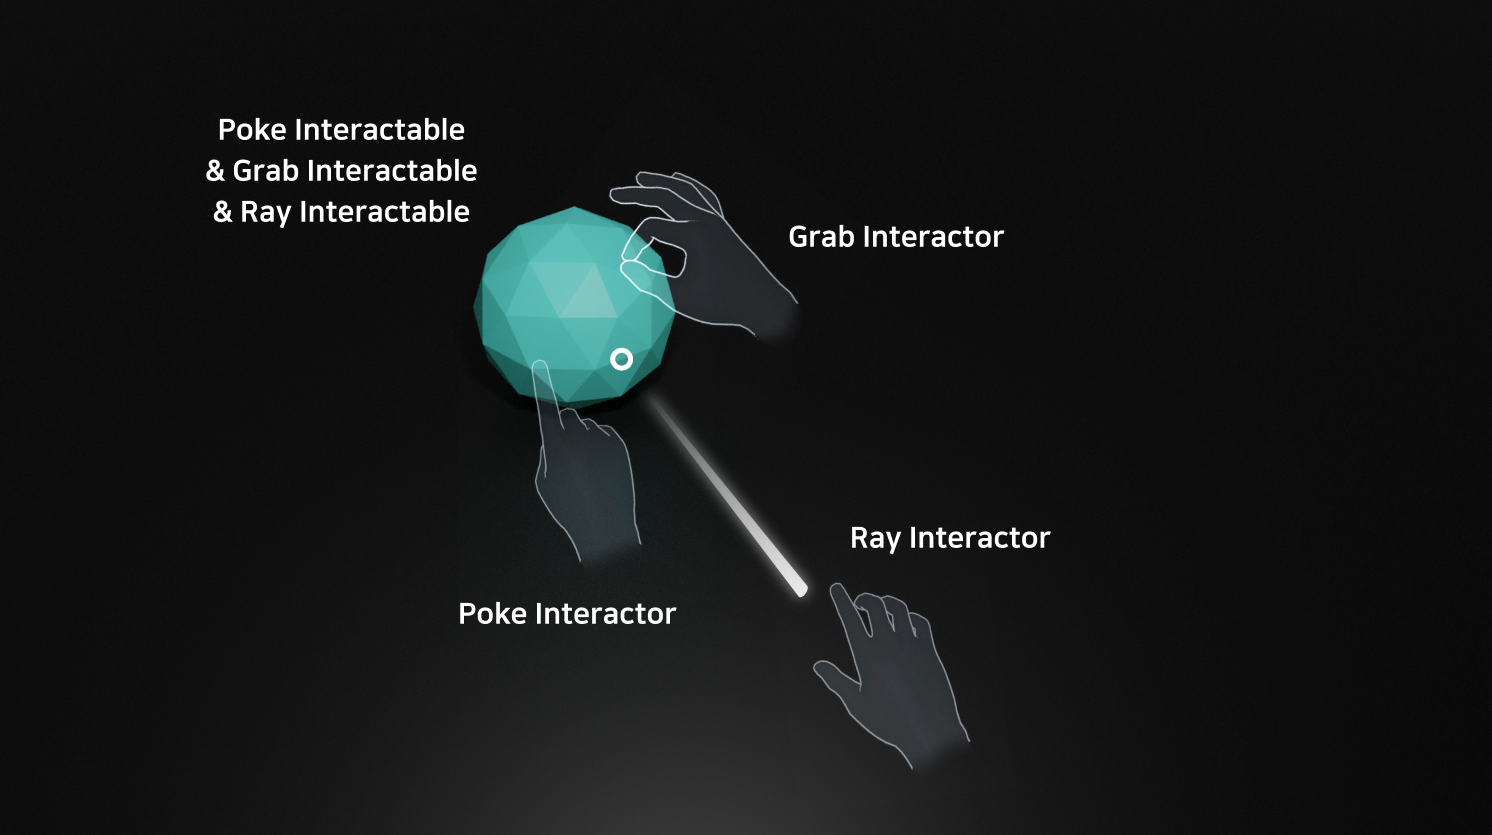
Interactor
An Interactor is a component attached to your hand or controller that initiates any action, like a grab, teleport, or poke.
Interactable
An Interactable is an object acted upon (hovered or selected) by the Interactors on your hands or controllers.
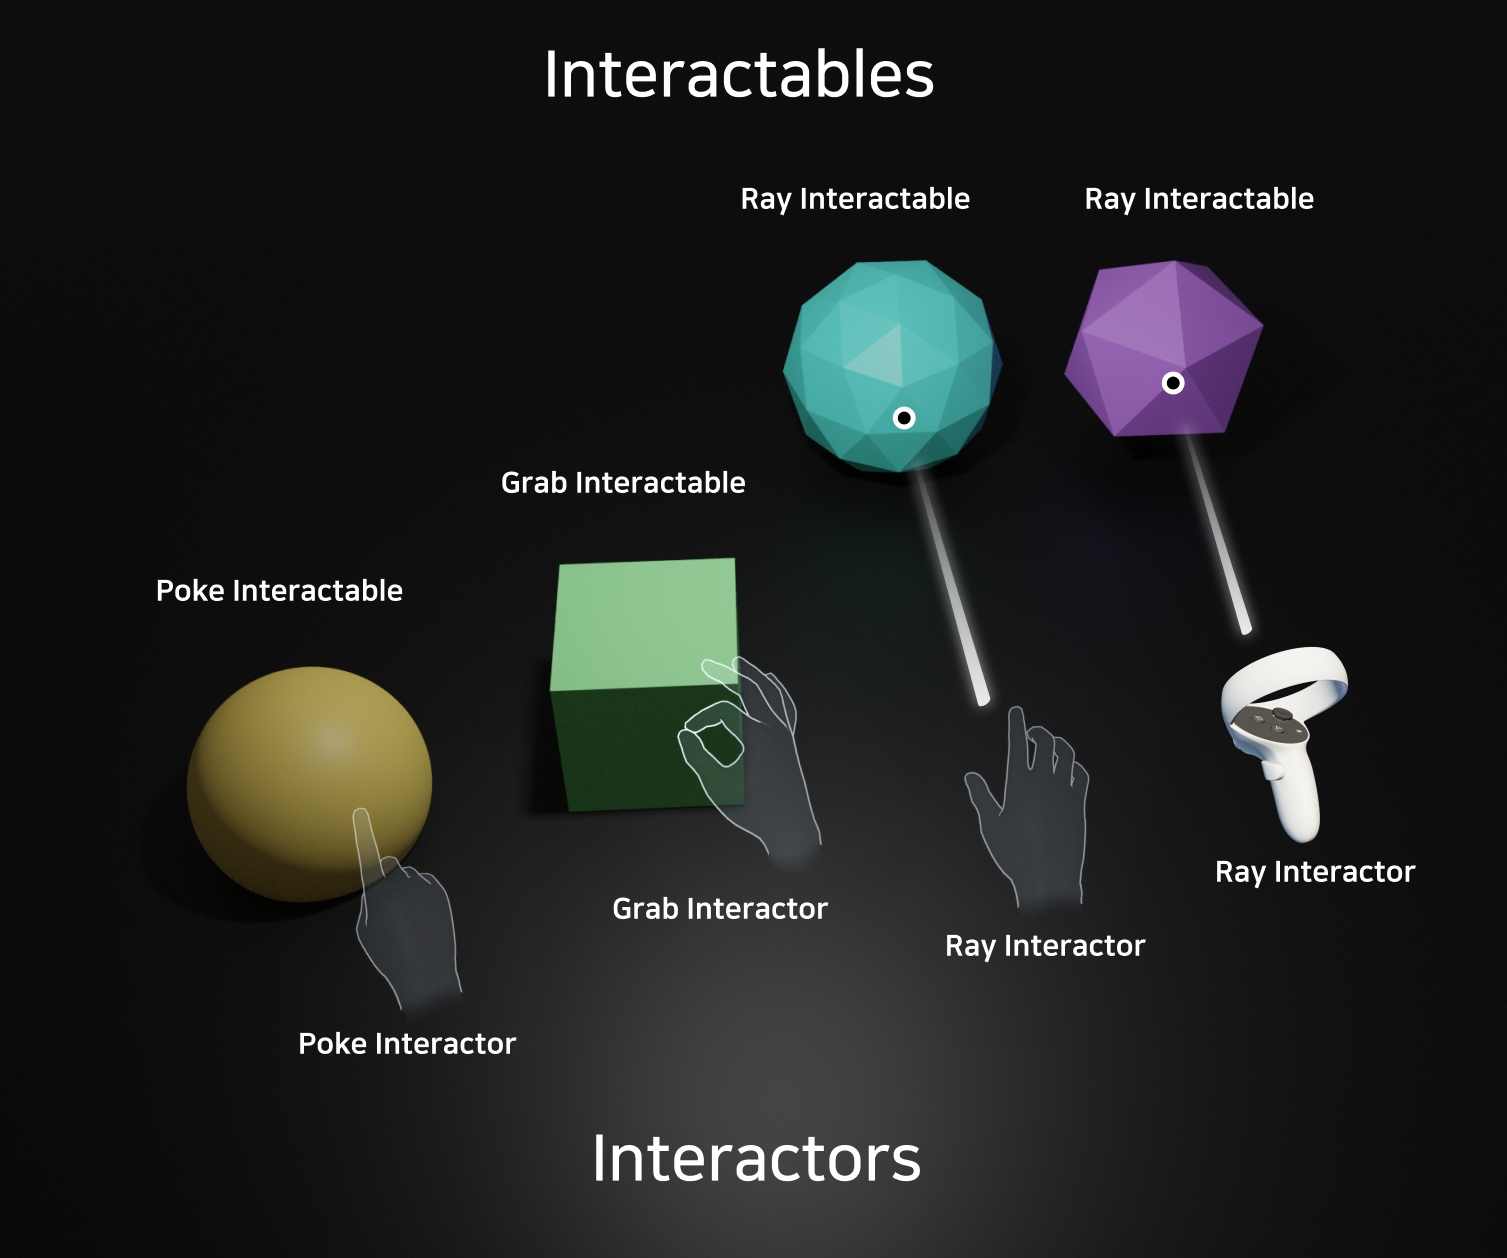
In summary, if you would like to achieve a specific interaction, you need to have two elements as a pair – Interactor on the source (e.g. input method) and Interactable on the target object. For example, if you want to make a cube object grabbable with the right hand, you need Grab Interactable on the target cube object and Grab Interactor on the right-hand input source.
How can I make an object support multiple interactions?
You can simply assign multiple Interactables on a single object to enable various interactions. For example, if I want to make an object support poke, grab, and ray interaction, I can assign PokeInteractable, GrabInteractable, and RayInteractable. Of course, you need to have corresponding Interactors on the input method as well. (explained in the next section)
Where should we assign Interactors and Interactables?
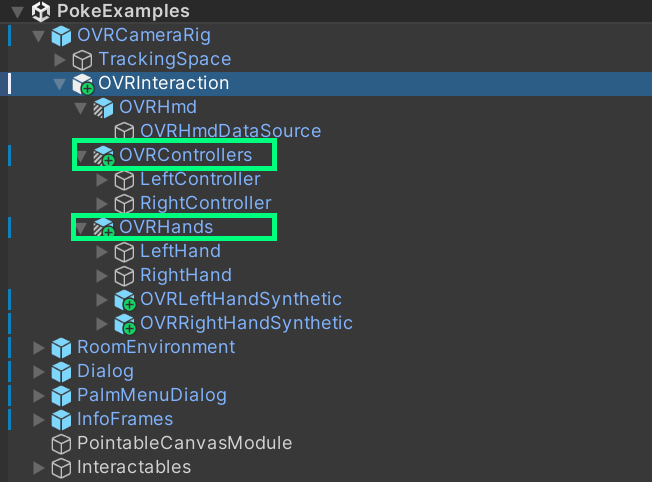
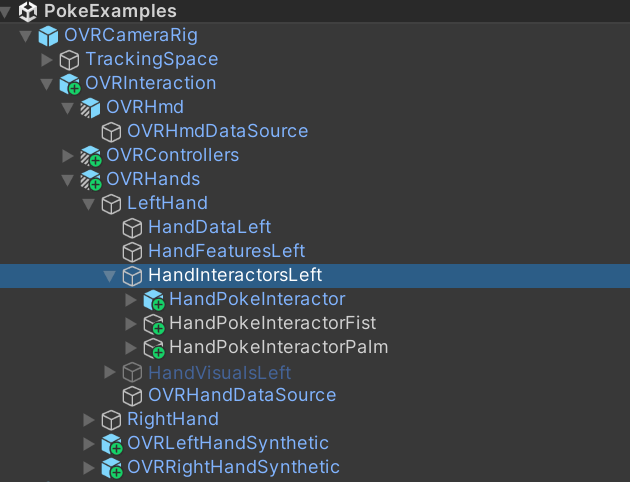
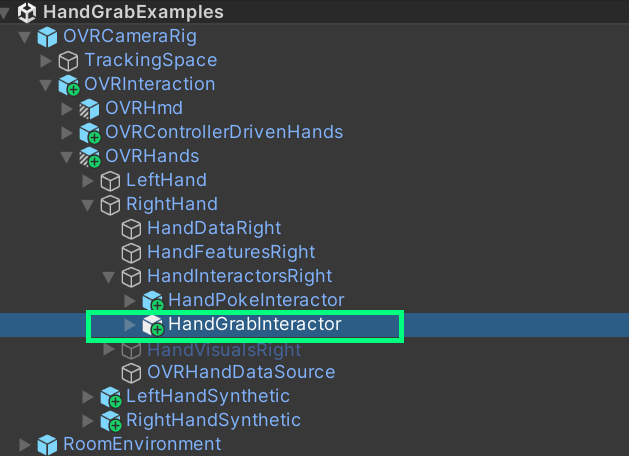
In Meta XR Interaction SDK, input sources are provided under OVRInteraction prefab. In the PokeExamples scene, take a look at OVRInteraction under OVRCameraRig. It has OVRControllers and OVRHands. Under OVRHands > LeftHand > HandInteractorsLeft, you can find HandPokeInteractor.
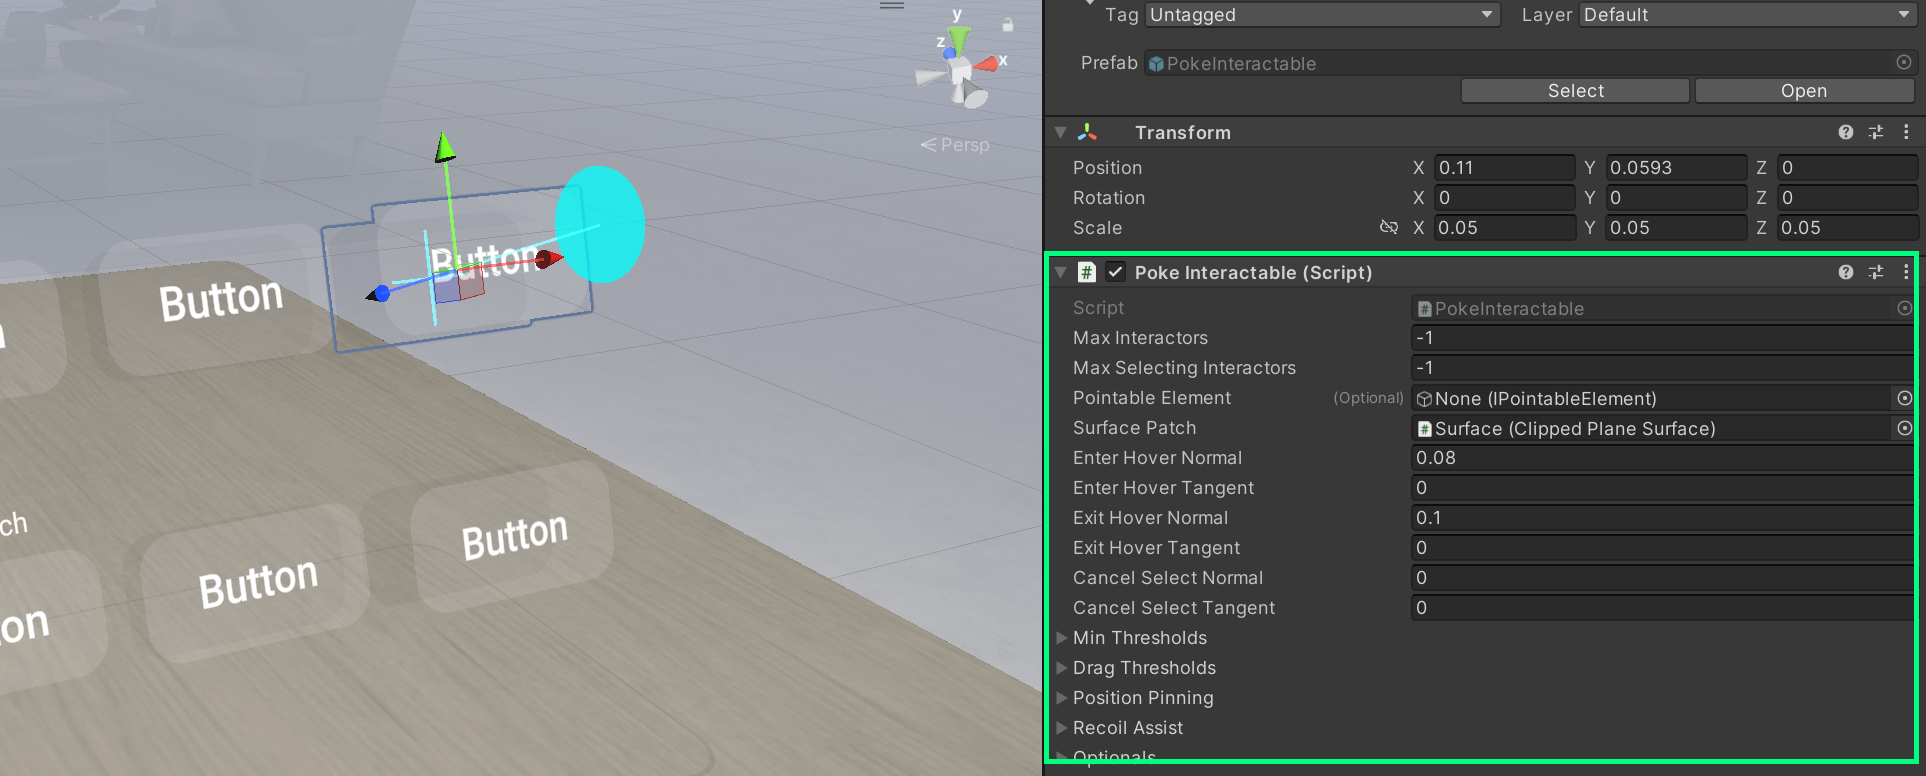
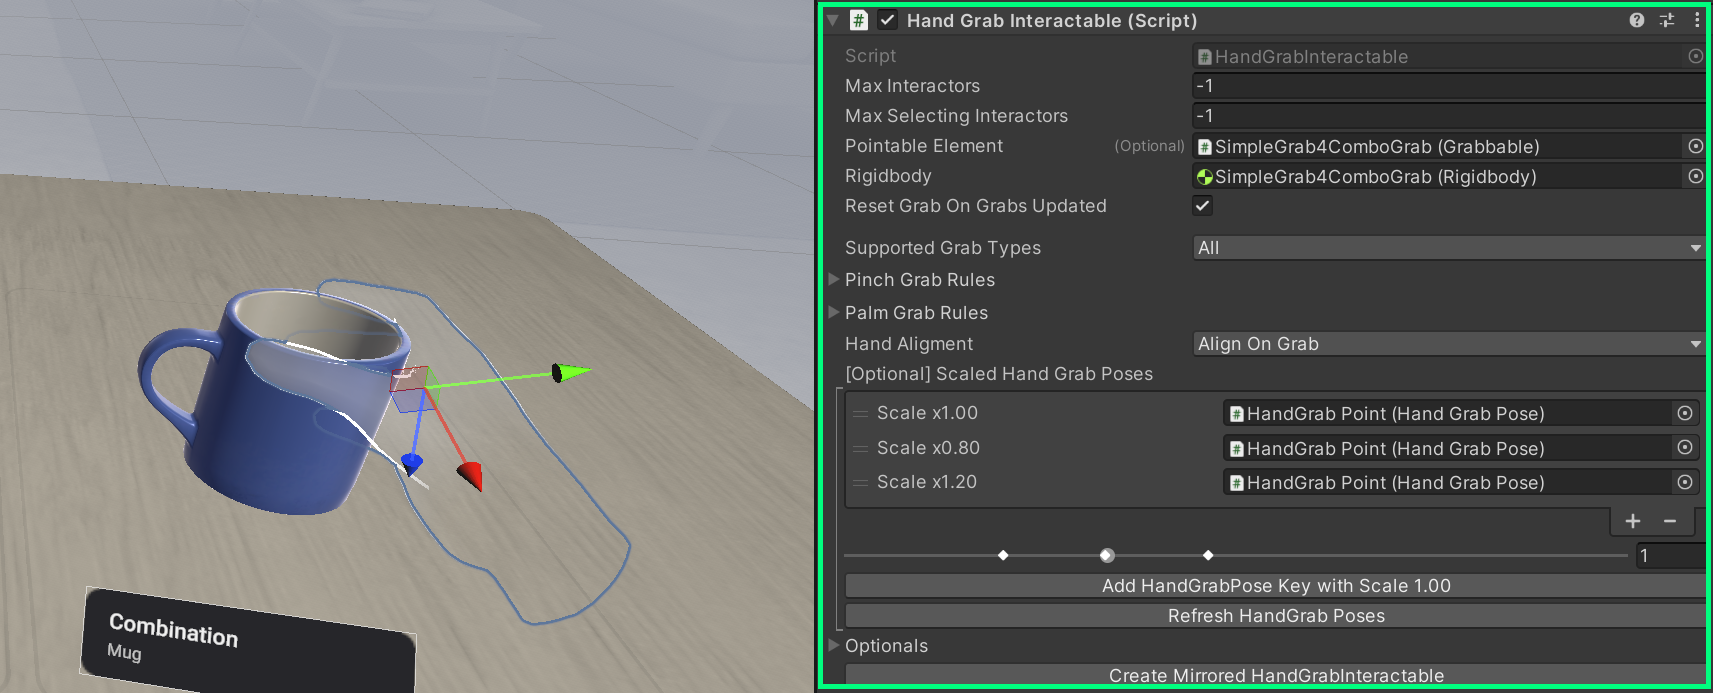
Then, when you select a target object in the scene (e.g. button) you can find PokeInteractable is assigned to it. You can find similar pairing patterns in other example scenes. Below shows HandGrabInteractor under OVRHands input modality and HandGrabInteractable on the target object (cup)
Easier Path: Using the Comprehensive Rig for rich multi-modal interactions
ComprehensiveRigExample scene demonstrates how multiple interactions can be wired together in a single rig such as Poke, Ray, Grab, Hand Grab, Hand Grab Use, Grab with Ray, Distance Grab, and Throw. All of them work with both hands and controllers.
You can find various Interactors are already configured under OVRInteractionComprehensive which allows you to jump-start designing and developing experiences.
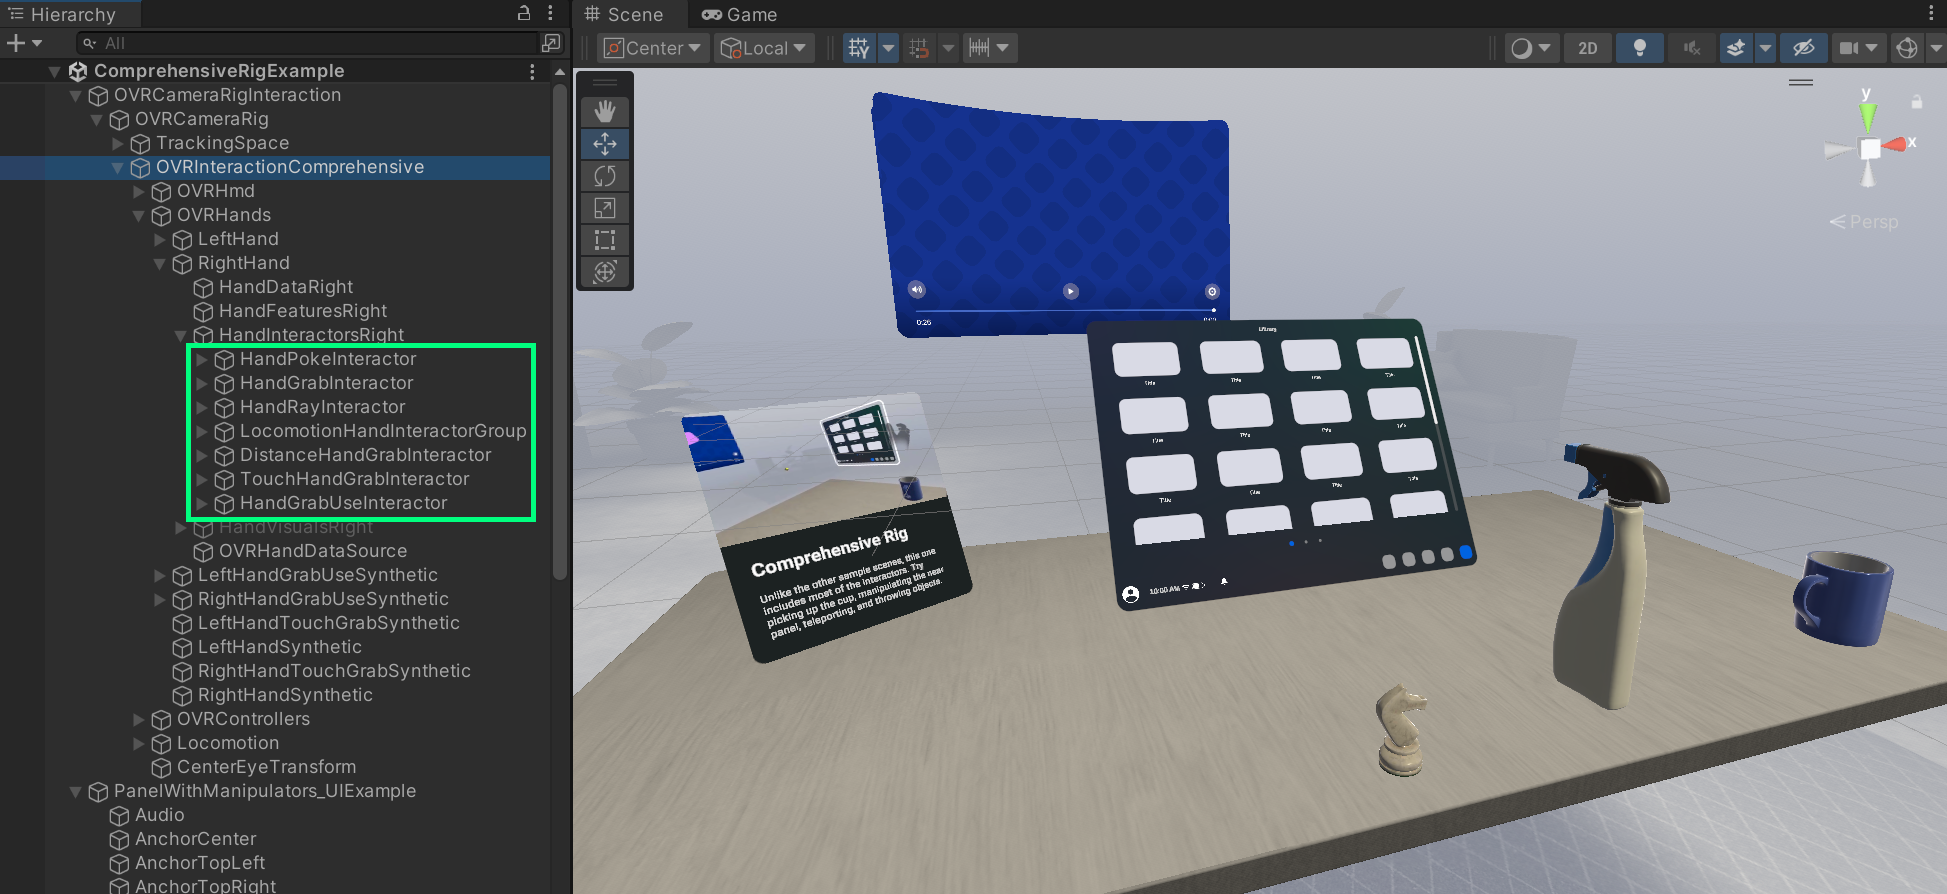
To use the Camera Rig with comprehensive interactions, you can simply drag and drop OVRCameraRigInteraction into your scene. Using the Comprehensive Rig, let’s take a look at how we can add various interactions to an object.
How to add Grab interaction
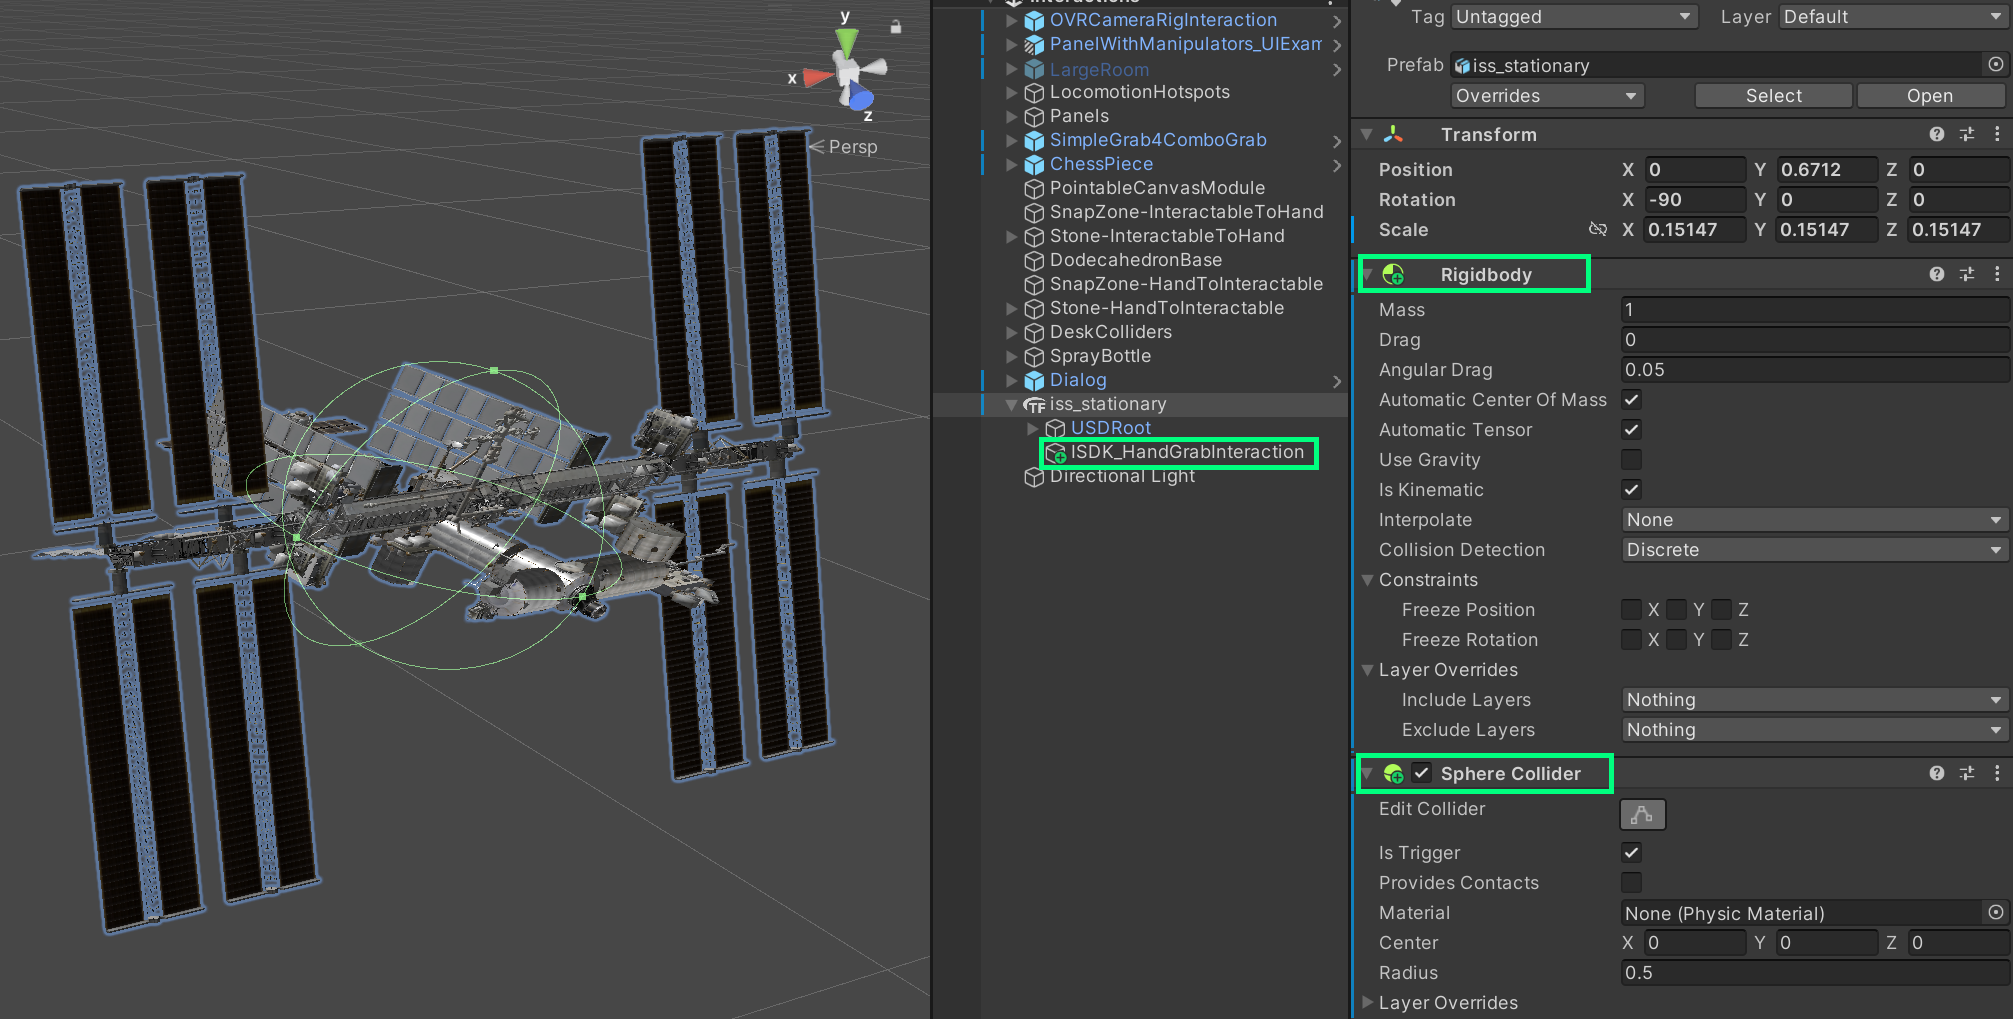
From Interaction SDK v62, you can use the Quick Actions menu to add interactions to an object. Right-click the object and under Interaction SDK > Add Grab Interaction
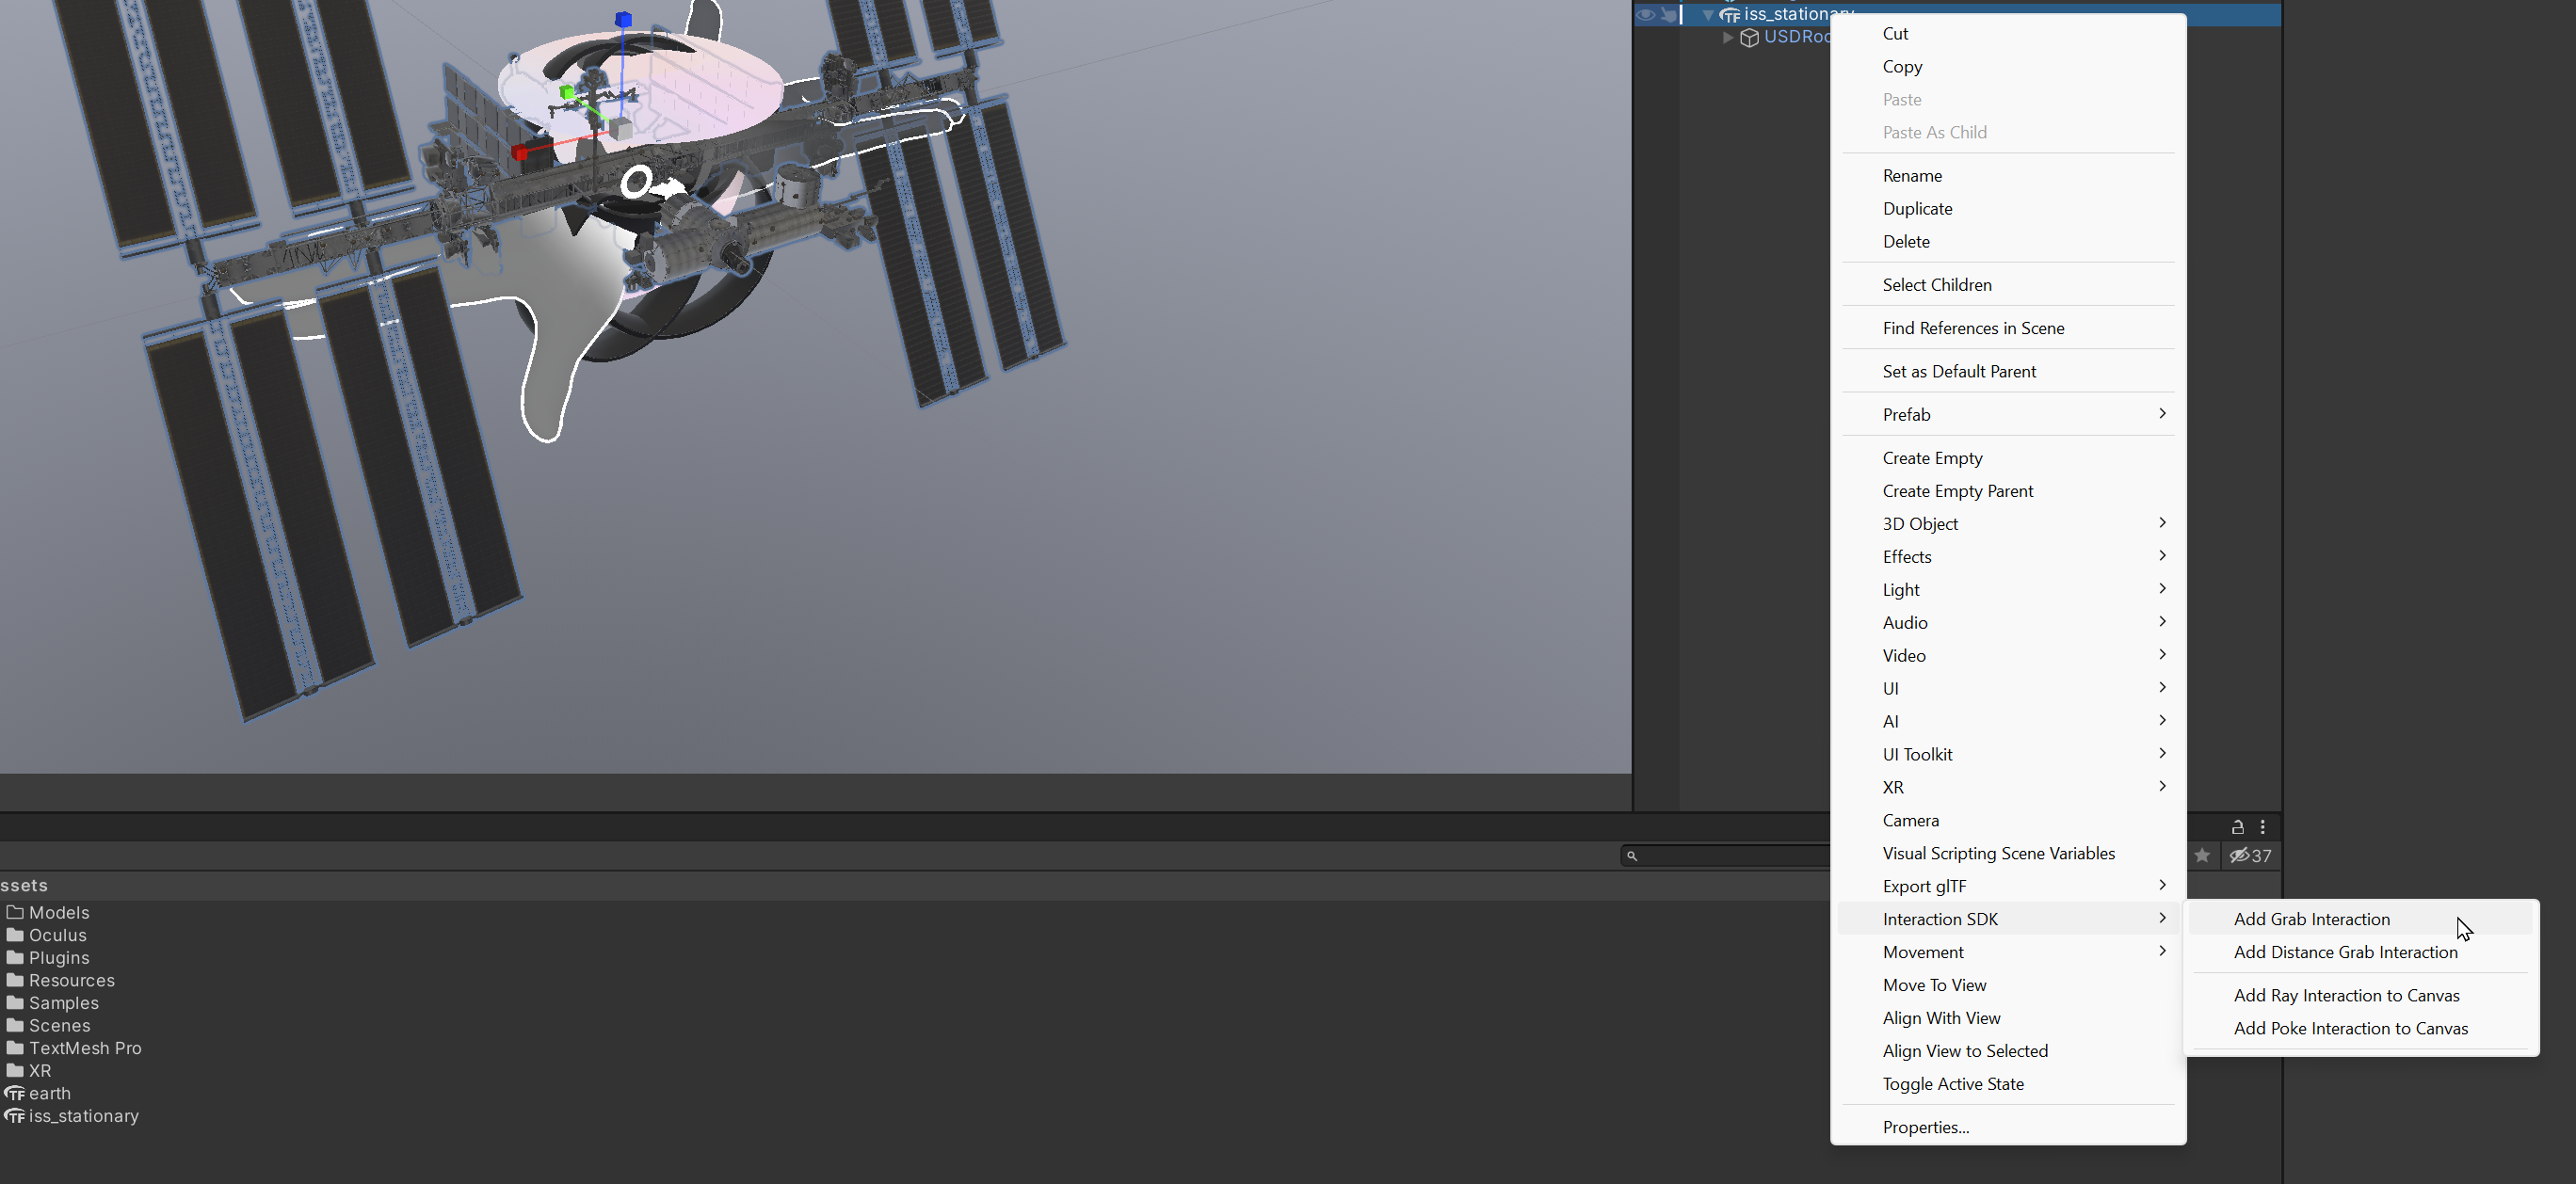
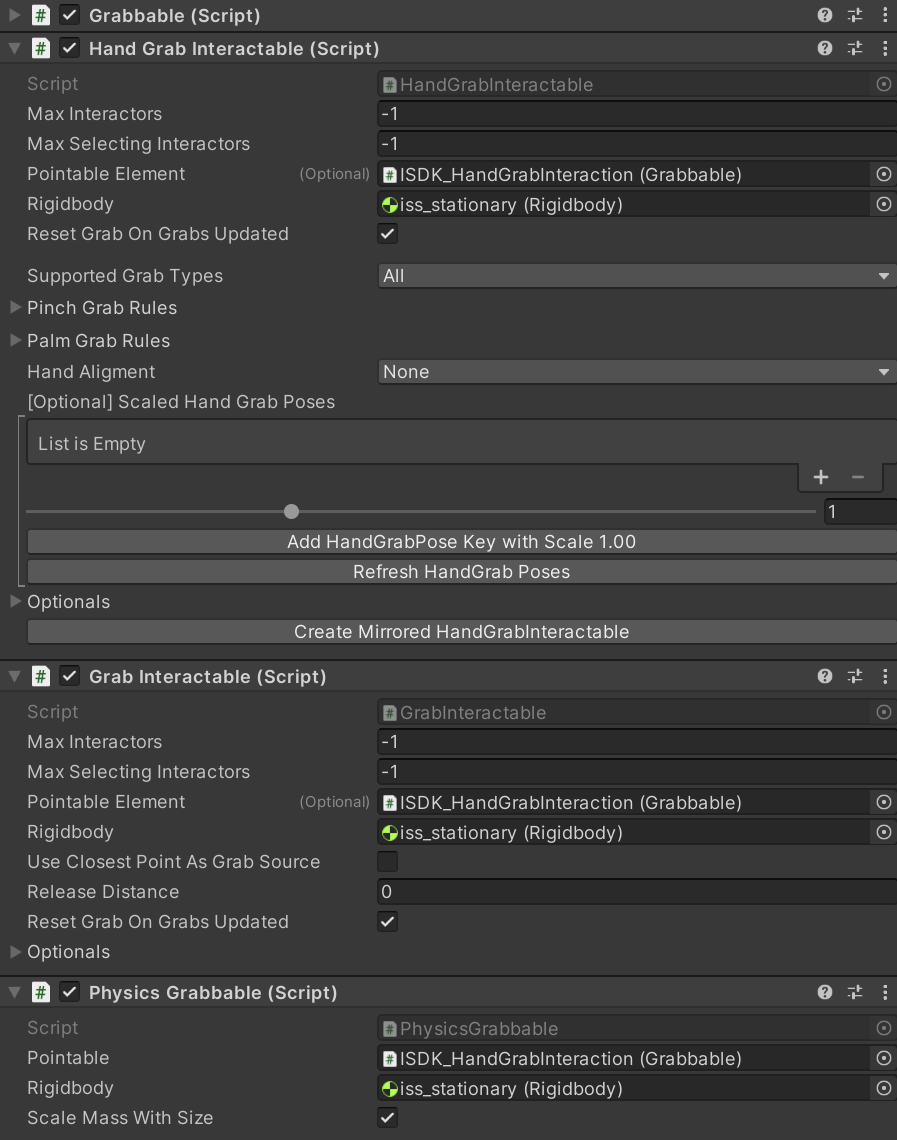
Grab Wizard automatically adds and configures required elements for the interaction such as Rigidbody and Collider. Click ‘Fix All‘ and then the ‘Create‘ button. Now you can see the newly added child object ISDK_HandGrabInteraction which contains scripts needed for grab interactions:
- GrabInteractable – Enable Grab interaction for the controllers
- HandGrabInteractable – Enable Grab interaction for the hands
- Grabbable – Enable move, rotate, and scale interactions
- PhysicsGrabbable

Automatically added Rigidbody and Sphere Collider:
How to add Two-Handed Manipulation (Rotating & Scaling)
Using Transformer, you can achieve multi-handed rich interactions. Check out the Grabbable and Transformer documentation for more details.
Let’s add OneGrabTransformer and TwoGrabFreeTransformer scripts then assign them to Grabbable > Optionals
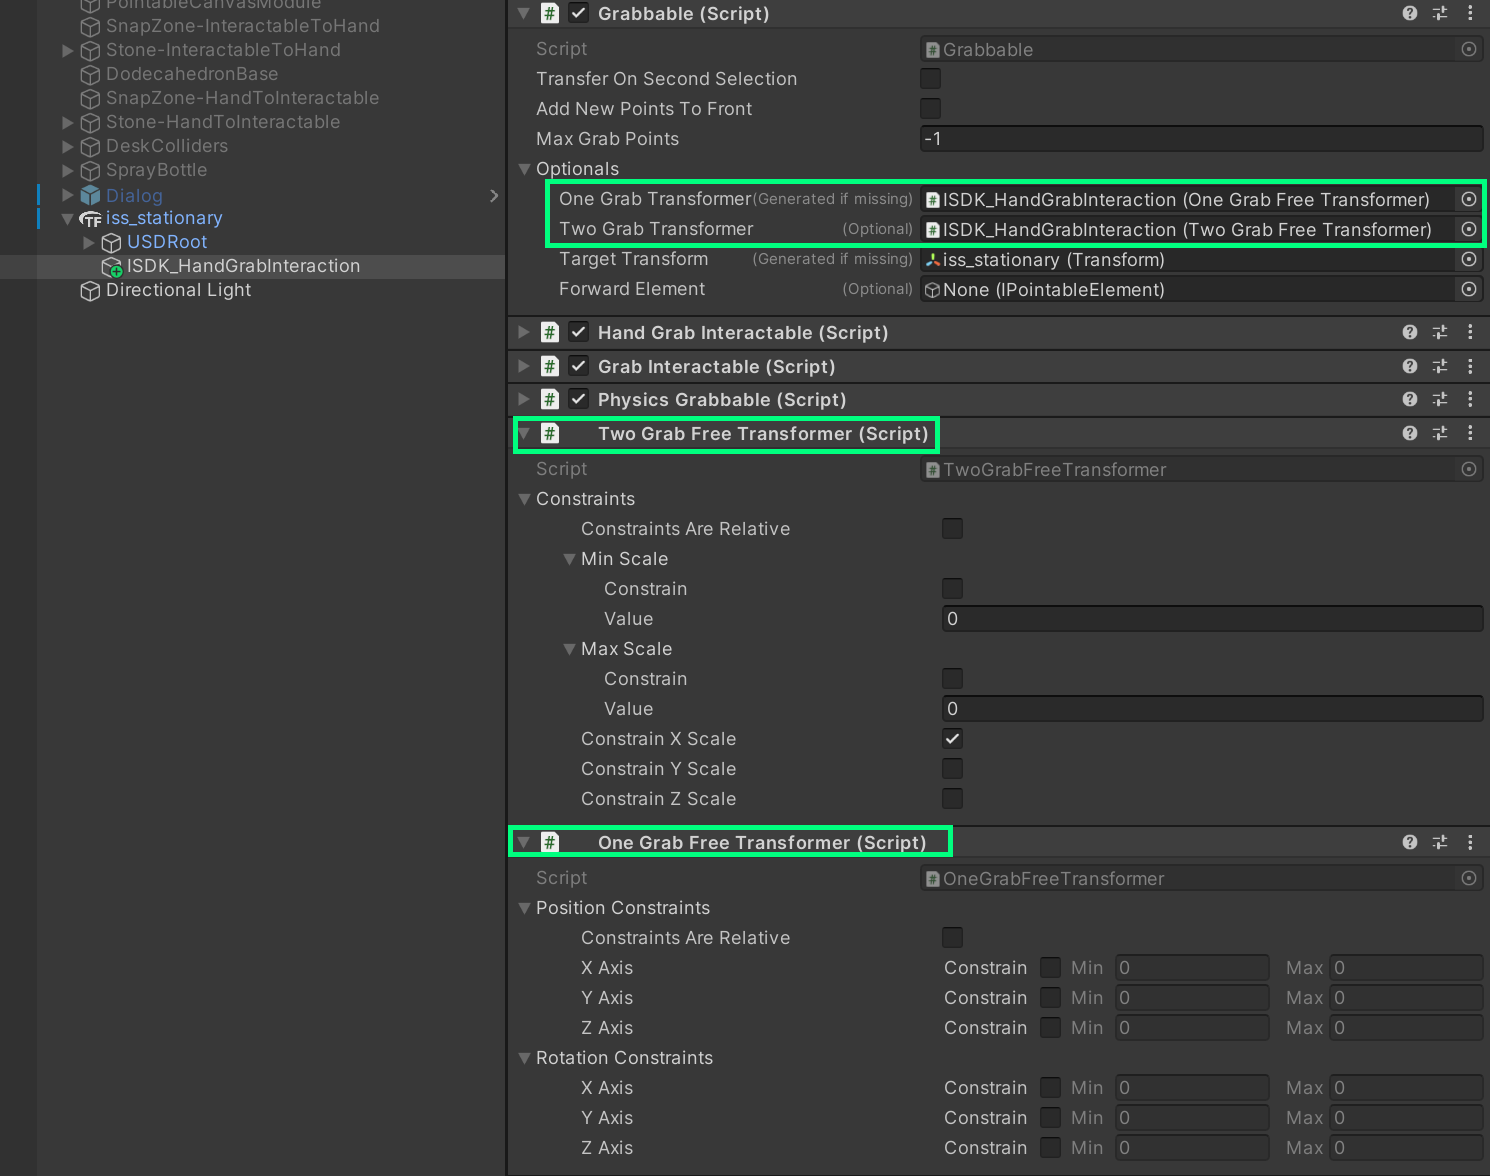
Now you can grab the object with second hand and resize or rotate the object. Being able to observe and interact with 3D objects in Mixed Reality using hand grab, scale, and rotate interactions is one of the most foundational and exciting experiences in Quest 3.
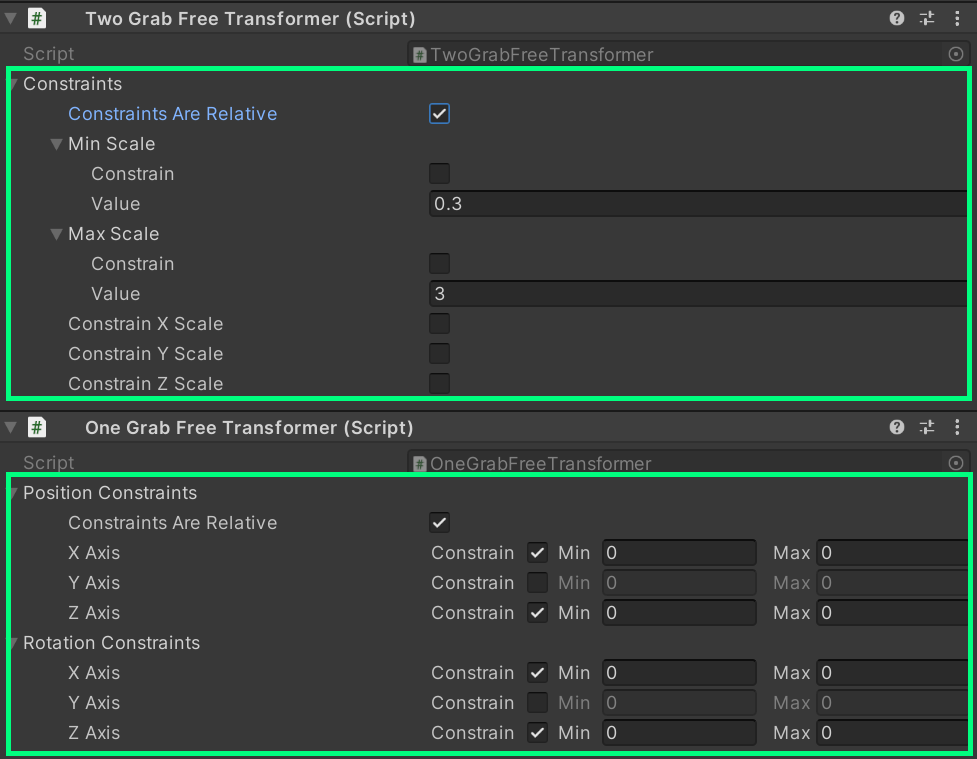
How to make it only move along a specific axis or limit the min/max size for scaling
Transformer provides very useful Constraint options. Using these, you can make an object only move along a specific axis or limit the scale with minimum and maximum values.
How to add Touch Grab interaction
With Touch Grab, you can improve the experiential quality of grab interaction by allowing the user to grab the body shape of the object.
In addition to the default sphere collider that has been automatically added by the Quick Actions Menu, we can add additional colliders that can represent the detailed shape of the object.

In this case, I have added multiple box colliders in empty game objects to represent the shape of the International Space Station’s main structure.
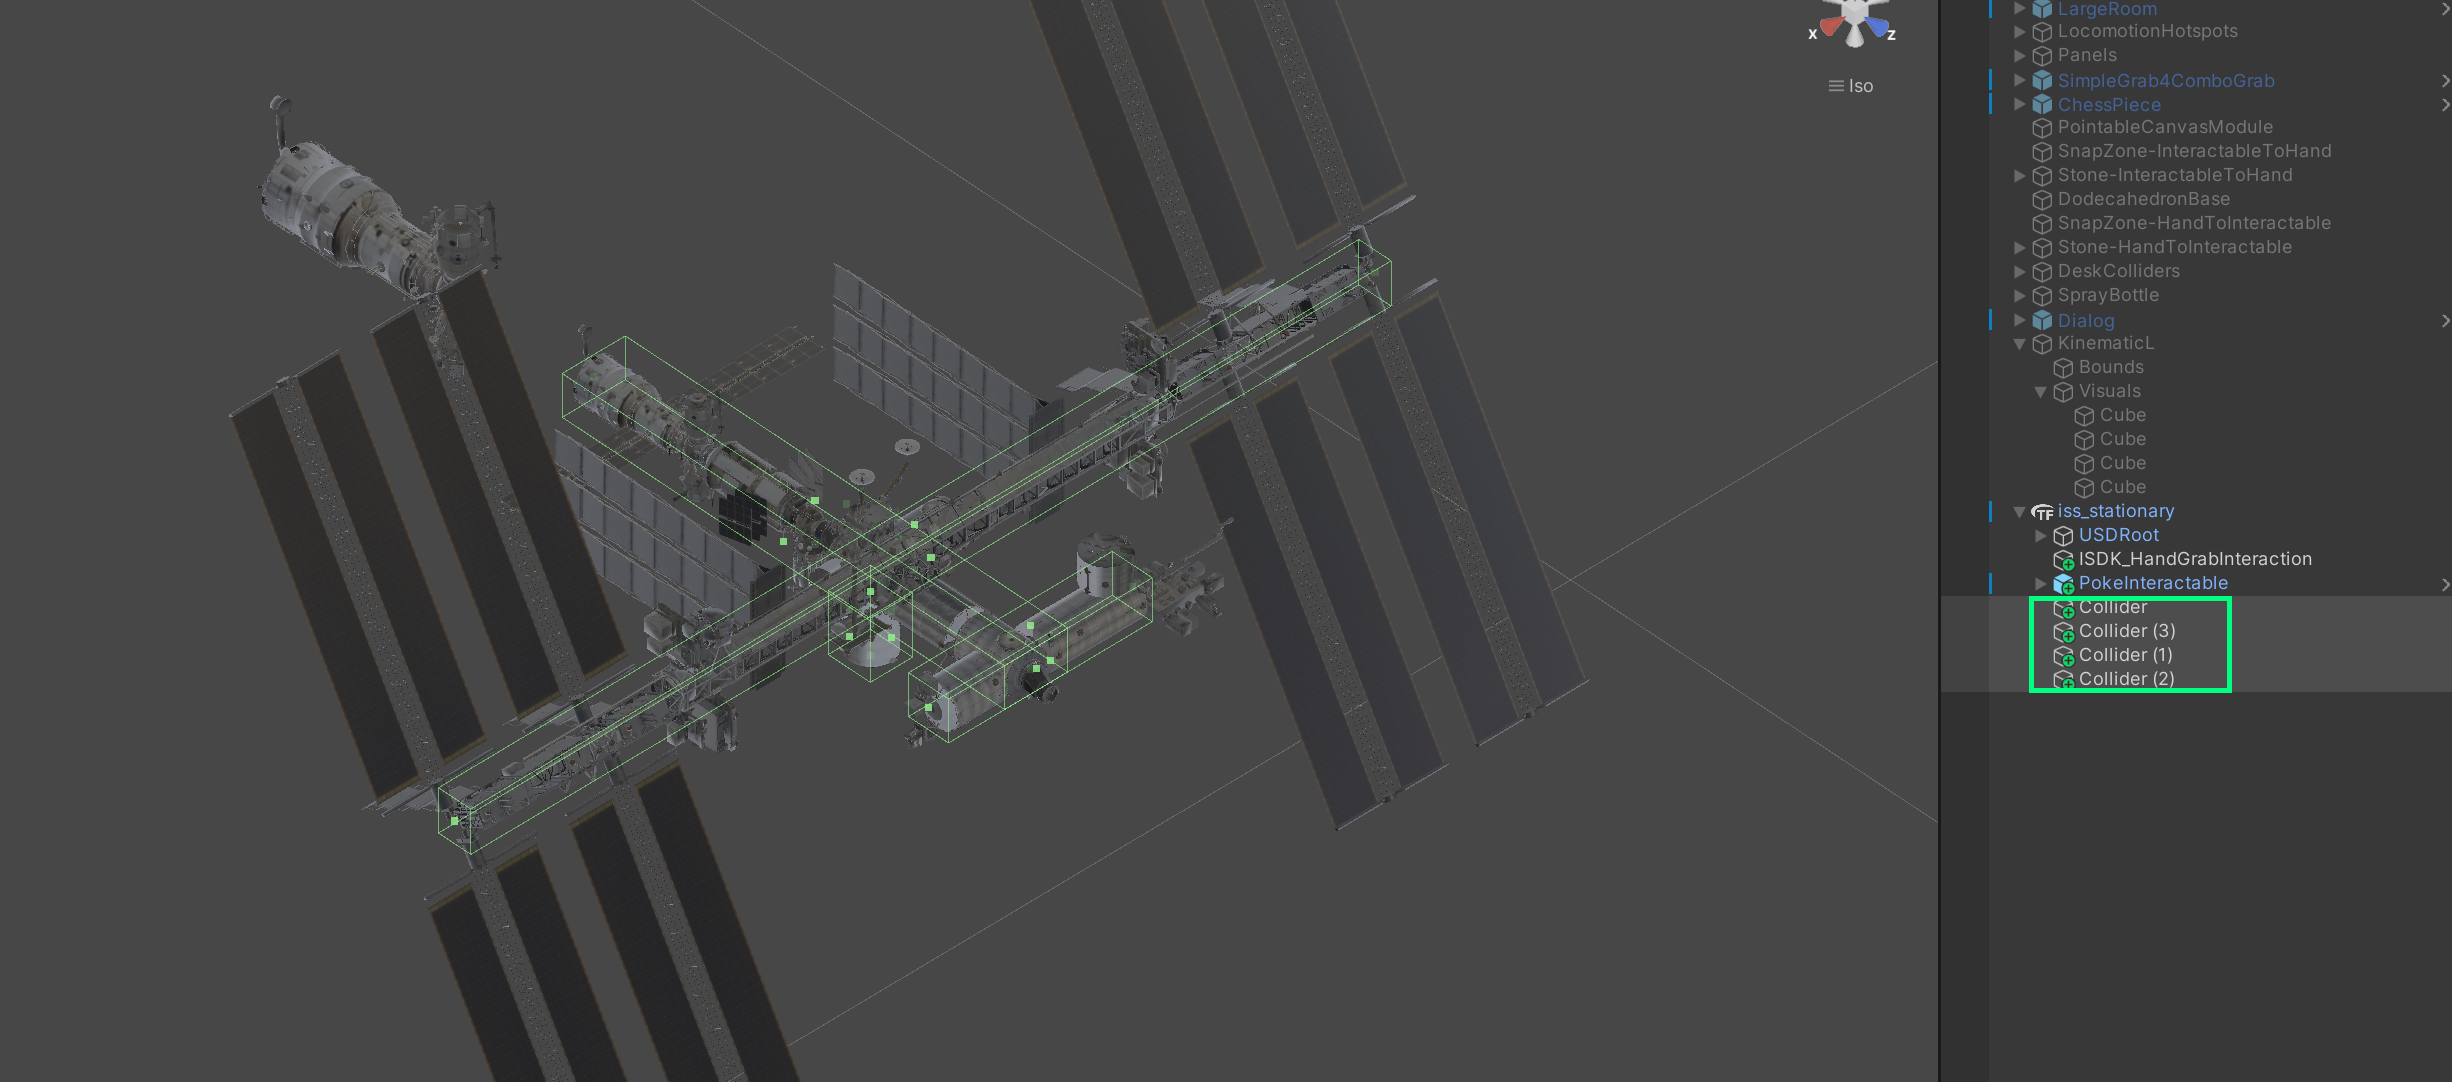
Then, under the ISDK_HandGrabInteraction object, unchecked the existing HandGrabInteractable and added TouchHandGrabInteractable. Assigned new colliders to the Colliders list. For the Bounds Collider, assigned the existing default sphere collider.
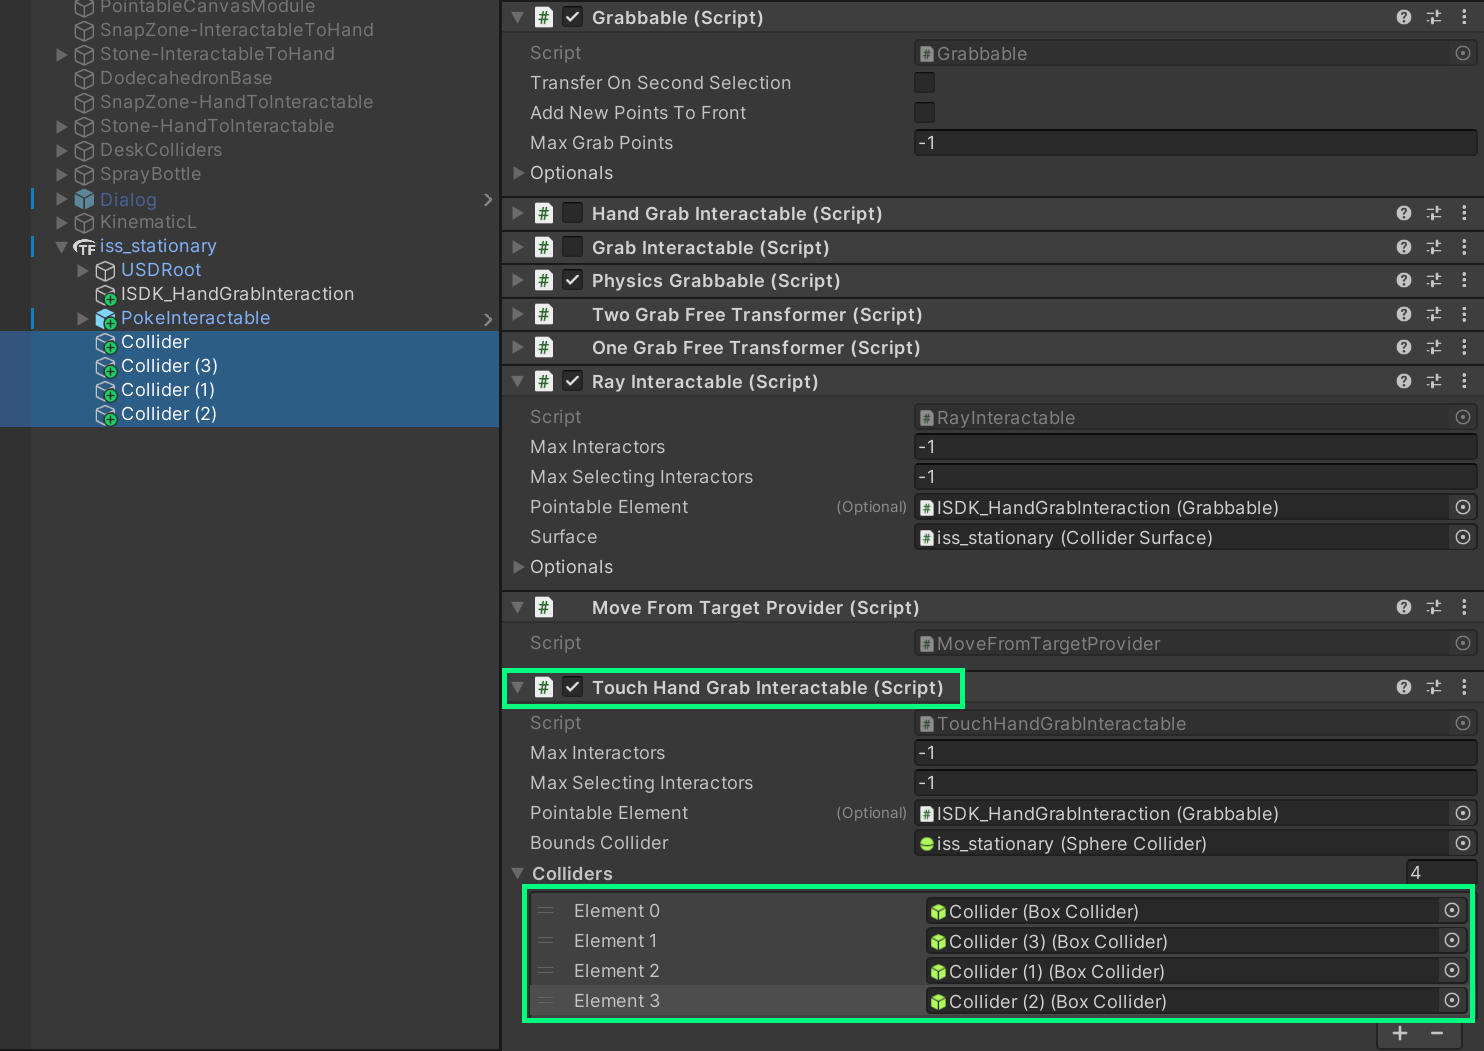
Now you can grab the shape of the object represented by these colliders.
How to add Ray for Far-Field interaction
One of the advantages of spatial computing is that we don’t have to be limited by real-life physics. We can use the superpower that allows us to interact with objects that are out of our reach. Hand Ray and Controller Ray are great input methods for interacting with far-field objects, usually between 1-2 meters away from the user.
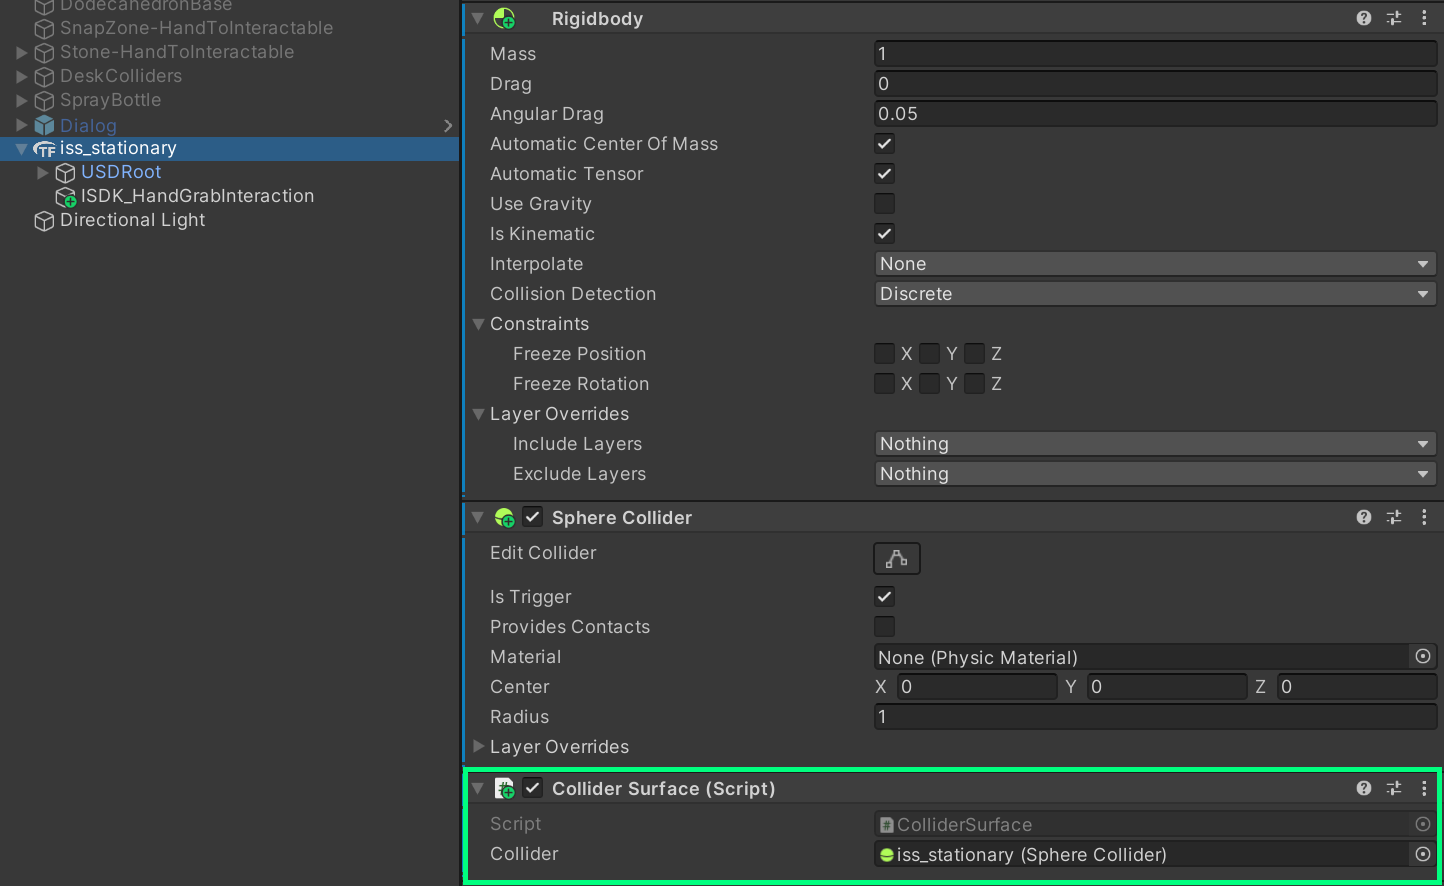
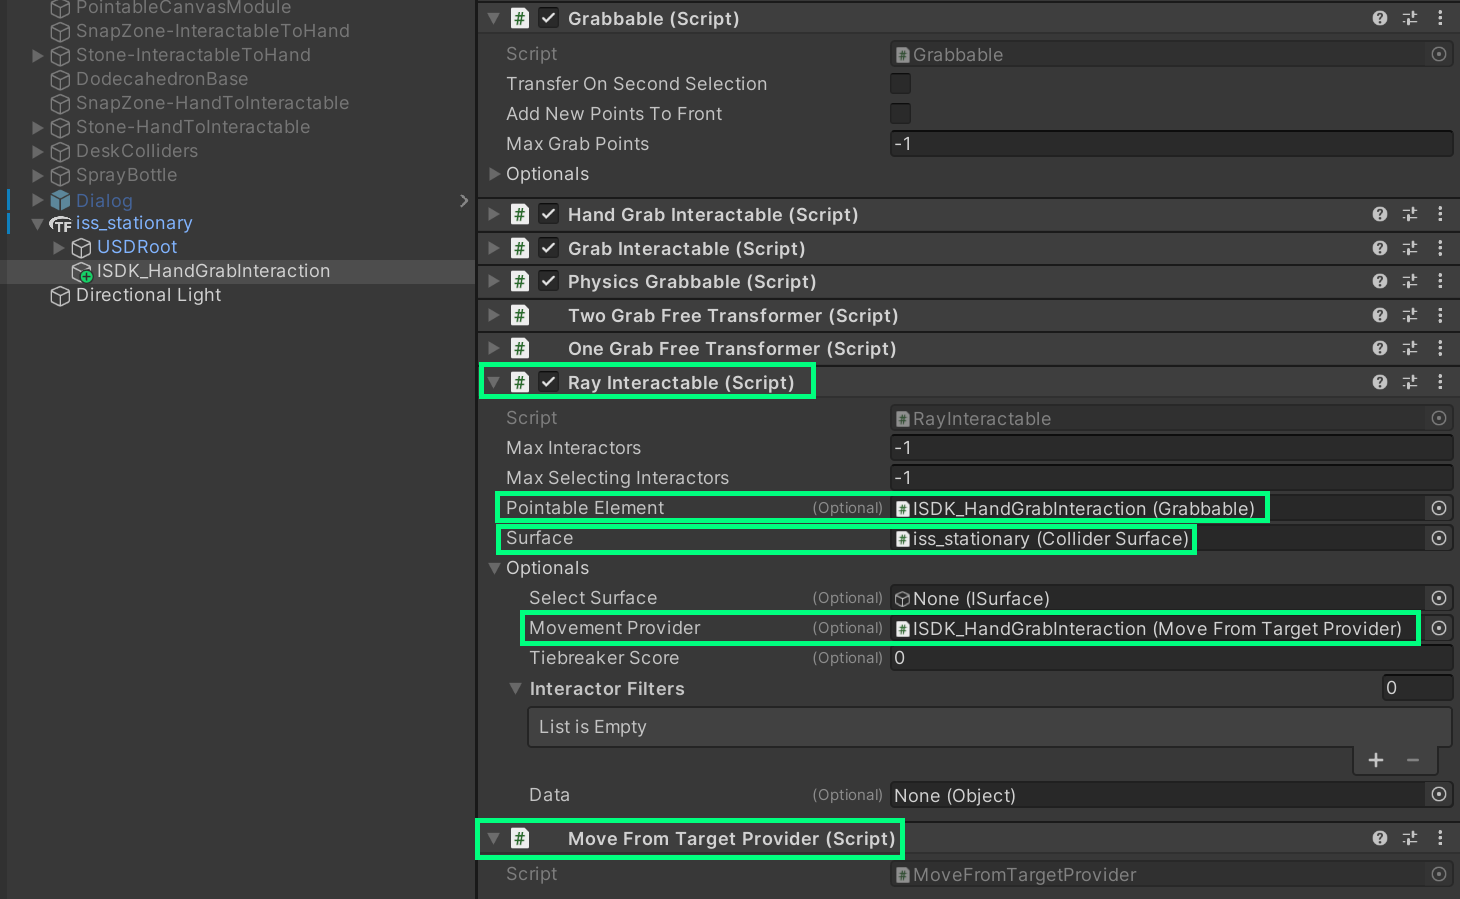
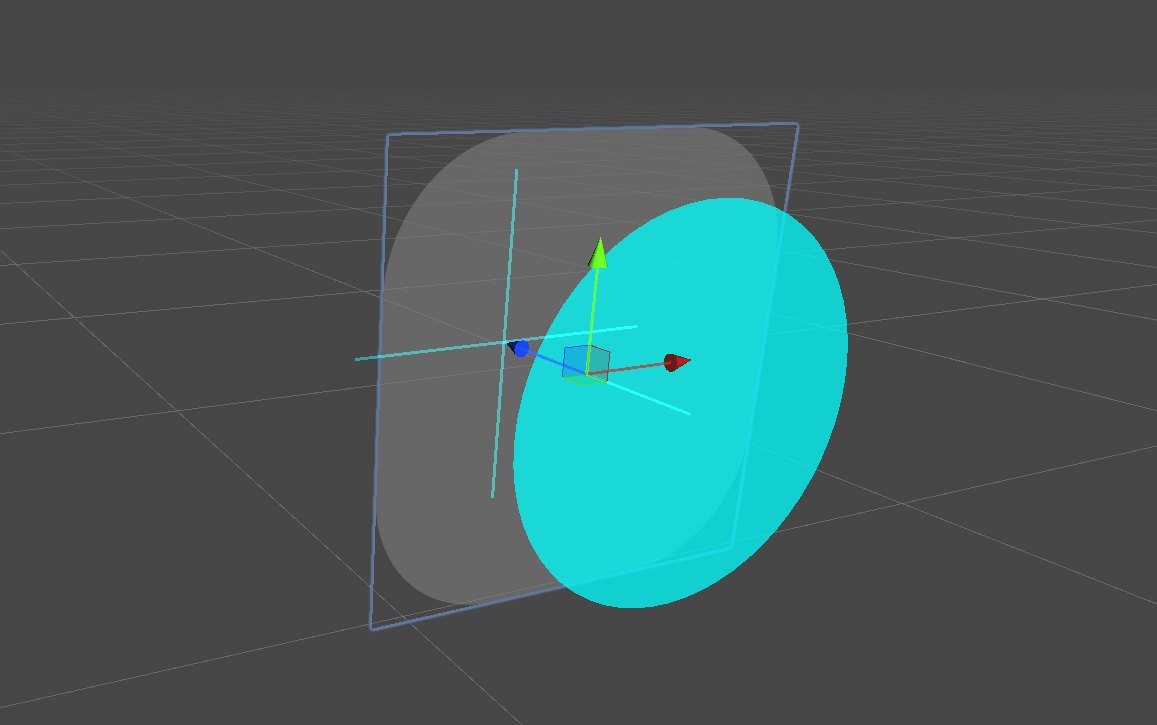
RayInteractable requires Surface components. On the object’s root, add the ColliderSurface component and assign self to the Collider field.
In addition to existing grab interaction components, let’s add a new component RayInteractable. To make the object move with Ray, we also need to add a Movement Provider which provides various types of movement behaviors. In this example, I have added MoveFromTargetProvider. Assign the following fields and populate them with the proper required objects.
- Pointable Element: Grabbable (self)
- Surface: Collider Surface (which we assigned to the object root)
- Movement Provider: MoveFromTargetProvider (self)
As you can see in the video above, Ray Interactable enables the cursor visual that can communicate the raycast hit and
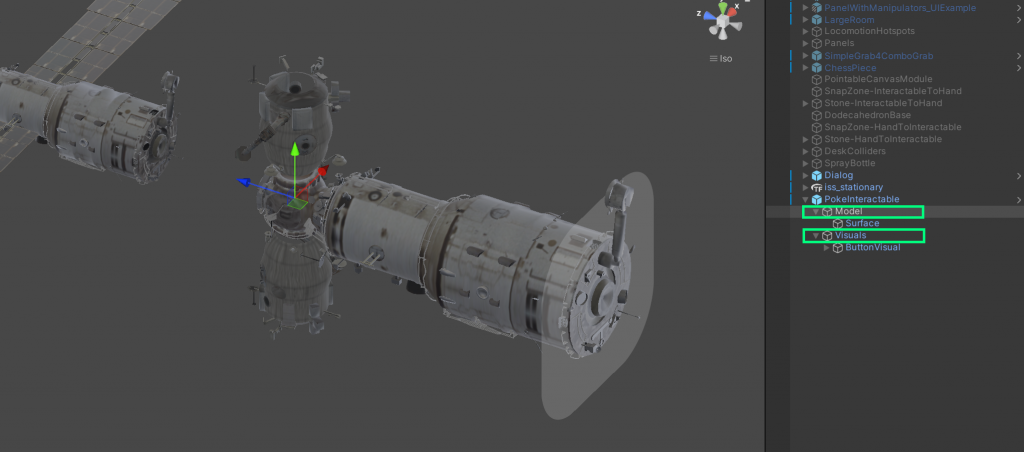
How to add Poke interaction
Poke interaction can be enabled with PokeInteractable. PokeExamples scene shows examples of poke interactions. One of the interesting elements in poke interactions is the ‘poke limiting‘. Since there is no physical surface or tactile feedback, we are essentially pressing through the air. To prevent the finger from passing through the surface of the target object, poke limiting stops the z-depth movement of the hand. Through this technique, we can enhance the usability and experiential quality of poke interactions.
Since Poke interaction requires multiple child components with proper structure configurations, it is easier to use the provided PokeInteractable.prefab which can be found in Packages/com.meta.xr.sdk.interaction/Runtime/Prefabs/Poke/ folder. Using this button prefab, we can simply place our object under Visuals object.
Placed an object (ISSModule) under the Visuals object which has a rounded rect button surface visual.
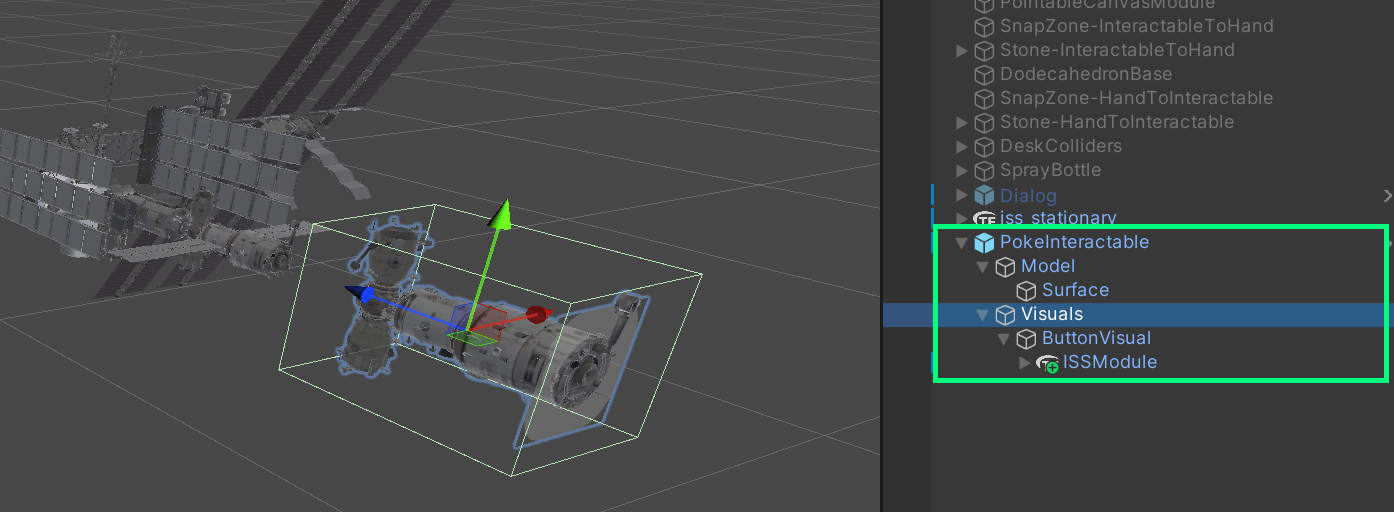
You can adjust the pressing amount by adjusting the z position of the Model object.
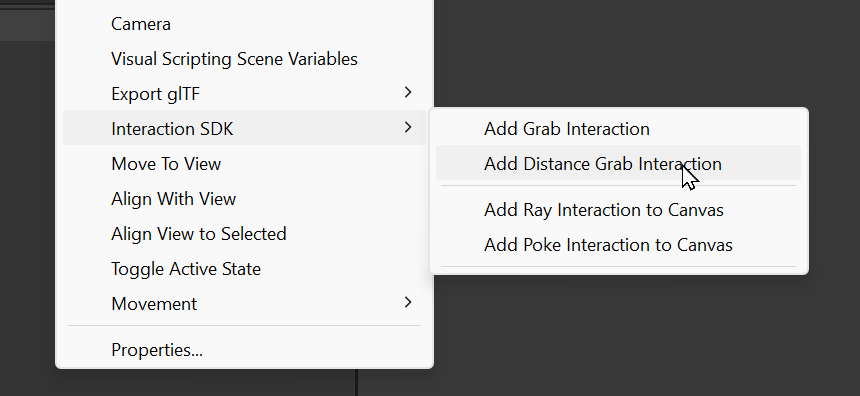
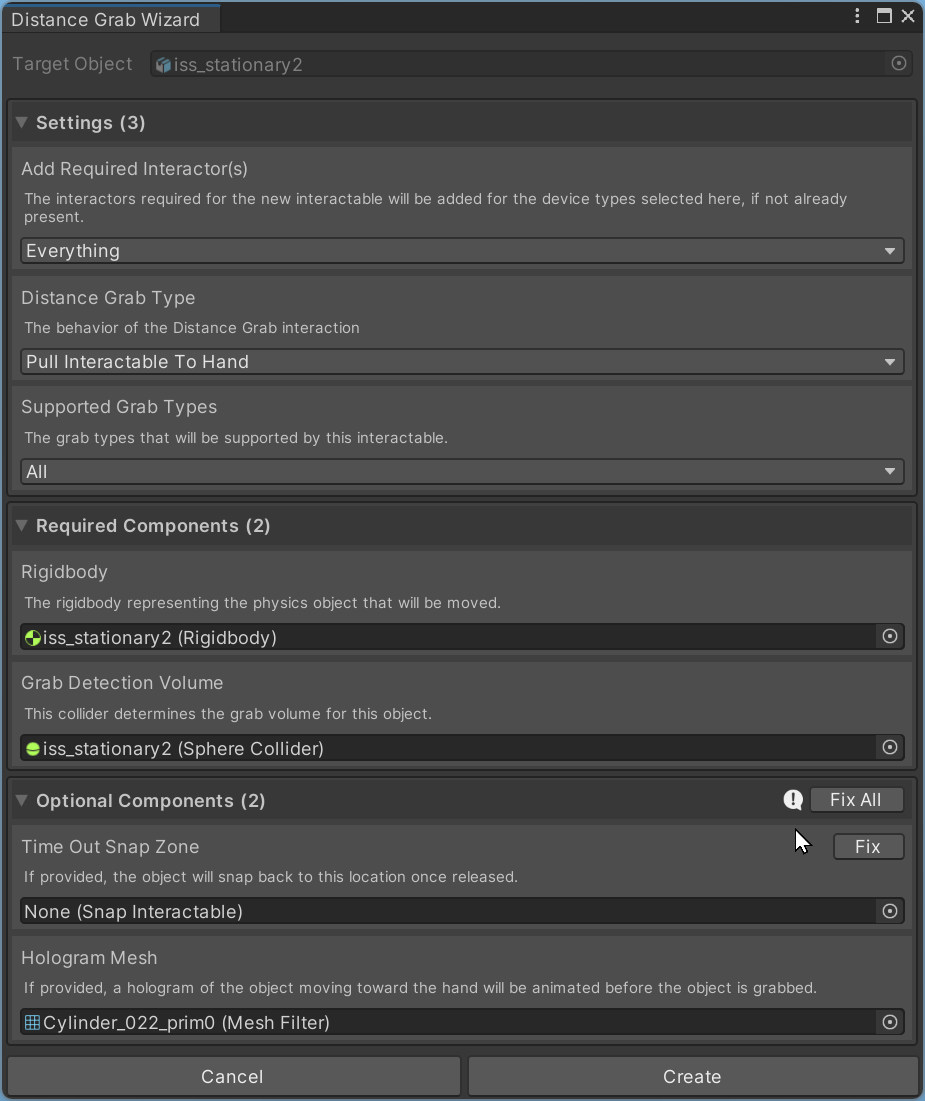
How to add Distance Grab
Distance Grab allows you to pull objects from afar, just like using the Force in Star Wars. Just like we did for Grab Interaction, we can use the Quick Actions Menu to easily add Distance Grab interaction. Right-click the object and select ‘Add Distance Grab Interaction‘.
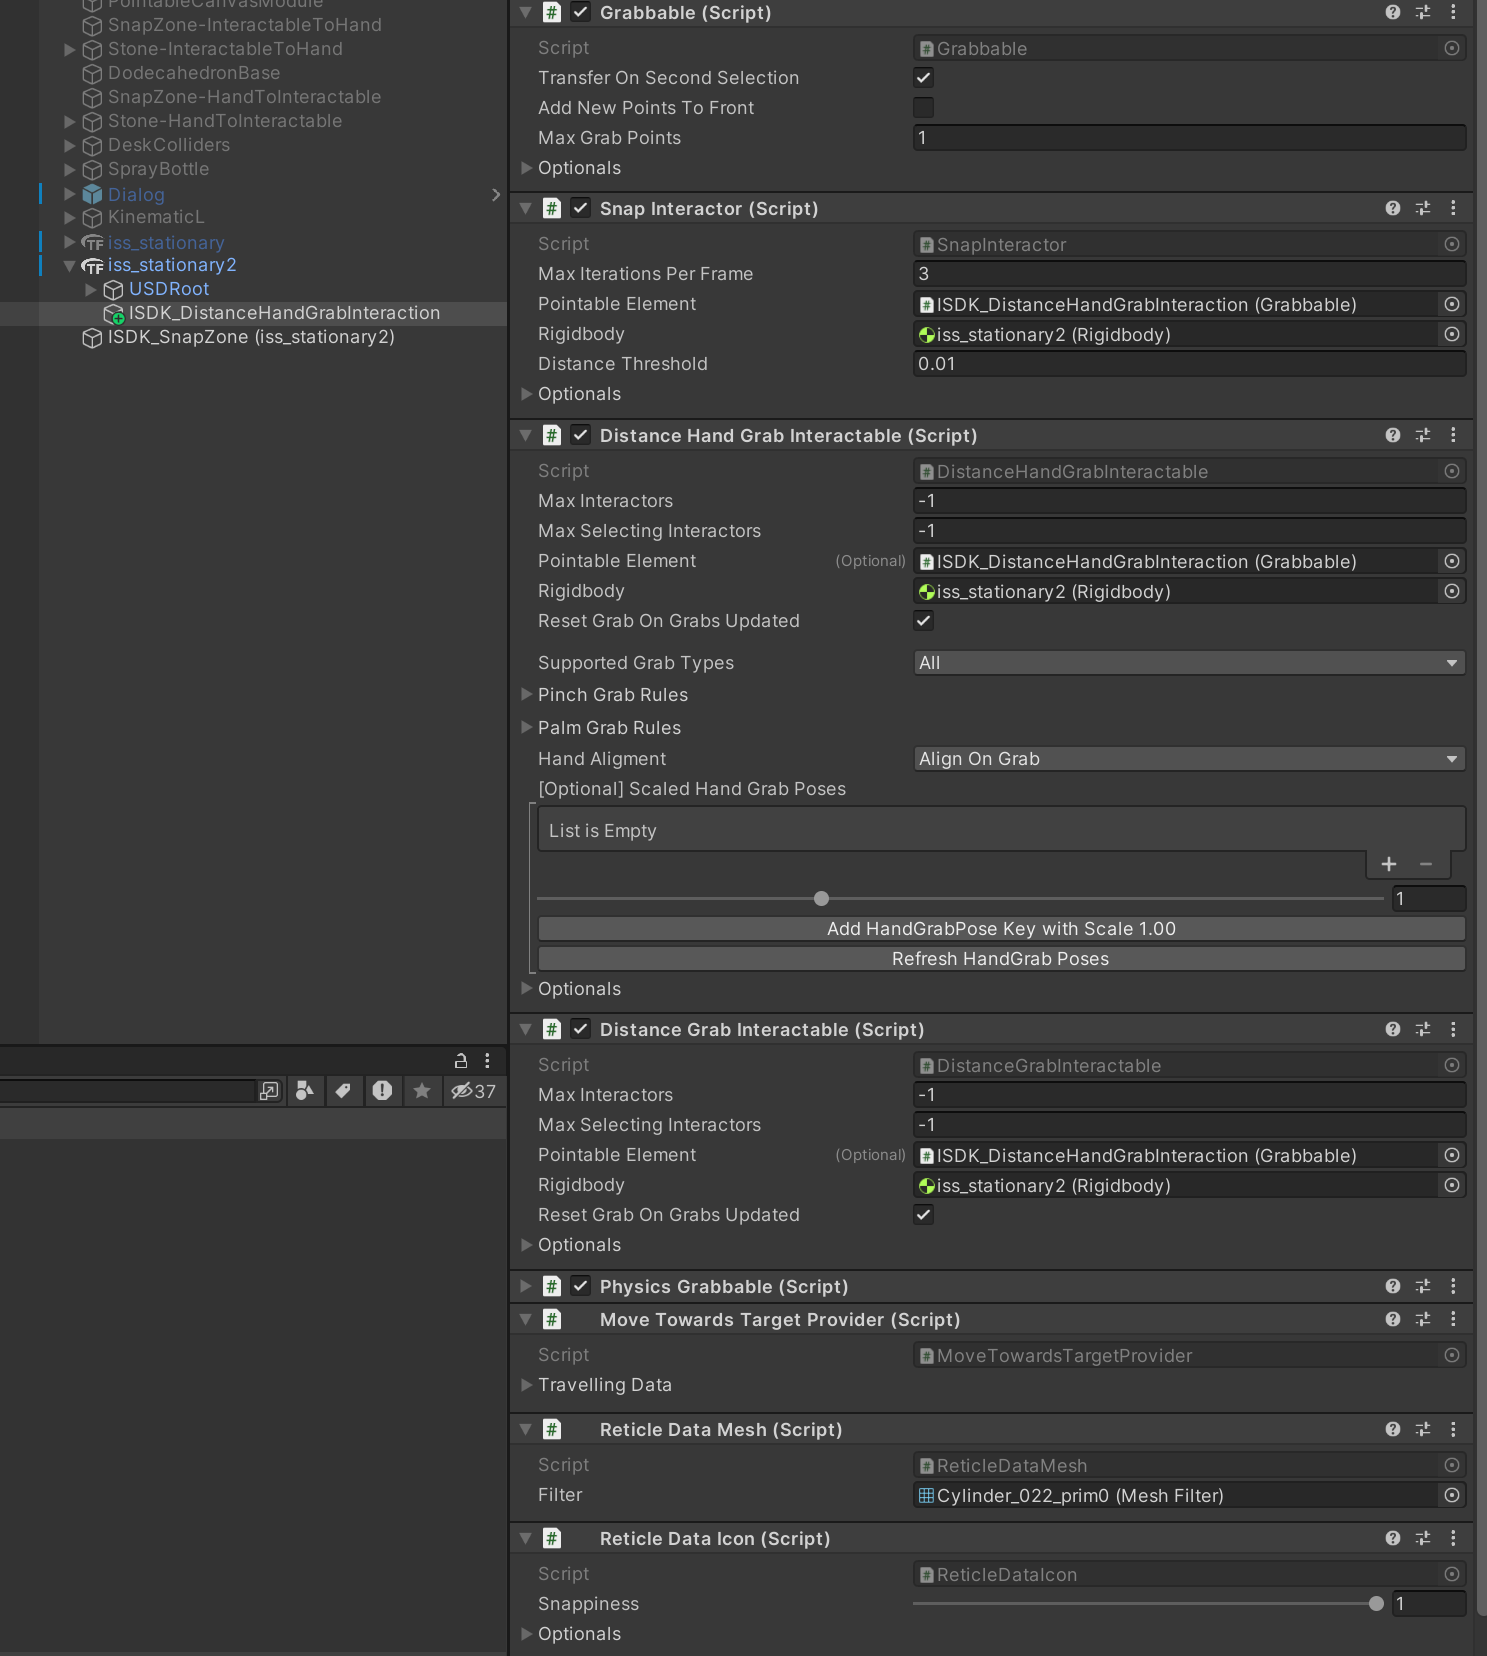
Distance Grab Wizard automatically adds and configures required elements. Click ‘Fix All‘ and ‘Create‘. You can find the object configured with new components such as SnapInteractor, DistanceGrabInteractable (for controllers), and DistanceHandGrabInteractable (for hands)
How to enable Controller interactions
The interactions that have been added above work well with the controllers as well, without additional work. When you use the Quick Actions Menu for adding grab interaction, GrabInteractor for Controllers was already added to the rig. No additional work is needed.
Using Building Blocks
Another way of adding various interactions and Quest capabilities is using the Building blocks. You can open the Building Blocks menu through Oculus > Tools > Building Blocks
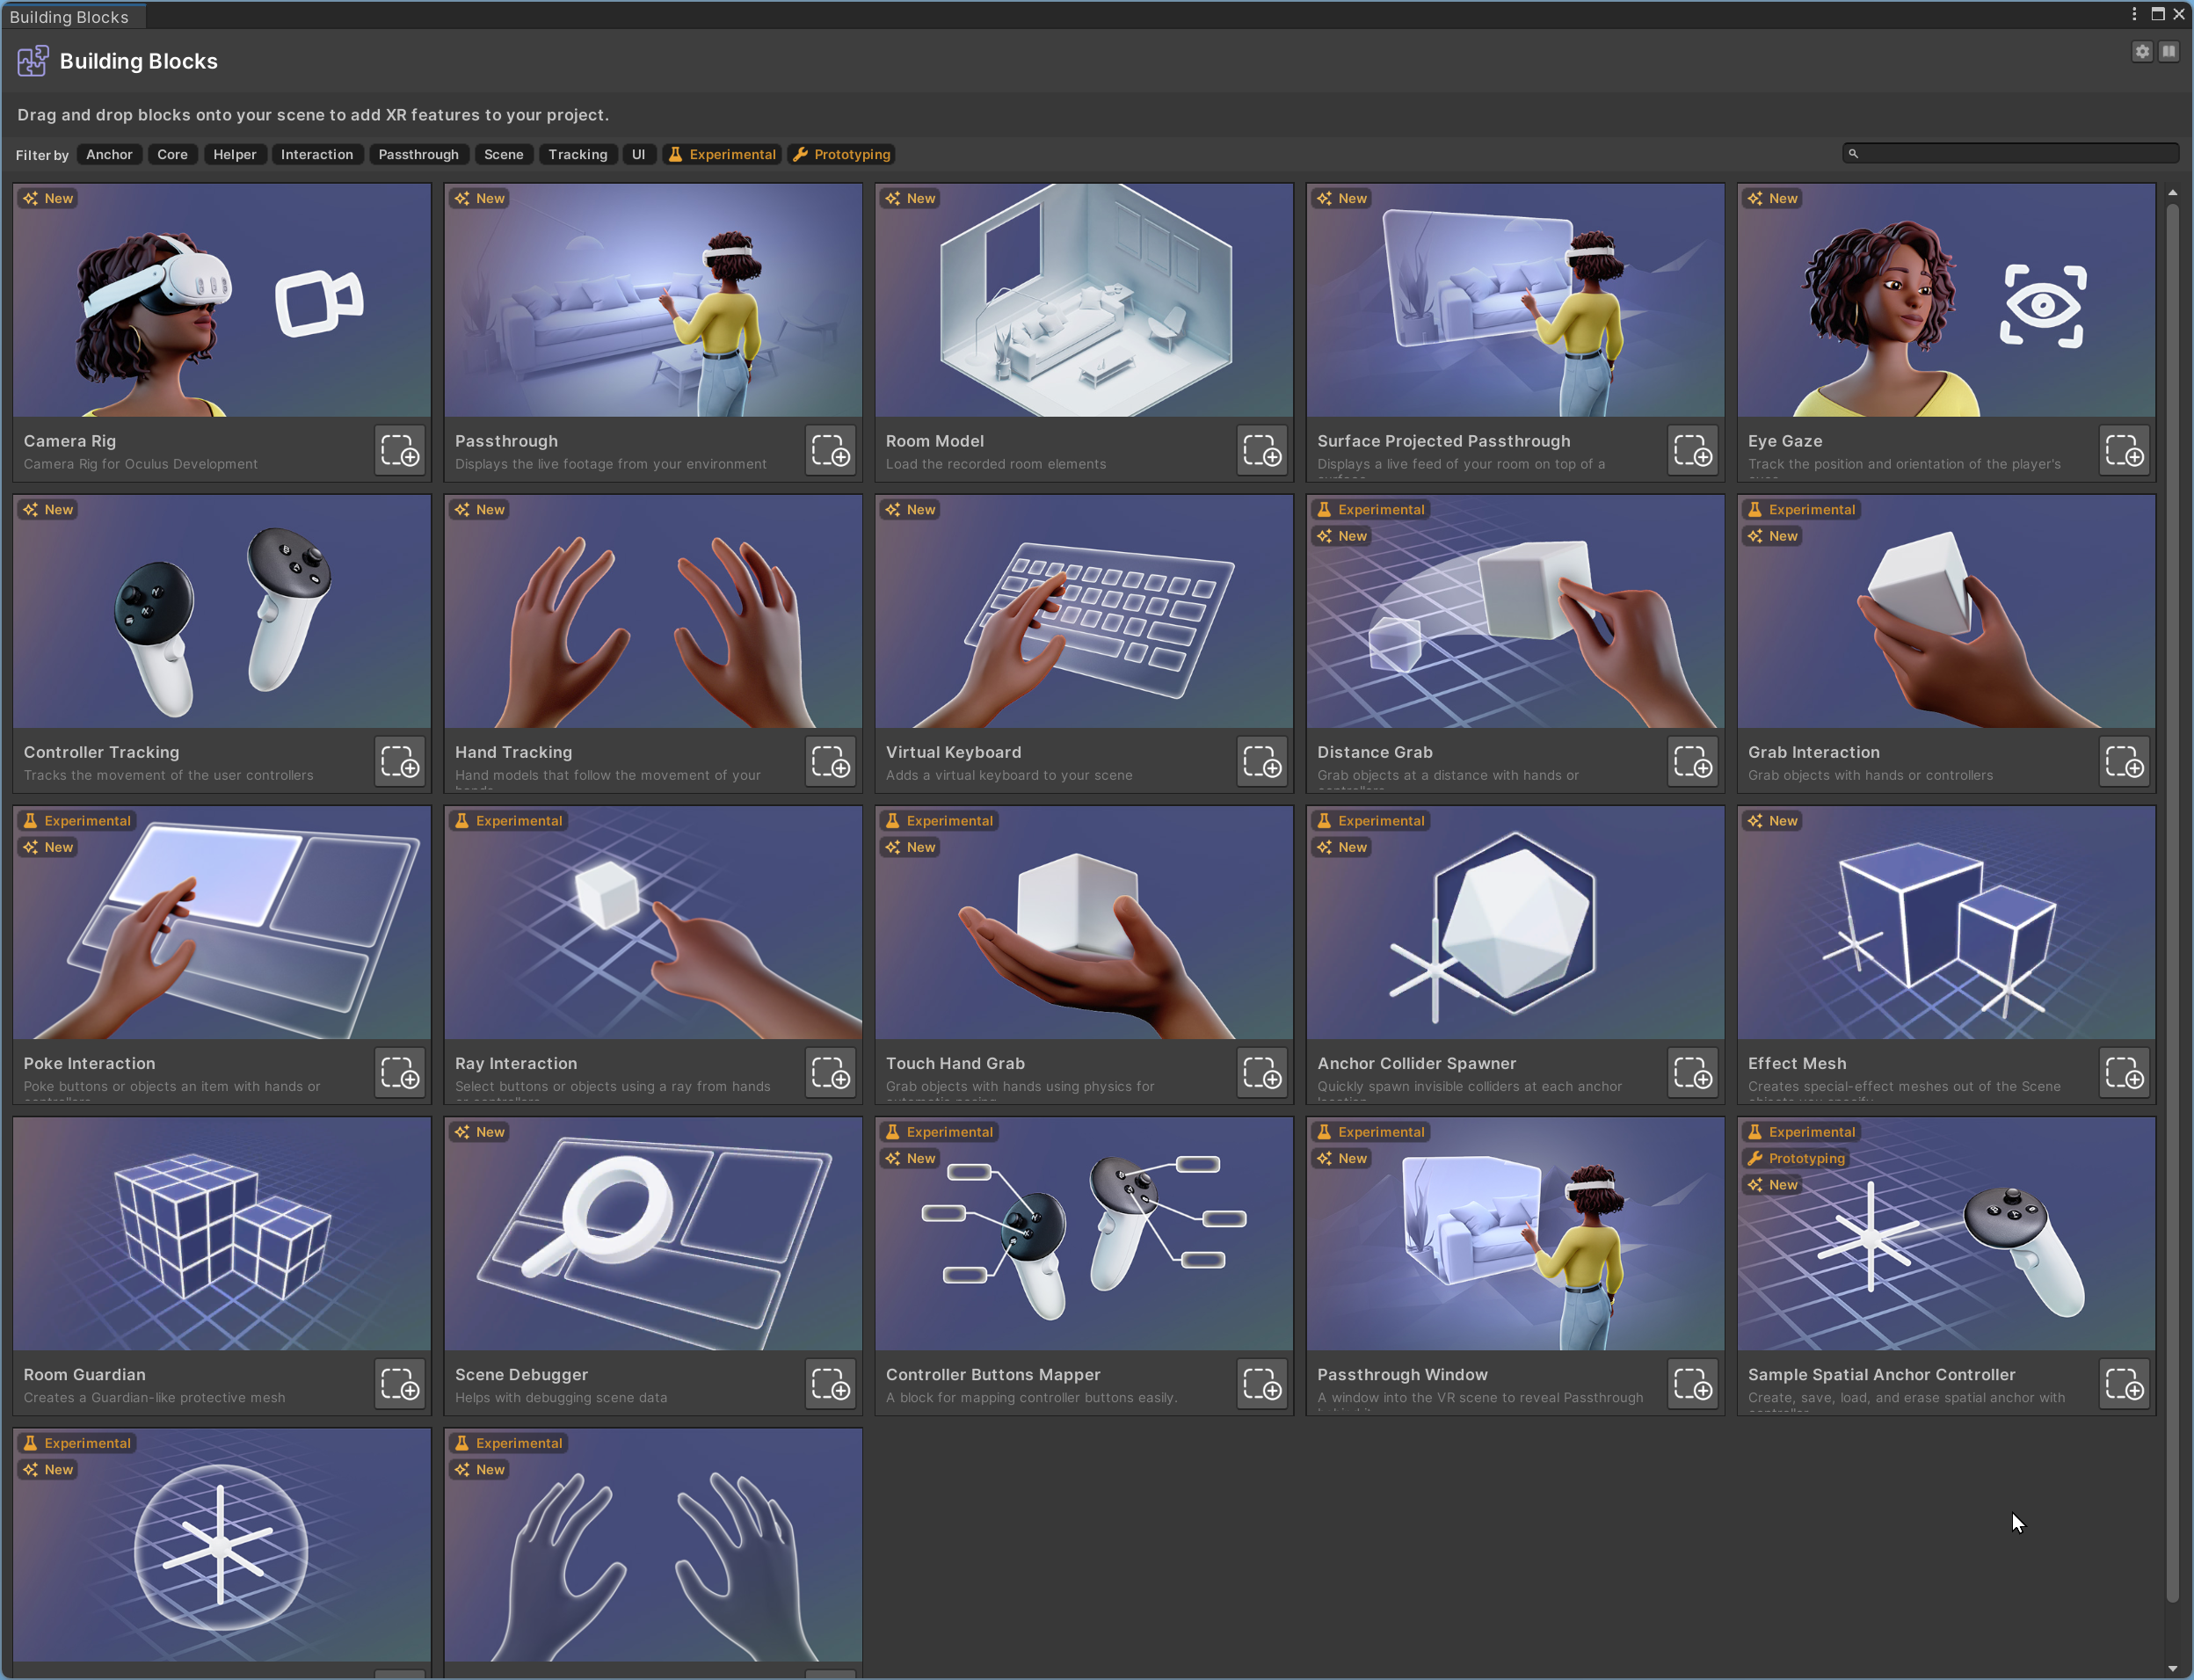

From the Building Blocks, drag and drop Grab Interaction onto the object. Similar to Quick Actions Menu, it will automatically add a child object called [Building Block] Hand Grab which contains required components such as GrabInteractable and HandGrabInteractable.
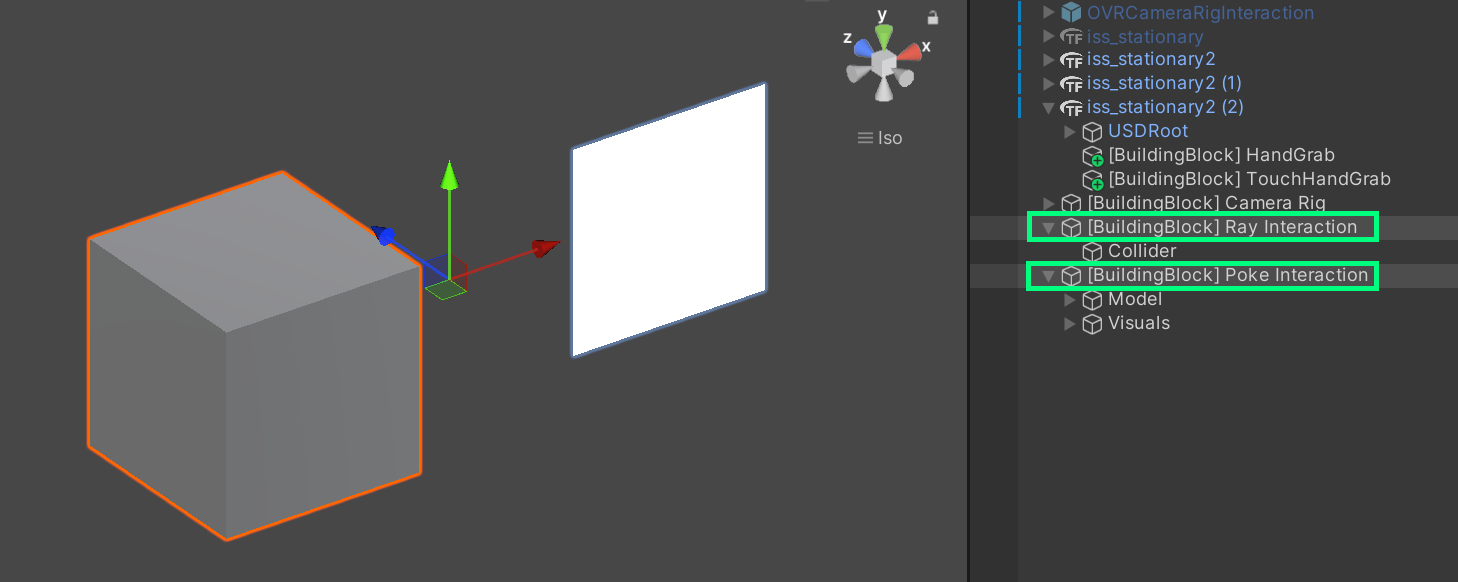
Currently, interactions such as Ray or Poke interaction cannot be directly applied to an object with drag & drop. They create an example object on the root. You can replace the default content (e.g. cube, plane) with your own object.

Example objects created by Building Blocks – Ray and Poke interactions:
How to enable Passthrough for Mixed Reality
To learn about how to enable passthrough, please check out this article:
Resources & Reference
Check out Meta Quest documentation for more details and tutorials on various interactions that can empower your creativity!