Learn how to use MRTK to achieve some of the most widely used common interaction patterns in Mixed Reality This article is based on MRTK 2.x release
MRTK-Unity is a Microsoft-driven project that provides a set of components and features, used to accelerate cross-platform MR app development in Unity. MRTK is available for Unity and Unreal. In this article, we will focus on MRTK-Unity.
MRTK-Unity is a Microsoft-driven project that provides a set of components and features, used to accelerate cross-platform MR app development in Unity. MRTK is available for Unity and Unreal. In this article, we will focus on MRTK-Unity.

- How to simulate input interactions in Unity editor?
- How to grab and move an object?
- How to resize an object?
- How to move or rotate an object with precision?
- How to make an object respond to input events?
- How to add visual feedback?
- How to add audio feedback?
- How to use HoloLens 2 style button prefabs?
- How to make an object follow you?
- How to make an object face you?
How to simulate input interactions in Unity editor?
MRTK supports in-editor input simulation. Simply run your scene by clicking Unity’s play button. Use these keys to simulate input.
With MRTK’s input simulation, you can design and test experiences without the devices. This helps you quickly iterate ideas and prototypes.
- Press W, A, S, D, Q, E keys to move the camera.
- Hold the Right mouse button and move the mouse to look around.
- To bring up the simulated hands, press Space bar(Right hand) or Left Shift key(Left hand)
- To keep simulated hands in view, press T or Y key
- To rotate simulated hands, press and hold the Ctrl key and move the mouse
Input Simulation Service – Mixed Reality Toolkit
How to grab and move an object?
To make an object grabbable, assign these two scripts: ObjectManipulater.cs and NearInteractionGrabbable.cs(for direct grab with articulated hand tracking input) ObjectManipulator supports both near and far interactions. You can grab and move an object with HoloLens 2’s articulated hand tracking input(near), hand ray(far), motion controller’s beam(far), HoloLens gaze cursor & air-tap(far).
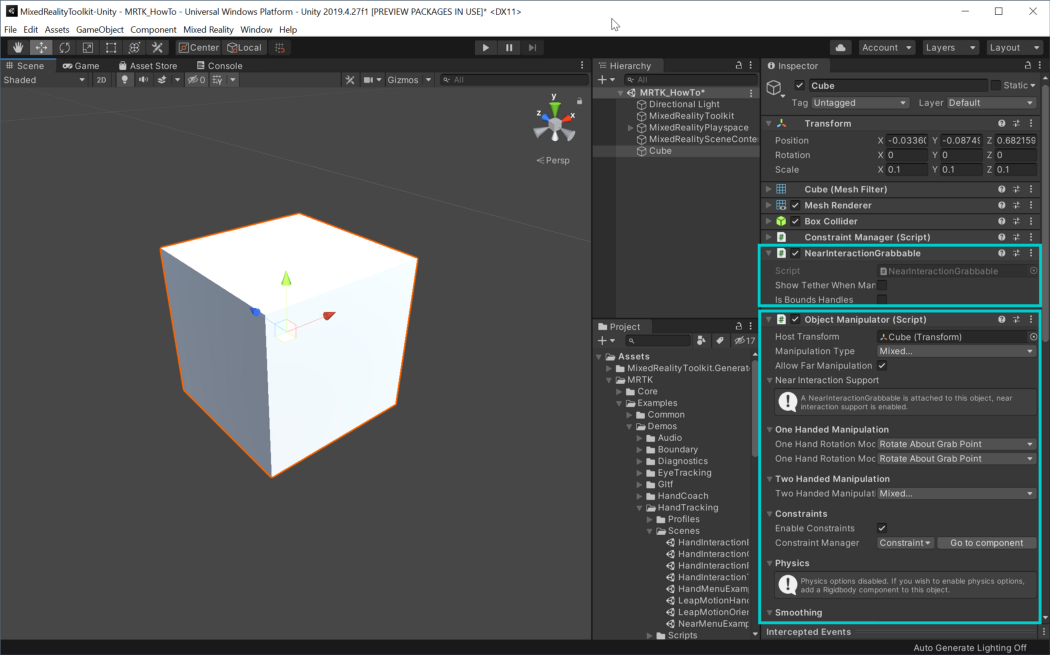
Grab and move with input simulation — far interaction with hand ray / near interaction with articulated hand
How to resize an object?
ObjectManipulator.cs supports two-handed scale/rotation. This works with various input types such as HoloLens 2’s articulated hand input, HoloLens 1’s gaze + gesture input, and Windows Mixed Reality immersive headset’s motion controller input.
ObjectManipulator – Mixed Reality Toolkit
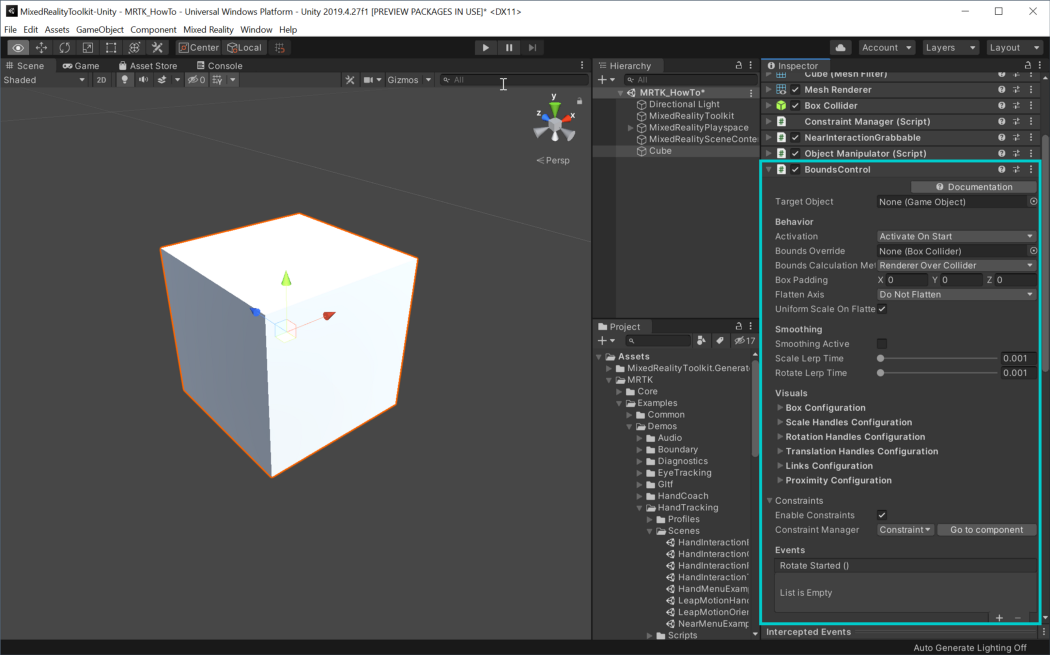
How to move, rotate, and scale an object with precision?
Assign BoundsControl.cs to an object to use Bounding Box which is the interface for scaling and rotating an object. By default, it shows HoloLens 1 style blue handles and wires. To use HoloLens 2 style proximity-based animated handles, you need to assign prefabs and materials. Please refer to Bounds Control documentation and the BoundingControlExamples.unity scene for the configuration details.
BoundsControl – Mixed Reality Toolkit
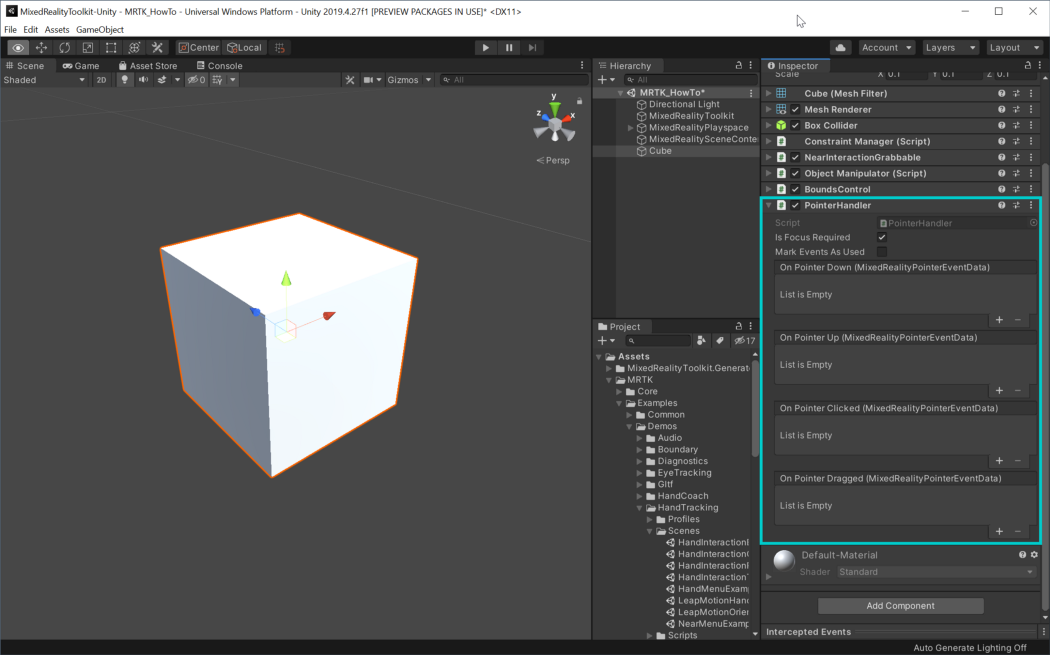
How to make an object respond to input events?
Assign PointerHandler.cs to an object. In the inspector, you will be able to use events OnPointerDown(), OnPointerUp(), OnPointerClicked(), OnPointerDragged()
To use these events in a script, implement IMixedRealityPointerHandler.
Input System Terminology – Mixed Reality Toolkit
How to add visual feedback?
Assign Interactable.cs to an object. In the inspector, create a new theme. Using Interactable’s theme profiles, you can easily add visual feedback to all available input interaction states.
Interactable – Mixed Reality Toolkit
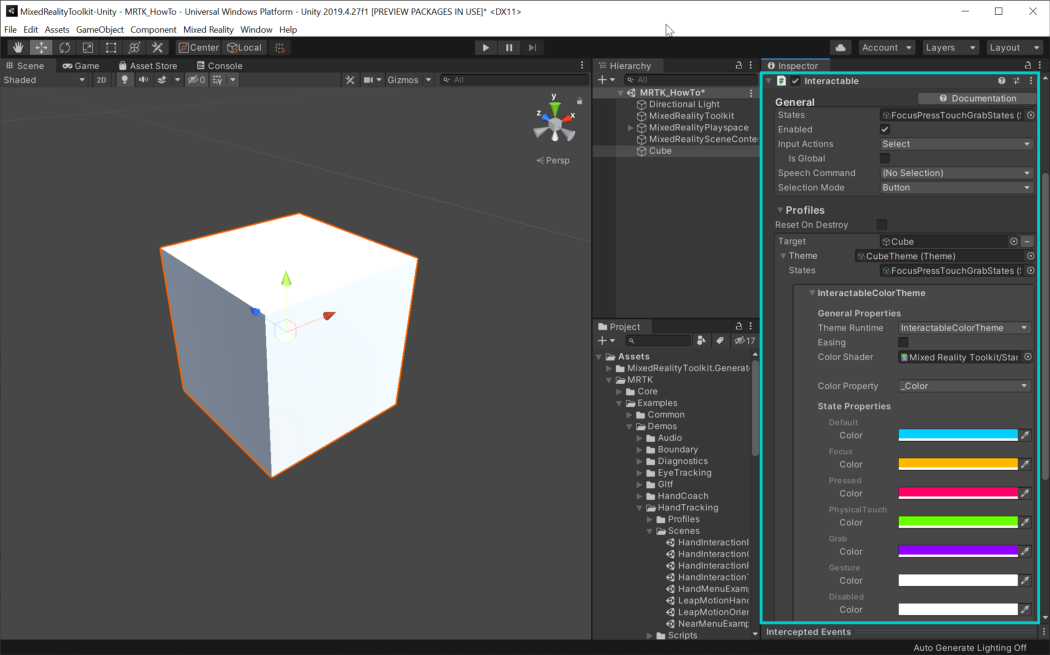
Interactable provides various types of themes including the shader theme which allows you to control properties of the shader per interaction state.
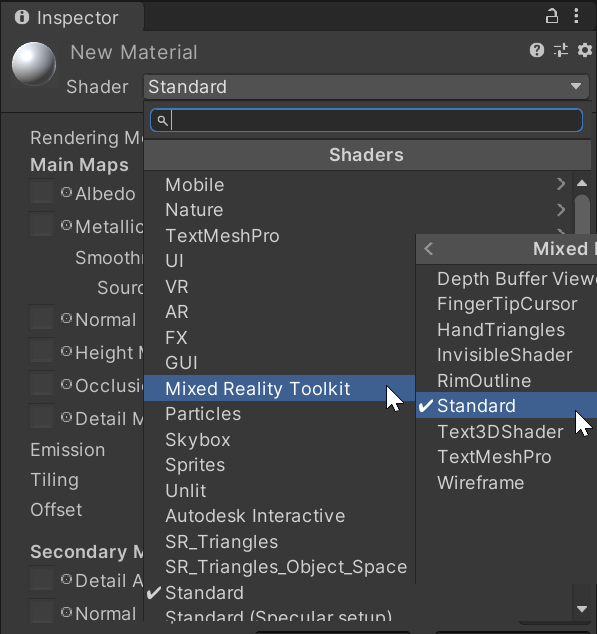
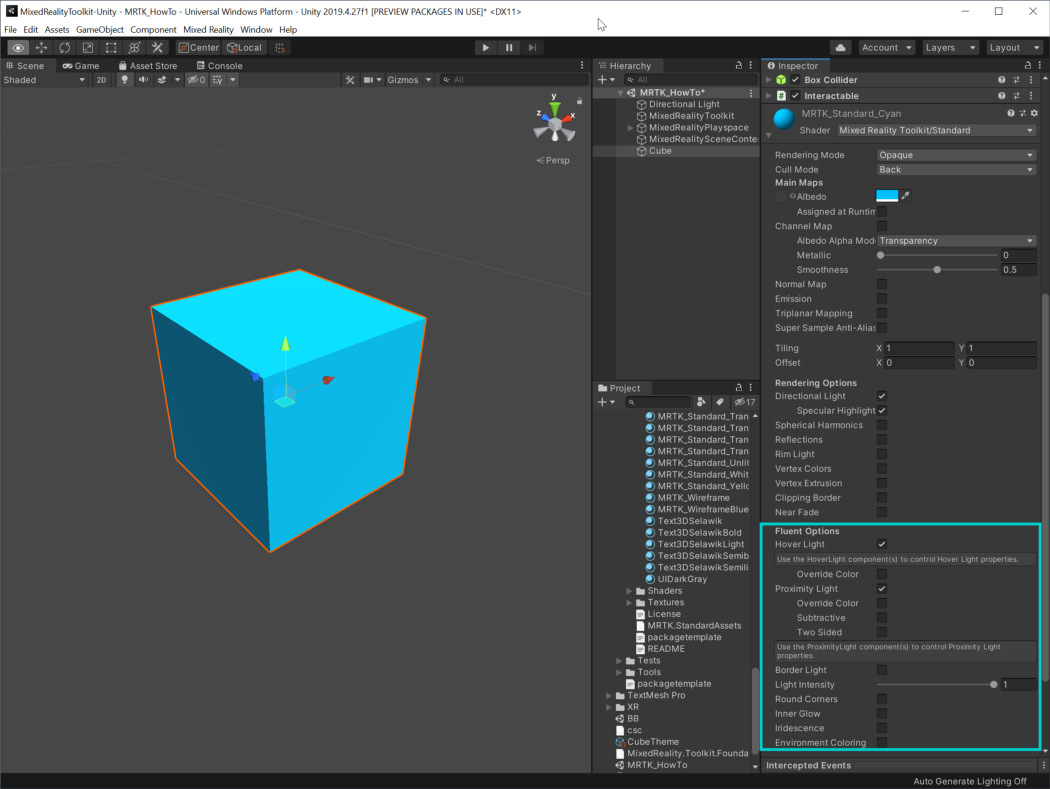
Another important building block for visual feedback is the MRTK Standard Shader. With MRTK Standard Shader, you can easily add visual feedback effects such as hover light and proximity light. Since MRTK Standard shader performs significantly less computation than the Unity Standard shader, you can create a performant experience.
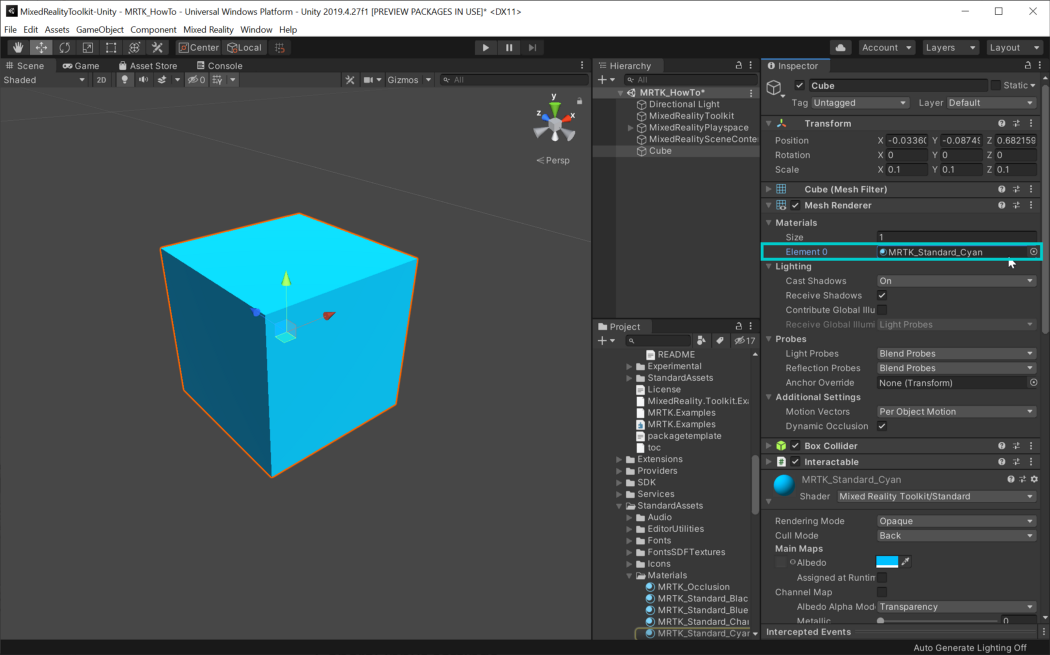
Create a new material and select the Shader ‘Mixed Reality Toolkit > Standard’. Or you can pick one of the existing materials that use MRTK Standard Shader such as MRTK_Standard_Cyan.
Assign the material into Mesh Renderer’s materials property.
MRTK Standard Shader – Mixed Reality Toolkit
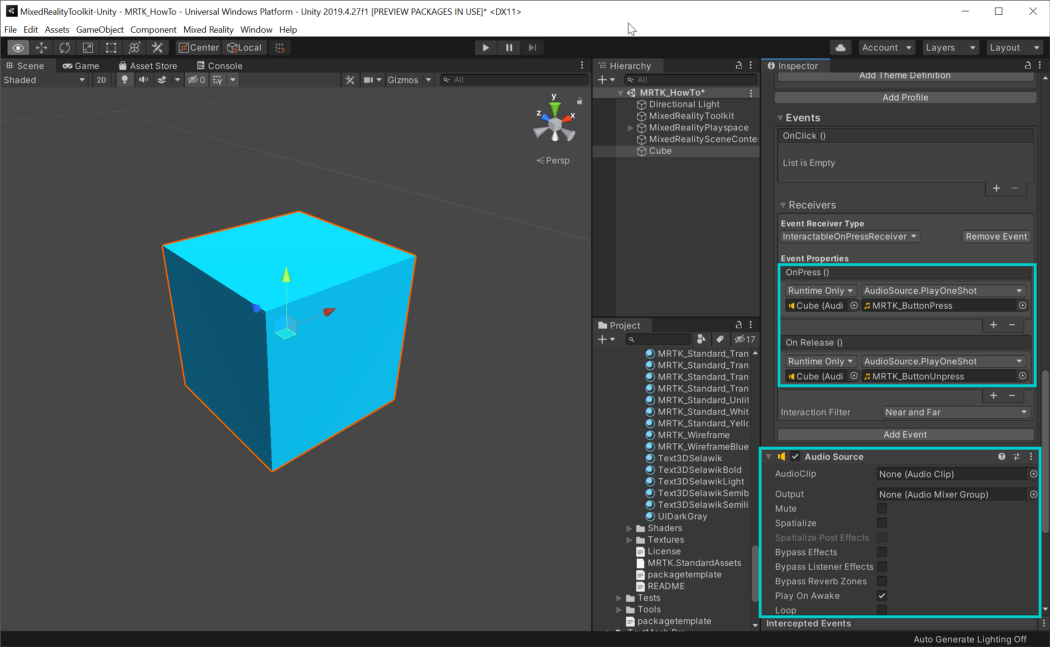
How to add audio feedback?
Add AudioSource to an object. Then, in the scripts that expose input events(e.g. Interactable.cs or PointerHandler.cs), assign the object to the event and select AudioSource.PlayOneShot(). You can use your audio clips or choose one from MRTK’s audio assets.
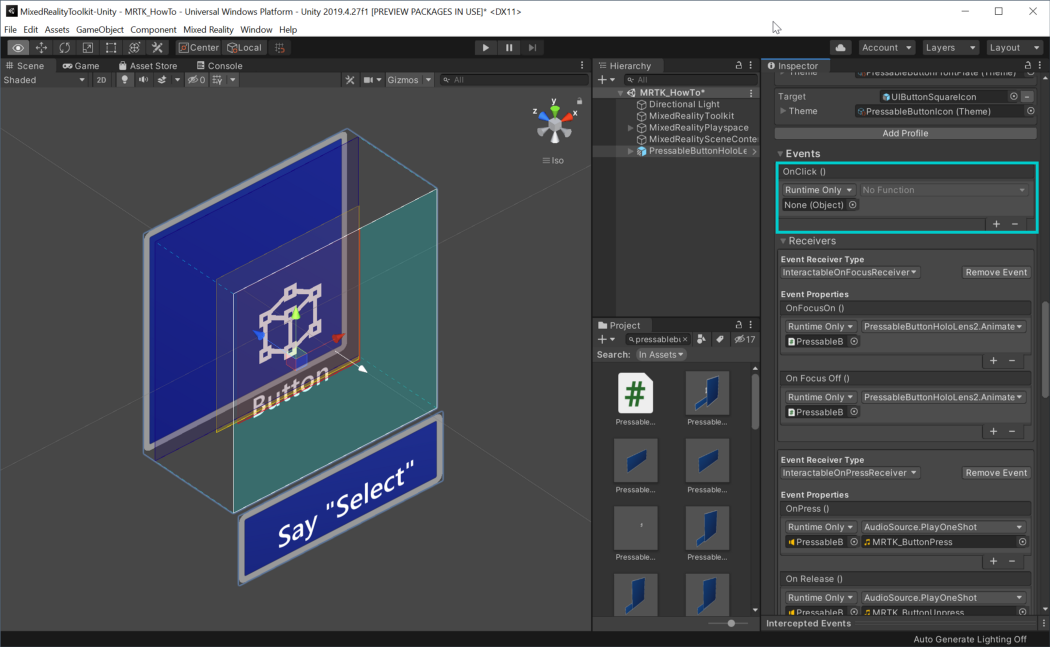
How to use HoloLens 2 style button prefabs?
MRTK provides various types of HoloLens 2’s shell(OS) style buttons. It provides sophisticated visual feedbacks such as proximity light, compressing box, and a ripple effect on the button surface to improve usability with hand-tracking input.
Buttons – Mixed Reality Toolkit
PressableButtonExample.unity example scene shows various types of HoloLens 2 style button prefabs.
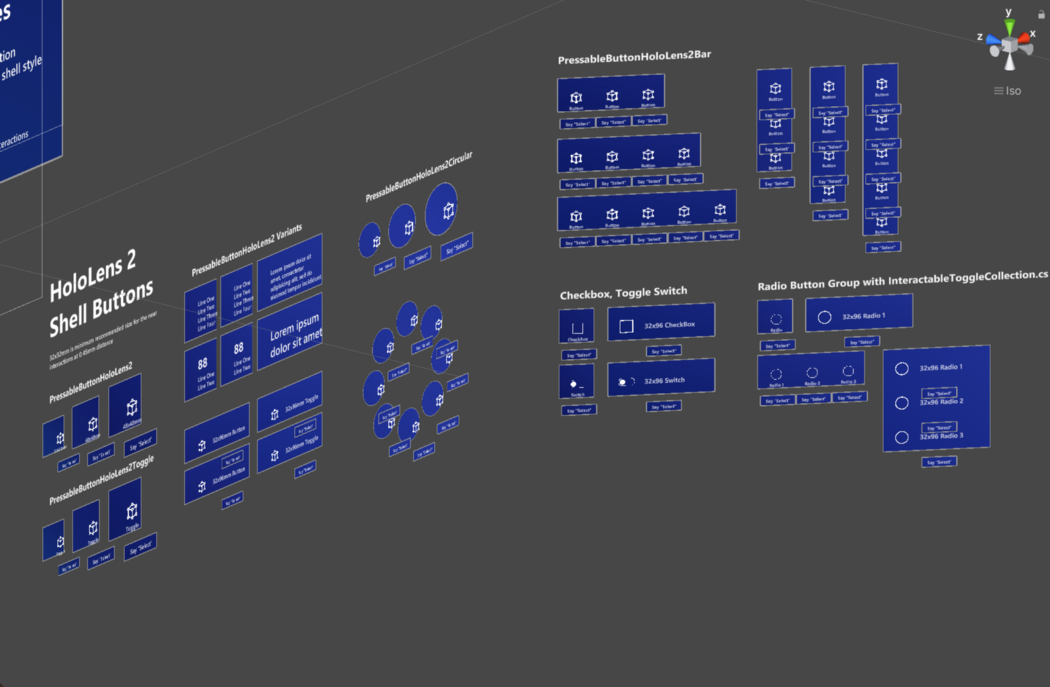
Simply drag and drop one of the HoloLens 2 style pressable button prefab into your scene. The prefab uses Interactable.cs which is introduced above. You can use exposed events such as OnClick() in the Interactable to trigger actions. Use OnClick() event to handle both near(direct) and far(indirect) interactions.
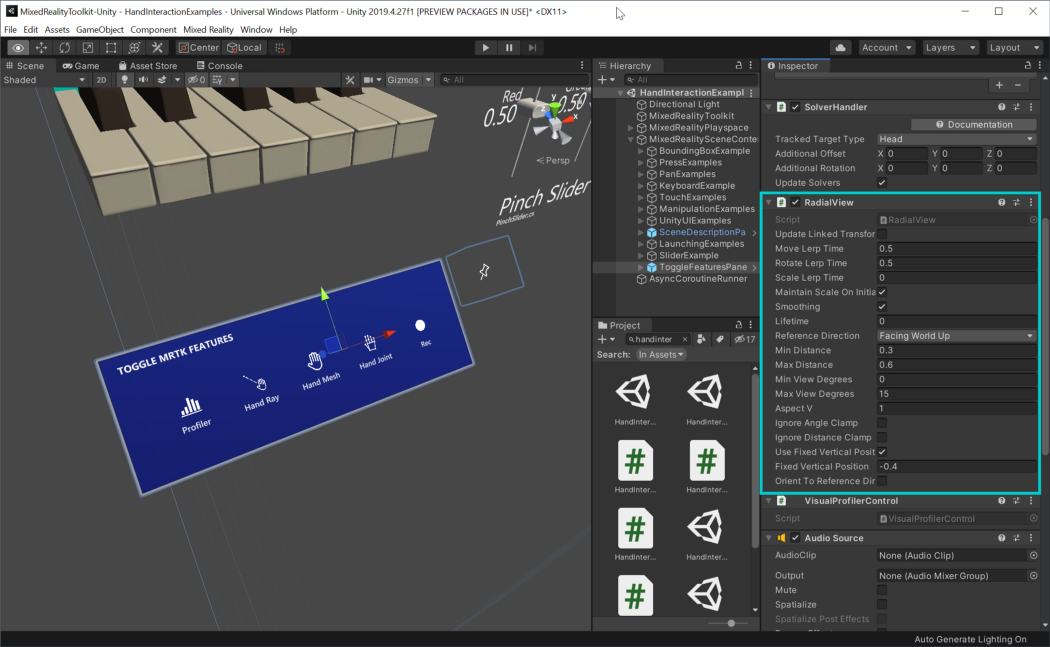
How to make an object follow you?
Assign RadialView.cs or Follow.cs script to an object. It is part of the Solver script series that allows you to achieve various types of object positioning in 3D space. SolverHandler.cs will be automatically added.
Solver – Mixed Reality Toolkit
Below is an example of Radial View configuration to achieve ‘lazy follow’ tag-along behavior just like the Start menu in the HoloLens shell. You can specify the minimum/maximum distance and minimum/maximum view degrees. The example below shows positioning the object between 0.4m and 0.8m range within 15°. Adjust Lerp Time values to make the positional update faster or slower.
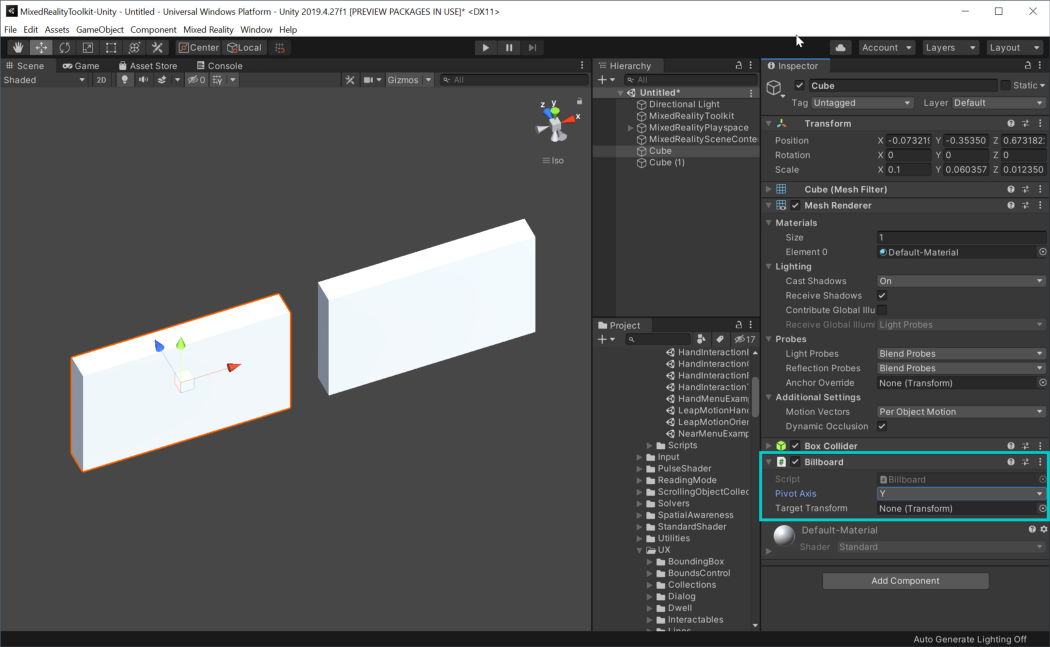
How to make an object face you?
Assign Billboard.cs script to an object. It will always face you, regardless of your position. You can specify the pivot axis option.