
프로젝트 배경
As a designer passionate about typography and spatial computing, I’ve long been captivated by the idea of placing beautiful type into real-world space. With 마이크로소프트 홀로렌즈는, you can anchor holographic objects in your physical environment — on tables, walls, or in mid-air — and walk around them just like real objects.
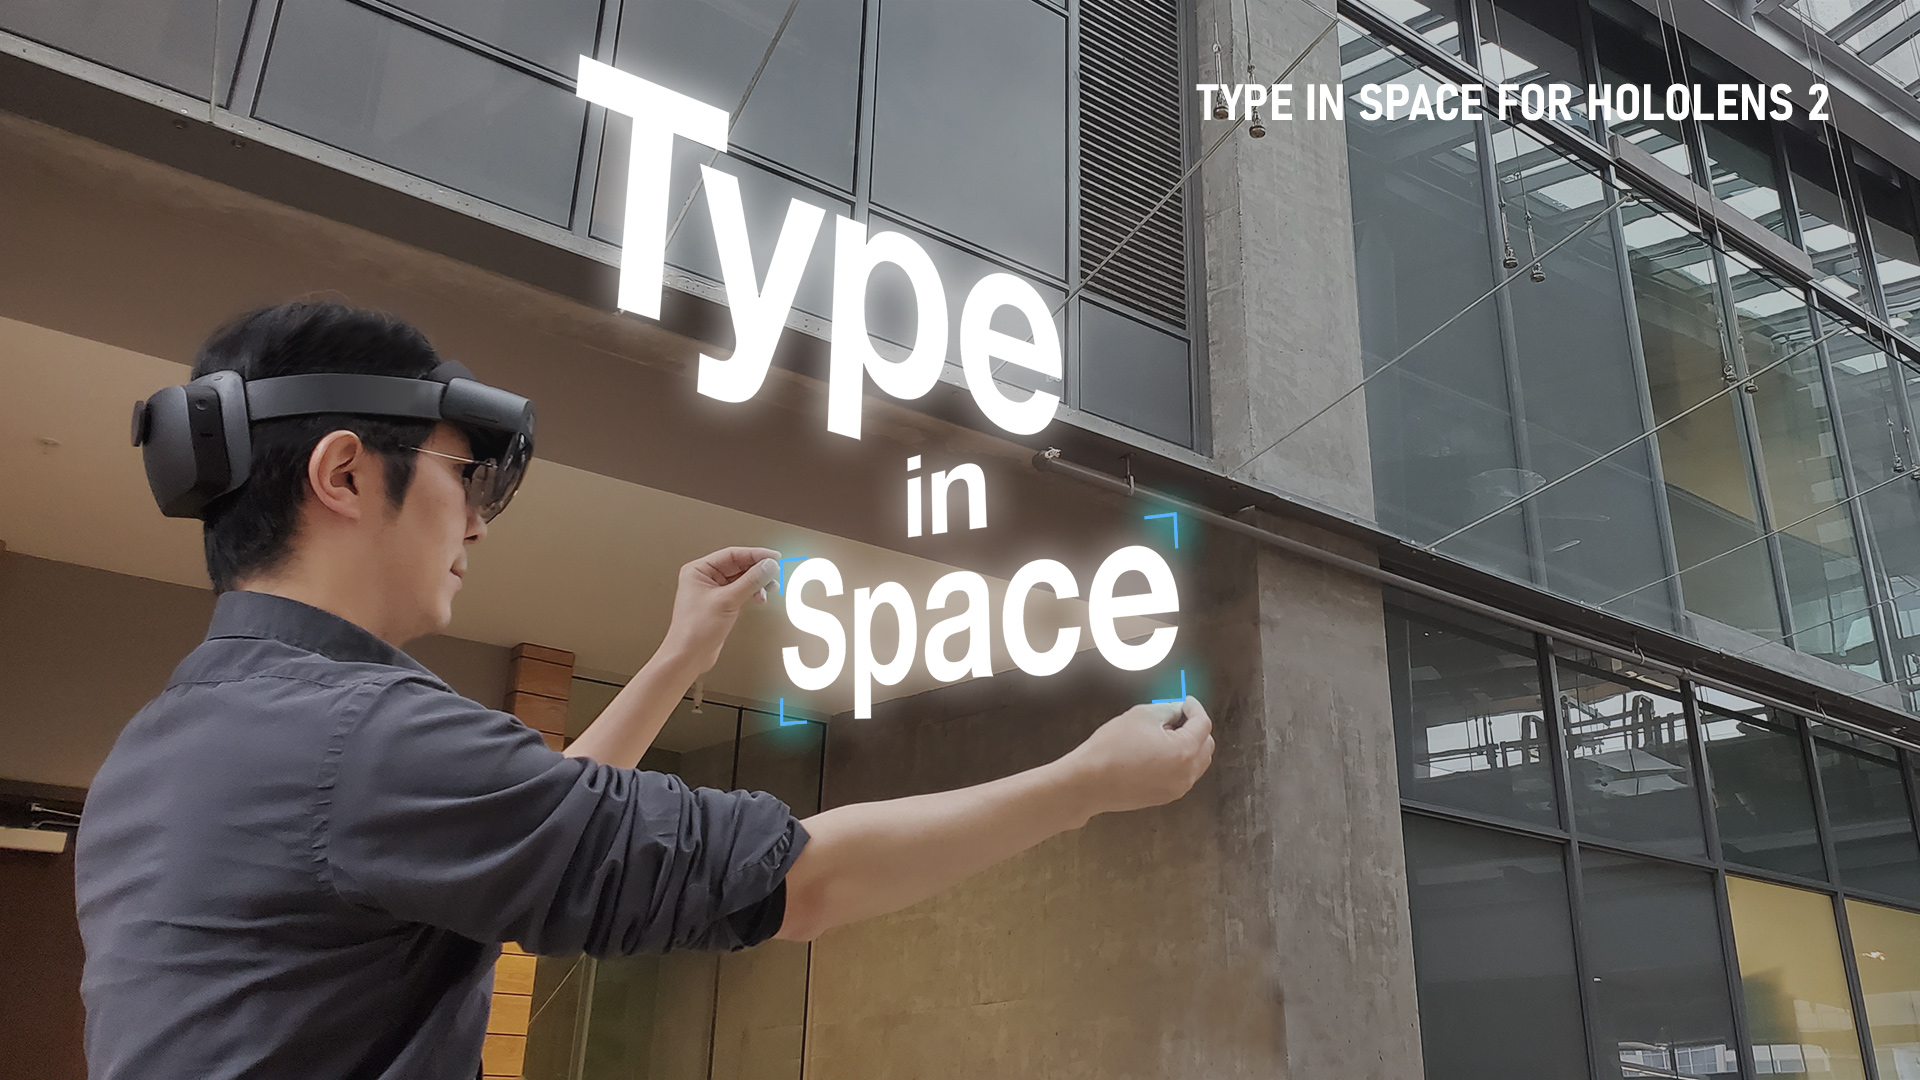
My journey began in 2016 with Typography Insight for HoloLens (2016), an early experiment that let users explore and manipulate holographic type in real space. That work evolved into Type In Space (2018), a full app focused on spatial typography for HoloLens.
Being able to see and interact with a holographic type in a real-world environment is one of the most magical experiences. With HoloLens 2, I had the opportunity to re-imagine this experience using the device’s advanced input capabilities. Instead of indirect controls, users can now touch, grab, and manipulate type directly with their hands — a leap toward truly instinctual mixed reality interaction.
홀로렌즈 2의 직관적인 인터렉션
HoloLens 2 introduced fully articulated hand-tracking and eye-tracking input, enabling direct, physical-like interaction with holograms that previously felt abstract. This shift changed the interaction model from controller or gesture-based input to something far more natural — users could reach out and engage with type the same way they do with physical objects.
This instinctual interaction was the foundational principle of the Type In Space redesign: make complex spatial typography feel intuitive, tactile, and expressive.
MRTK: 공간적인 인터렉션과 UI를 위한 컴포넌트
MRTK(Mixed Reality Toolkit) 는 마이크로소프트의 오픈소스 프로젝트 입니다.. MRTK-Unity는 Unity에서 혼합 현실 앱 디자인 및 개발을 손쉽게 하기 위한 필수적인 컴포넌트 및 기능을 제공합니다. MRTK v2의 최신 릴리스는 HoloLens/HoloLens 2, Windows Mixed Reality 및 OpenVR 플랫폼을 지원합니다.
MRTK v2는 처음부터 완전히 재설계되었으므로 입력 시스템은 MRTK v1(HoloToolkit)과 호환되지 않습니다. 저의 앱 Type In Space의 원래 버전에서는 HoloToolkit을 사용했기 때문에 이번에는 MRTK v2로 새로운 프로젝트를 만들기 시작했습니다. 대부분의 핵심 상호 작용은 MRTK v2의 컴포넌트들로 달성할 수 있기 때문에 생각보다 빠르게 구현할 수 있었습니다.
Text Object as Core Component
At the heart of the experience is the holographic text object. I chose TextMesh Pro for its high-quality rendering and sharpness across distances — essential given the HoloLens’s high pixel density.

Text Mesh Pro (텍스트 매시 프로)
HoloLens는 47 PPD(Pixels Per Degree)의 고해상도 디스플레이를 갖추고 있어 선명하고 아름다운 텍스트를 표시할 수 있습니다. 이 고해상도를 적절하게 활용하려면 적절하게 최적화된 텍스트 구성 요소를 사용하는 것이 중요합니다. Unity의 TextMesh Pro는 SDF(Signed Distance Field) 라는 기술을 이용하여 거리에 관계없이 선명하고 선명한 텍스트를 표시합니다. Typography guideline and Text in Unity on Mixed Reality Dev Center.
Direct Manipulation and Hand Interaction – Near & Far Field Interactions
Using MRTK’s manipulation handlers, users can grab and transform text with one or two hands. This enables expressive positioning, scaling, and rotation directly in 3D space — no indirect controls or menus needed.
Bounding Box
The bounding box is a standard interface for the precise scale and rotation of an object in HoloLens. For the Type In Space app, I used it to indicate the currently selected text objects by displaying the corner handles. MRTK’s Bounding Box provides various configurable options for the visual representation of the handles as well as the behaviors.
Menu UI for Text Properties
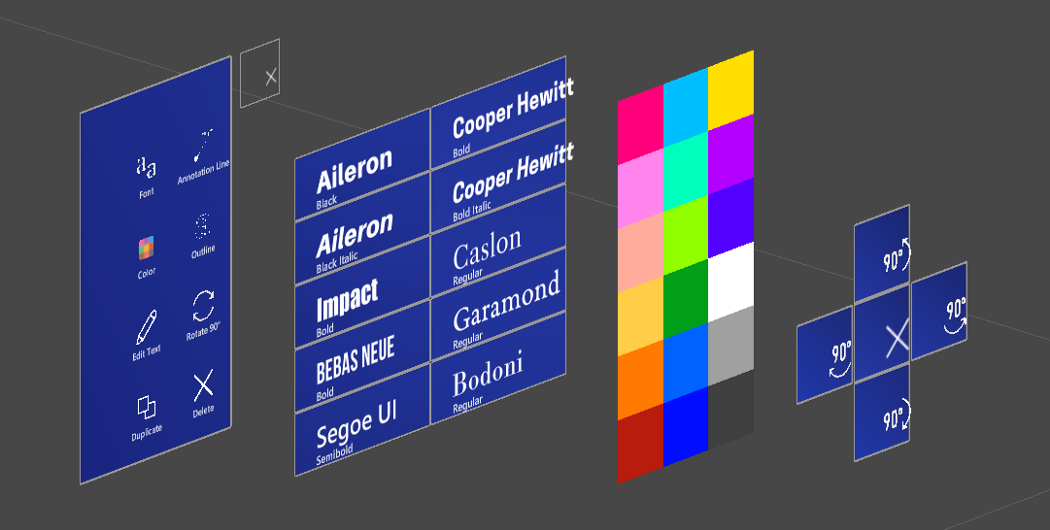
Button
In HoloLens 2, button input occurs through direct hand-tracking without any physical surface. As a result, users receive no tactile confirmation at the moment of activation. To maintain clarity and reduce ambiguity, the button interaction model relies heavily on strong visual affordances, touch-proximity cues, and spatial audio feedback to simulate a sense of “press.”
MRTK’s HoloLens 2 style button provides rich visual/audio cues and handles complex logic for the speed/trajectory/direction of the finger movements. Visual feedback includes proximity-based lighting, highlight box, compressing front cage, hover light on the surface, pulse effect on press event trigger, and the fingertip cursor.
Hand Menu
In the original version, the text tools were accessed through a floating tag-along menu that followed the user to remain always available. With HoloLens 2, a new interaction pattern — the hand menu — emerged. Hand menus use hand-tracking to surface contextual controls near the user’s hand only when needed. This eliminates UI clutter, shortens interaction travel distance, and lets users stay focused on the content.
I adopted this pattern for text property controls and tested its effectiveness. Below are Mixed Reality Capture clips recorded on the HoloLens 2 device.
As shown in the capture, the interaction works well — users can simply raise their palm to reveal the menu, adjust text properties, and continue working. However, repeatedly holding the palm up can introduce arm and shoulder fatigue, especially when making multiple adjustments. To address this, I added an option to “world-lock” the menu, allowing users to pin it in place or pull it out into the environment for longer editing sessions.
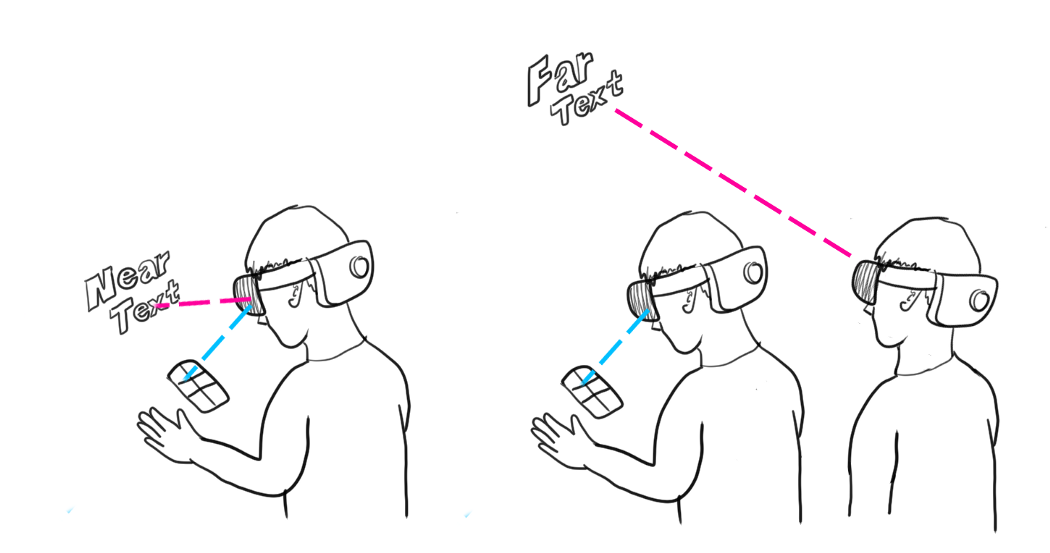
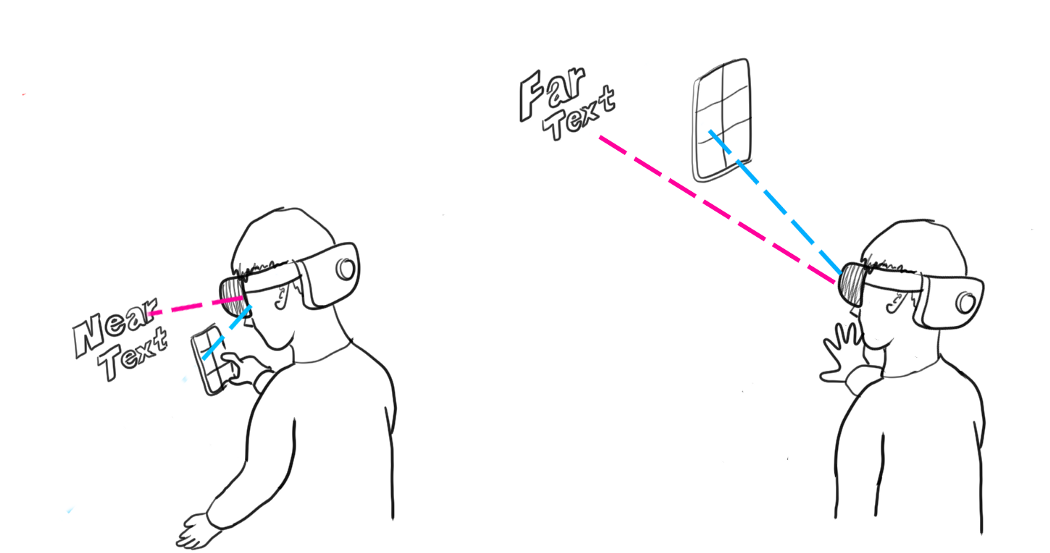
While the hand menu felt natural when working with text objects close to the user, usability issues emerged in far-field scenarios. To edit text placed several meters away, I needed to maintain visual attention on the distant object while simultaneously checking the menu near my hand. This forced continuous eye-focus switching between depth planes, creating noticeable discomfort and eye fatigue within a short period. It highlighted a core ergonomic challenge unique to spatial UX — where UI lives in depth matters just as much as how it behaves.
One potential solution was to attach the text-related menu directly to each text object. However, for content positioned far away, the menu would need to scale up significantly to remain usable with hand rays or gaze-based pointers. This would visually dominate the scene and compete with the text itself, which should remain the hero. Additionally, I wanted to preserve direct, fingertip interaction for near-field editing — something that a purely object-attached menu wouldn’t fully support.
In-Between Menu with Angular Scaling
My solution was to place the text property menu between the target object and the user’s eyes — positioned closer to the text to minimize depth-switching. After iterating on distance values, the optimal placement was approximately 30% farther from the object (or 70% from the headset). This allowed comfortable direct hand interaction in the near-field while maintaining readability for far-field objects. The same positioning and scale also remain usable within the smaller field of view of the first-generation HoloLens.
MRTK already includes a set of spatial Solvers for world-anchored UI, and fortunately one of them — the InBetween Solver — provided exactly the positioning pattern I needed. It enables UI to sit between two objects, with a tunable percentage that determines how close it is to either side. To preserve ergonomic accessibility, I paired it with the ConstantViewSize Solver, which keeps the menu’s visual footprint consistent at any depth. The result is a menu that expands when positioned farther away and compresses when closer to the user, enabling smooth transition between interaction modalities: direct touch in near-field and hand-ray or air-pinch when farther away.
UX Elements: Main Menu for the global features
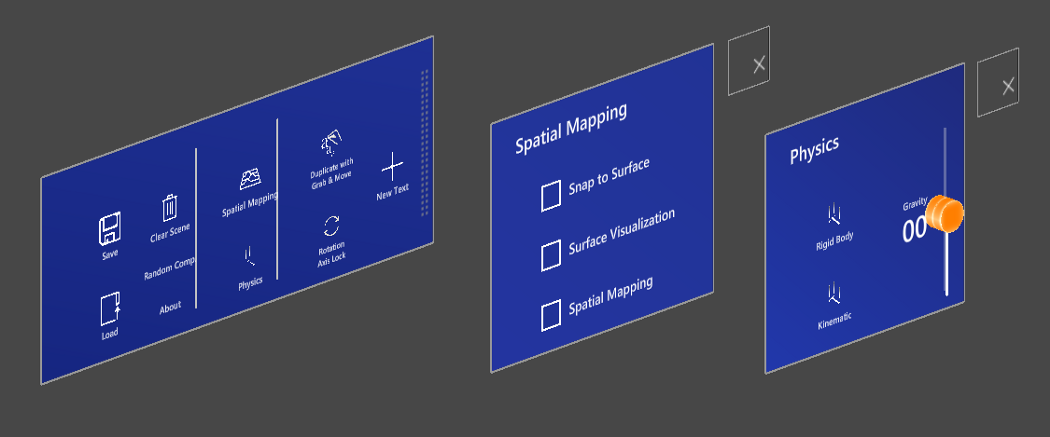
For global, non–object-specific actions, I kept those buttons in the hand menu. As described earlier, the menu can be grabbed and pulled out to become world-locked when longer interactions are required.
The main menu includes:
- New Text | Clear Scene | Save & Load Scene
- Spatial Mapping | Mesh Visualization | Snap to Surface
- Physics: Rigid Body | Kinematic | Slider UI for gravity(force)
- Grab & Duplicate Toggle
- Random Composition
- About
Below is the latest design iteration — a more compact version that automatically world-locks when the user drops their hand. Once world-locked, the menu becomes easier to use for multi-step adjustments and interaction with multiple UI controls.
UX Elements: Annotation
One powerful aspect of spatial text is its ability to annotate physical objects — labels, notes, or explanations that live in the space where they are relevant. To reinforce this connection, I introduced an optional visual linking system consisting of a sphere and a connector line. The user can reposition both the text anchor and the sphere to create clear, meaningful annotation layouts. The implementation leverages MRTK’s Tooltip component, which provides a robust base for line-based UI relationships.
UX Elements: Spatial Mapping & Surface Magnetism
Spatial Mapping is one of HoloLens’ most compelling capabilities — it enables holograms to understand and interact with real-world surfaces. In the original version of Type In Space, text objects were placed on physical surfaces using a Gaze cursor. With HoloLens 2, I updated this to use the hand-ray endpoint, allowing users to attach and move text directly along surfaces with far-interaction input. Placement and movement are toggled via air-tap.
In MRTK, Spatial Mapping is exposed through the Spatial Awareness system, which provides the environment mesh. To support snapping behavior, I used the Surface Magnetism solver, allowing text objects to automatically adhere to detected surfaces.
UX Elements: Physics
With Spatial Mapping providing real physical surfaces, I explored adding physics-based behavior to the text. In addition to the basic gravity toggle from the original version, the new iteration introduces a slider that lets users control both the magnitude and direction of the force—allowing text to fall, float, or collide dynamically with real-world objects.
UX Elements: Text Input with keyboard and speech
HoloLens 2’s direct hand interaction dramatically improves text entry as well. Instead of relying on indirect gestures or head gaze selection, users can now type with their fingers on a holographic keyboard — much like a physical keyboard, but in mid-air.
Of course, speech remains available for dictation. The system keyboard includes a built-in speech input button, and MRTK also provides examples for using both the system keyboard and speech input in applications.
Below is an example of dictation input, powered by the Windows speech service.
UX Elements: Grab & Duplicate
In the original version, duplication was handled through a simple “duplicate” button, which created a new text object with identical properties and placed it at a small offset. This resulted in a visually interesting array-style effect.
In the latest iteration, I redesigned duplication to be far more natural: users can simply grab a text object and pull to create a copy. This direct manipulation approach feels intuitive and fluid — and when repeated, it produces beautiful, world-locked trails of holographic text.
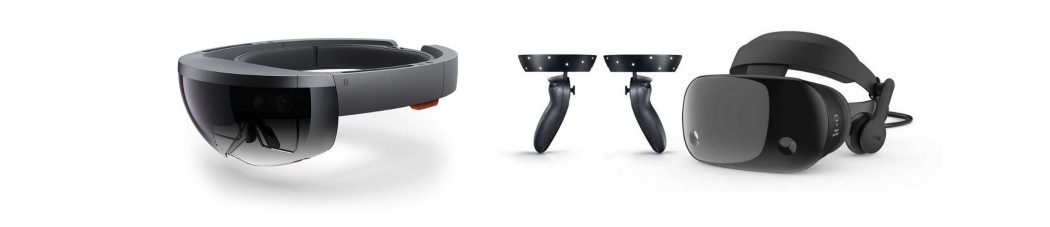
Supporting HoloLens 1st gen and Windows Mixed Reality VR devices

A key benefit of using MRTK is its cross-platform support. Its interaction building blocks and UI components work across input systems, from HoloLens 1’s GGV (Gaze, Gesture, Voice) to Windows Mixed Reality headsets with motion controllers.
The text-property menu (the In-Between menu) required no changes to function on HoloLens 1 — its fixed placement relative to the selected text keeps it visible even within the device’s smaller FOV, and motion-controller pointer input in VR also works seamlessly.
Because hand tracking is not available on HoloLens 1, I converted the Main Menu into a floating tag-along menu with a pin/unpin toggle. Aside from that minor adjustment, the app shipped to both HoloLens 1 and HoloLens 2 from a single Unity project.