
Last year, with my love of typography, I have explored spatial text layout in the physical space and introduced two apps for HoloLens.
- Typography Insight for HoloLens: A spatial type layout and reference tool for learning and experimenting with type in physical space.
(Medium post: Designing Typography Insight for HoloLens) - News Space for HoloLens: A spatial news headline visualizer which fills up your room with the latest news headlines.
(Medium post: News Space for HoloLens)
With Windows Mixed Reality immersive headsets, I have continued my journey, exploring the possibilities of the typography education in the virtual space.
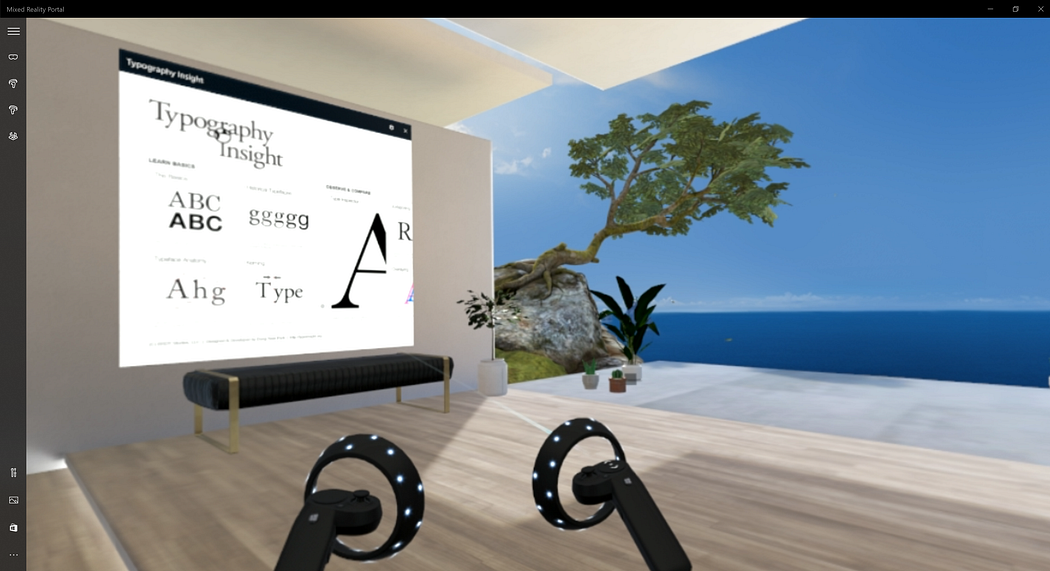
Museum of Type is a virtual museum where you can explore and learn about historically important typefaces. With motion controllers, you can pick up type and observe its detailed shape and characteristics. I wanted to share my design and development story.
*I work at Microsoft as a User Experience Designer. Museum of Type, Typography Insight for HoloLens and News Space are my personal projects. All experiments and related opinions are my own.
프로젝트 배경
Typography, all the details, and classification of type can be a dry subject and could block the way to learning for many young people and students in this digital era. Books are great but often books on typography get left on the shelves. With mixed reality experience, I wanted to bridge that gap by making the subject come alive, by making it more tactile, physical, and interactable. Typography education leveraging new media and interaction design has been my consistent research topic as you can find in my previous article.
When I first experienced virtual reality, I was really excited about the fact that I can construct my own virtual environment at any scale. With this interest in the virtual environment, I started thinking about an imaginary museum space where I can walk around, observe and learn about historically important beautiful typefaces.
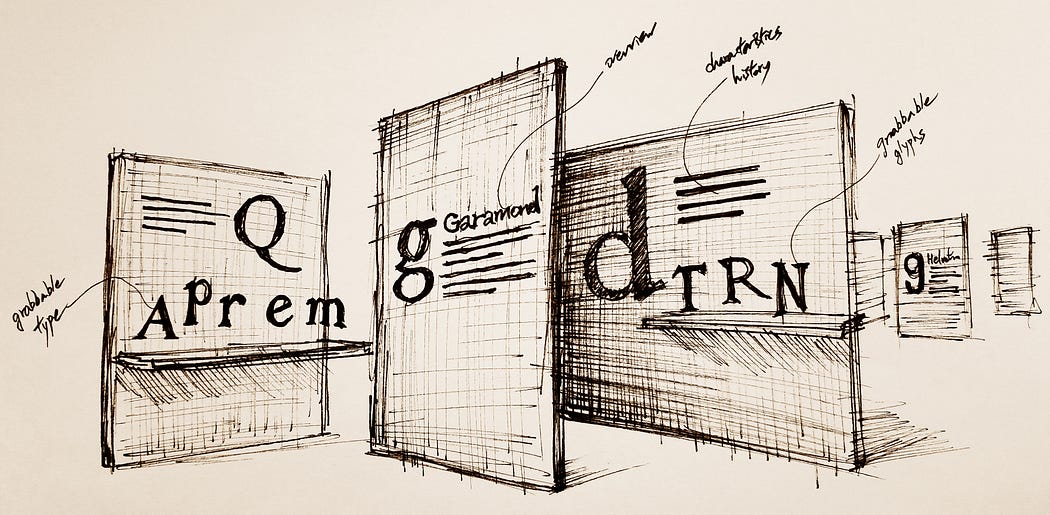
Sketches
I started sketching out some ideas about the environment. Since this will be a space for type, I wanted to make it a clean, undecorated environment where a user can focus on the content: beautiful typefaces and their history. Because of this, I started with simple planes, and cubes with pure white color to construct the environment.
Setting up the tools and environment
Since I learned the importance of experiencing my design in the device from HoloLens app design, I quickly started creating this environment in Unity to see how it feels like in the actual headset. These are the required tools for Windows Mixed Reality app development.
- Windows 10 Fall Creators Update
- Unity 2017.2.0p1-MRTP4
Unity Mixed Reality Technical Preview is specifically made for Windows Mixed Reality. You need the MRTP version of Unity to develop apps for Windows Mixed Reality’s immersive headsets. - Visual Studio 2017 Community+ Fall Creators Update SDK (16299)
Windows 10 SDK 16299 can be installed in Visual Studio’s installation process. - Mixed Reality Toolkit (MRTK)
MRTK contains foundational components for the mixed reality app development. In my project, I used input-related components for the motion controllers and UX components for the button and menu UIs. Here are some of the useful example scenes you can find in MRTK:
– Motion Controller Test
– Grab Mechanics Examples
– Interactable Object Examples
– Object Collection Examples

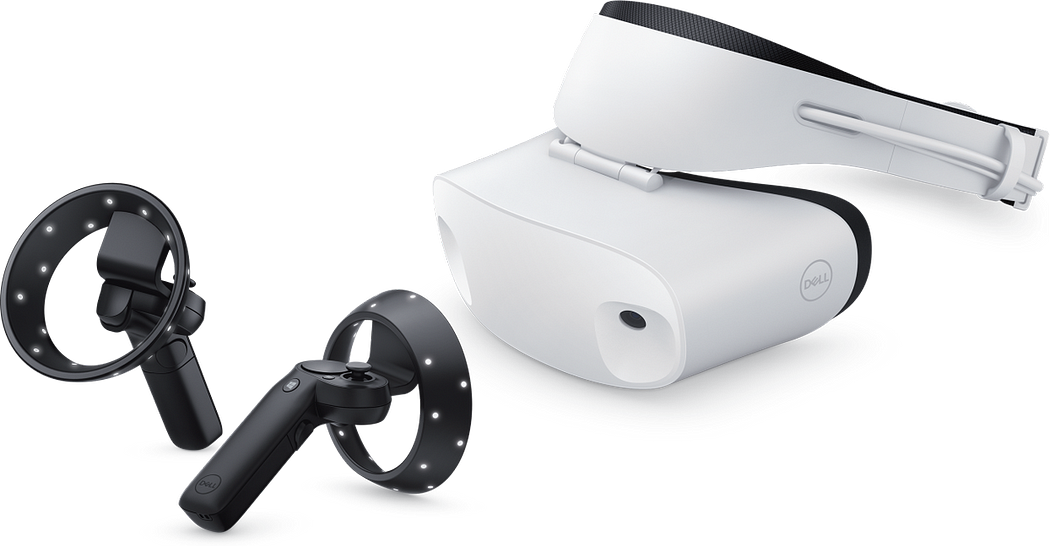
- PC and Windows Mixed Reality headset with motion controllers
You can find Windows Mixed Reality headsets from Microsoft Store. For the PC, I used my DELL nspiron 7559 laptop which was used for my HoloLens app development. It has an Intel Core i7–6700HQ with NVIDIA GTX 960M. Even though this is not a high-performance gaming laptop, I was able to develop apps for Windows Mixed Reality without any performance issue.
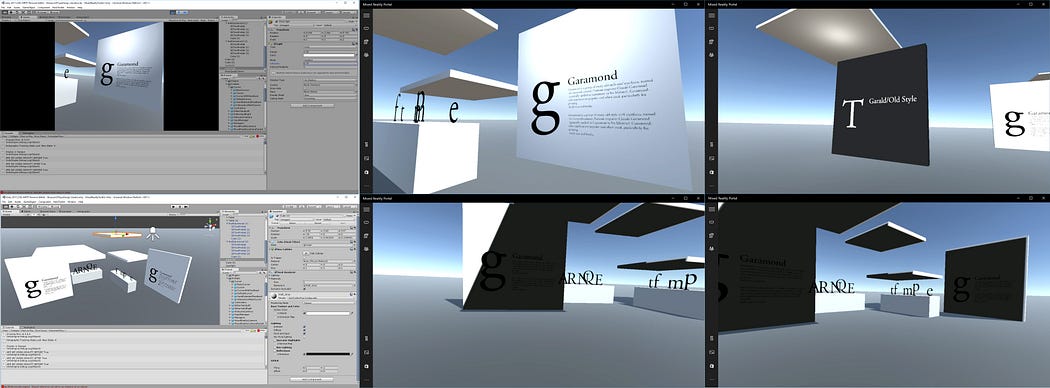
Design & Development iteration with Unity and Mixed Reality Portal
I started using Motion Controller Test scene in MRTK since it had basic motion controller and camera setup for Windows Mixed Reality. This scene already includes basic teleportation and locomotion with motion controllers. Because of this, you can easily create something in Unity editor and move around with motion controllers wearing the headset.
To experience your scene in the immersive headset, open Windows Mixed Reality Portal app and make sure your motion controller is paired and working well in the cliff house.
While Mixed Reality Portal is running, simply hit Unity’s ‘Play’ button to enter the game mode. This mode allows you preview your scene without building/deploying your project. Now put on your headset and you will see your scene in three-dimensional space with your motion controllers. Using this Unity’s game mode preview, you can quickly experience and iterate your design ideas with your headset. Always, experiencing and testing your design in the headset is very important in MR app design and development. It could be quite different from what you imagined and designed in the 2D editor.
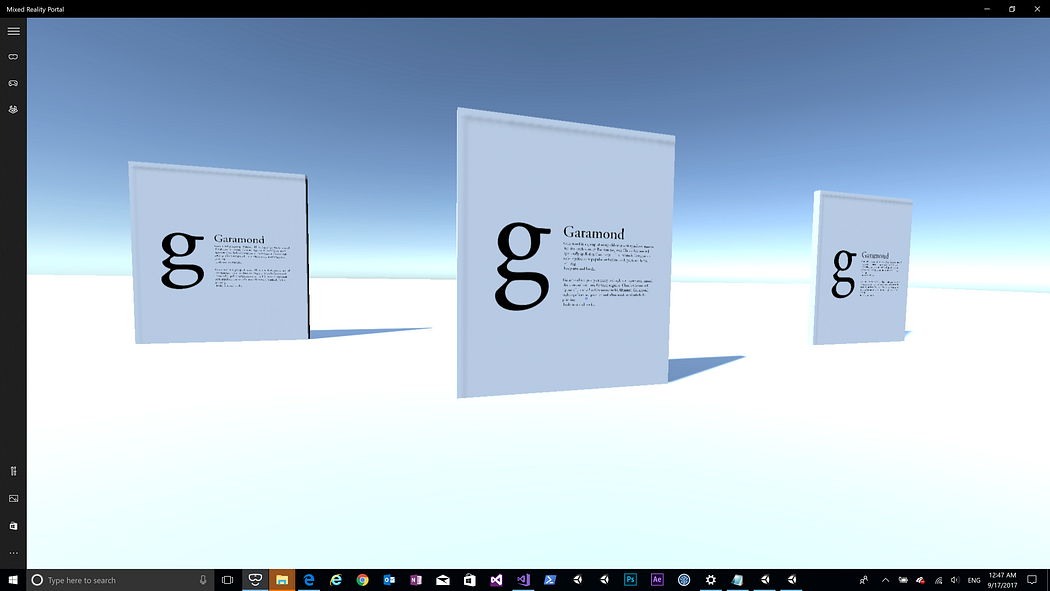
Constructing the virtual museum environment
I started laying out the walls using Unity’s cube game object and added text content in the space. With some iterations, I was able to find right size and distance for the objects and text size in three-dimensional space. I also played with lighting and material for the walls to get a proper amount of contrast with shadow. Since I am not familiar with shader programming, I picked up one of the materials in MRTK and tweaked it for my environment.
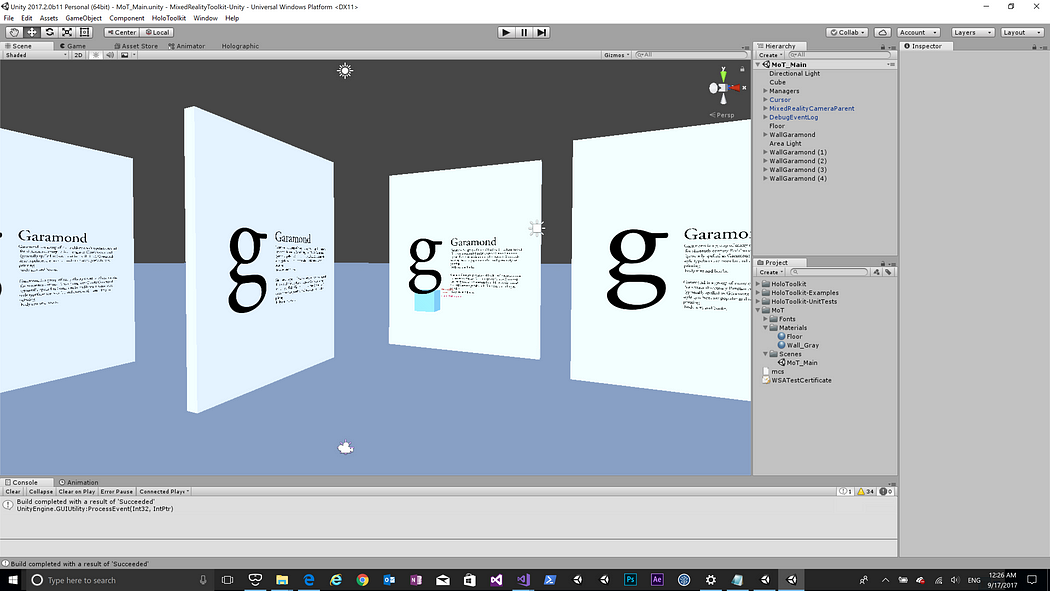
In Unity’s game mode, you can still click the scene tab and select/modify any object in the scene hierarchy. You can see your updates in real-time in the headset. This was really helpful for fine-tuning detailed color, size, and the position of the objects.
In virtual reality world, the skybox is an important element that impacts your app experience. You can simply think it as three-dimensional background. Since it is surrounding your entire space, you can use 360-degree images as a texture for the skybox.
The floor is also an important element in virtual reality experience. It makes the user feel safe and grounded. The floor is included in the MixedRealityCamera.prefab in MRTK. I just updated the color of the material for my app experience.

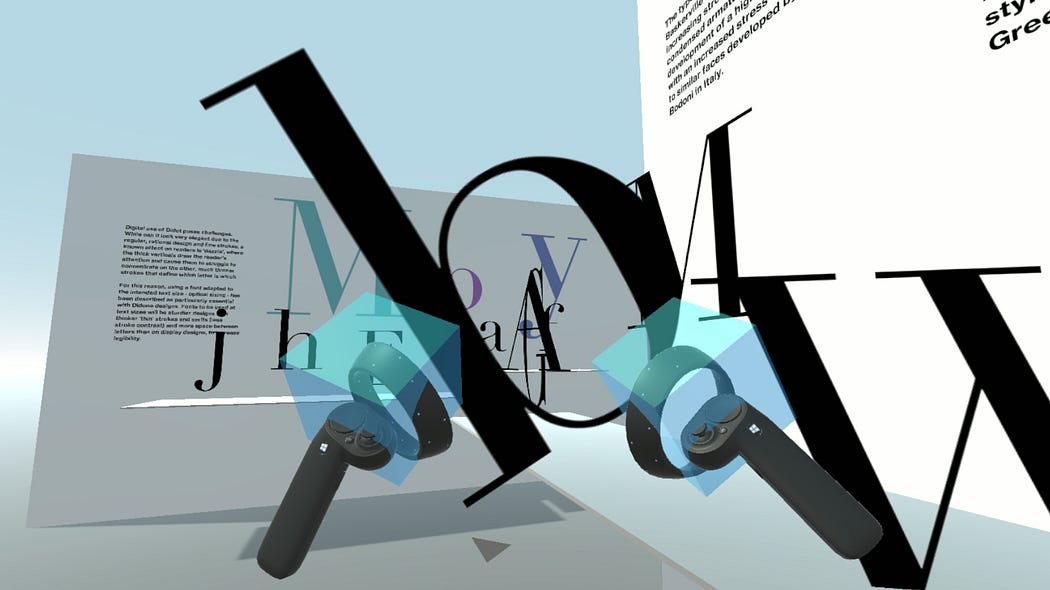
Direct manipulation with motion controllers
After establishing basic museum environment, I started placing some of the sample type glyphs in the space. I wanted to make it grabbable so that user can pick up, hold and observe its detailed shape. Usually, we don’t have a chance to observe 2D type in a three-dimensional way in real-life. As a type lover, being able to grab type and observe it from a different angle was a very exciting experience.
To make the type grabbable with motion controllers, I used grabber scripts from Grab Mechanics Example scene in MRTK. This example scene contains useful scripts and prefabs for grabbing and throwing objects with motion controllers. Just simply assigning GrabbableChild and ThrowableObject scripts made my sample type glyphs grabbable with motion controllers. Direct manipulation with motion controllers is one of the most exciting and fun interactive experience in mixed reality.
Since the motion controllers do not have a rigid body or box collider in default, you cannot grab objects directly. Grab Mechanics Example scene uses two cubes as controllers that have a rigid body and box collider. To make default controllers work with grabbing behavior, you can attach these controller cubes to the controllers. Of course, you can hide the visual of these cube by simply changing the opacity with ‘fade’ option in the material.
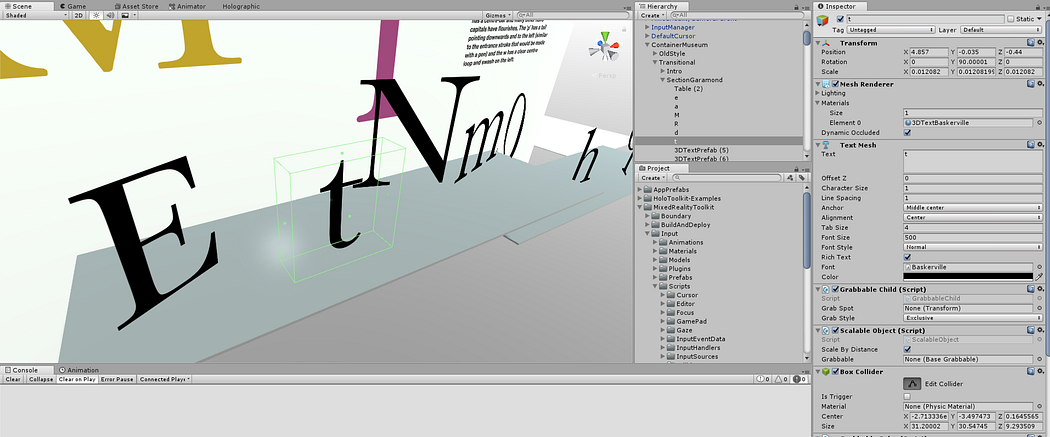
Optimizing text rendering quality
I have introduced some of the technics for optimizing the text rendering quality in Unity (3DTextMesh and UIText), in my previous article. Now Unity has new text component ‘TextMeshPro’ which enables crisp text rendering regardless of the distance and size, using SDF(signed distance field) technique. It shows rounded stroke edge issues on very large scale text but works well in normal size. I used both 3DTextMesh and TextMeshPro to display text content.

3DTextMesh requires proper material assignment. When you change the font in the editor, Unity reverts the material back to default ‘Font Material’ which does not support proper occlusion. You can find the instructions for creating and assigning proper font texture and material in MRTK.

Attaching UI to the motion controller
As the museum grows bigger with more content, I realized that I need some kind of method for easily jumping to different sections. On the left motion controller, I added simple menu interface which makes it easy to teleport to a specific section. One of the benefits of attaching the UI to the motion controller is that user can always access it easily anytime, just like a wristwatch. It is a great place to put user interfaces for quick action.
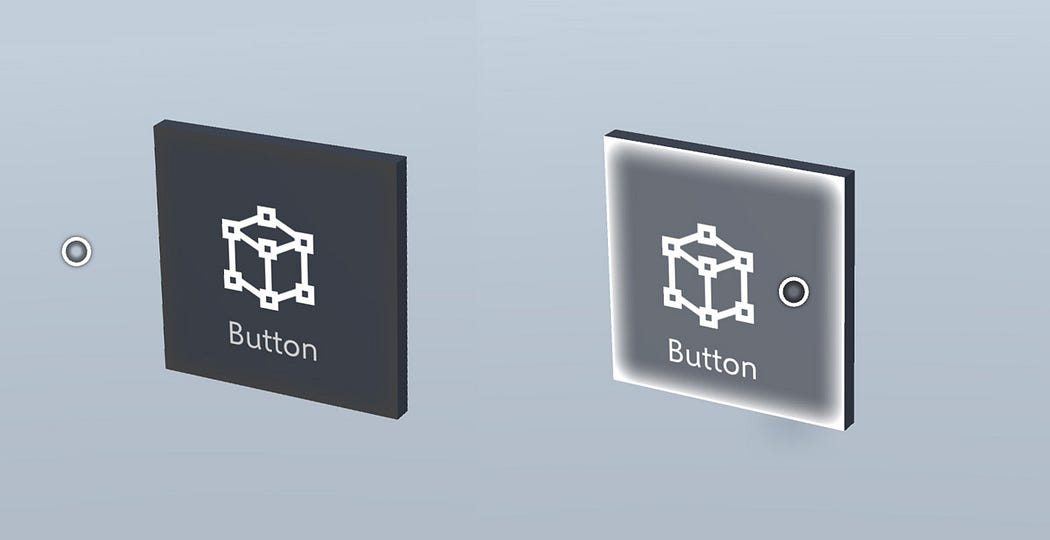
For the menu system, I used MRTK’s Holographic Button which can be found in the Interactable Object Example scene. It contains predefined visual states and animations for different input states such as idle, ready, and pressed. It supports both HoloLens’ gaze and gesture input as well as the immersive headset’s motion controller pointer input.
In the Interactable Object Example scene, you can also find a great example of using an ‘Interaction Receiver’. The Receiver makes it easy to manage input events from multiple Interactable Objects in a single script. It is especially useful for the menu system where you have an array of multiple buttons.
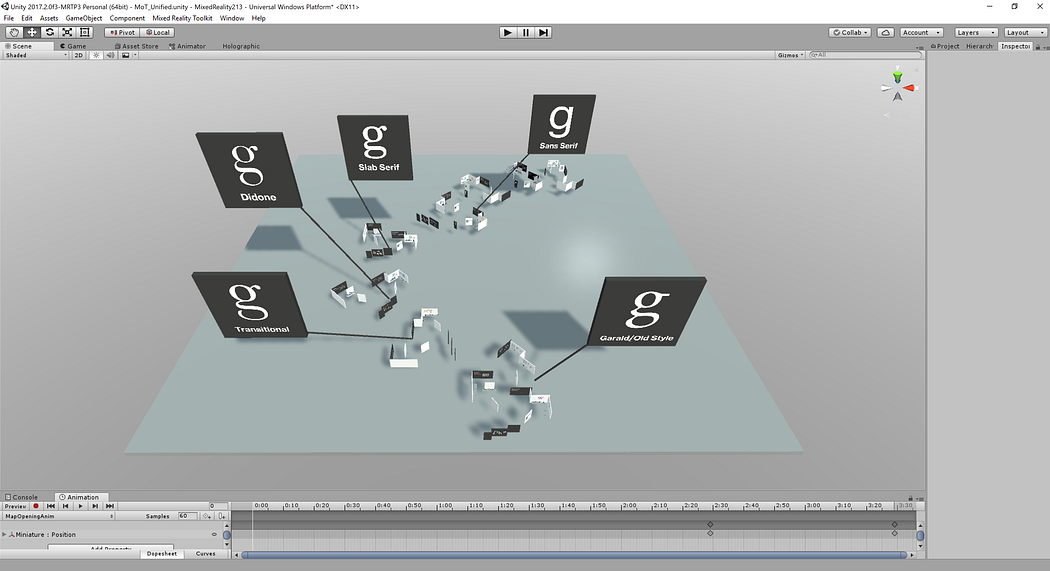
To construct the menu’s layout, I used MRTK’s Object Collection script which can lay out an array of objects in three-dimensional space in specific surface type and spacing. The below example shows how I used it to make a curved layout for the multiple-button objects.

I attached the menu to the left motion controller using AttachToController script in MRTK. With AttachToController script, you can easily specify handedness(left or right) and the element of the controller that you want to attach to.
Using the pointer of the right controller, you can point and select the menu. Since the menu could be disturbing in grabbing interaction, I added show/hide animation and assigned it to motion controller’s menu button event. The user can show/hide by pressing the menu button.
Intro scene
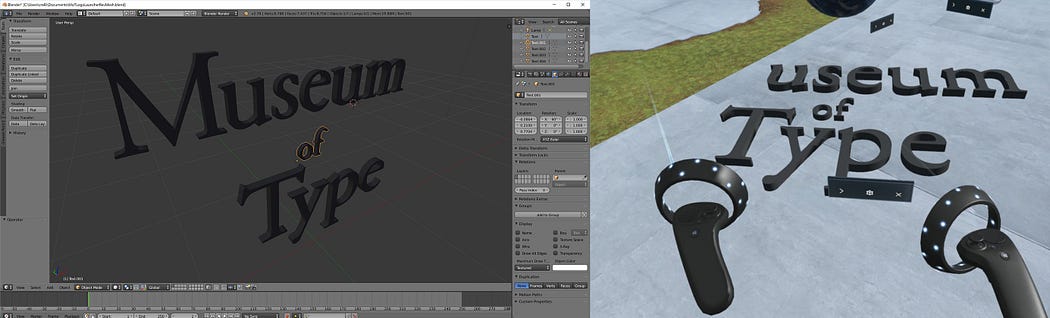
With the museum layout and content ready, I added simple intro scene with an animated logo. I used Blender(free open-source) to create 3D text logo and imported into Unity. In Unity, I used Animator and Animation clip to achieve a simple animated fade-in effect. Unity’s keyframe animation with a timeline is very similar to other timeline-based application. You can easily understand how to use it if you are familiar with After Effects or Flash.

In the intro scene, the user can overview the museum in a bird’s-eye view and see five different sections based on type classification categories.
Tooltip for the motion controllers
One of the important aspects of the first-run experience in mixed reality app is the introduction of the input method and button mapping. Since the user can get lost in a fully immersive virtual space, it is important to clearly communicate how to interact with the world in your app experience. Especially if your app is using customized button mapping, it is crucial to introduce button mapping information either through tutorial scene or tooltips on the controller.
In Museum of Type, I used standard default button mapping:
- Trigger for Select
- Thumbstick for Teleport and Locomotion
- Grab button for grabbing and releasing objects
- Menu button for displaying menus
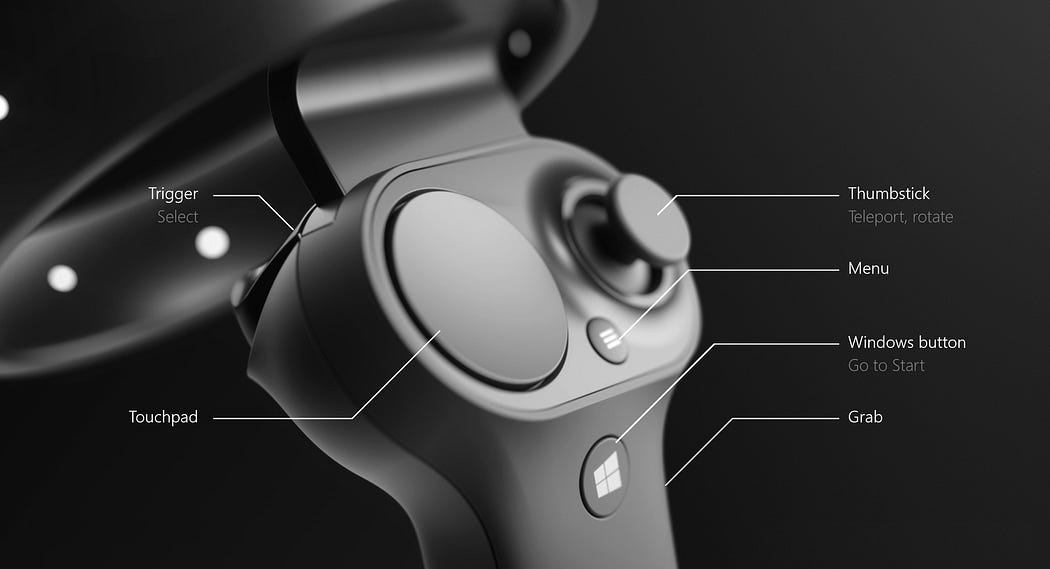
To clearly show available button interactions, I created simple tooltips attached to the controllers. They are pointing to specific buttons and explaining their behavior.
Type Playground
At the end of the museum experience, I created a space where the user can observe and play with type. It is still in early stage but I want to bring additional features including font and color options, just like Typography Insight for HoloLens. This will become a place where the user can experiment with historically important typefaces in 3D space.
Adding 3D app launcher
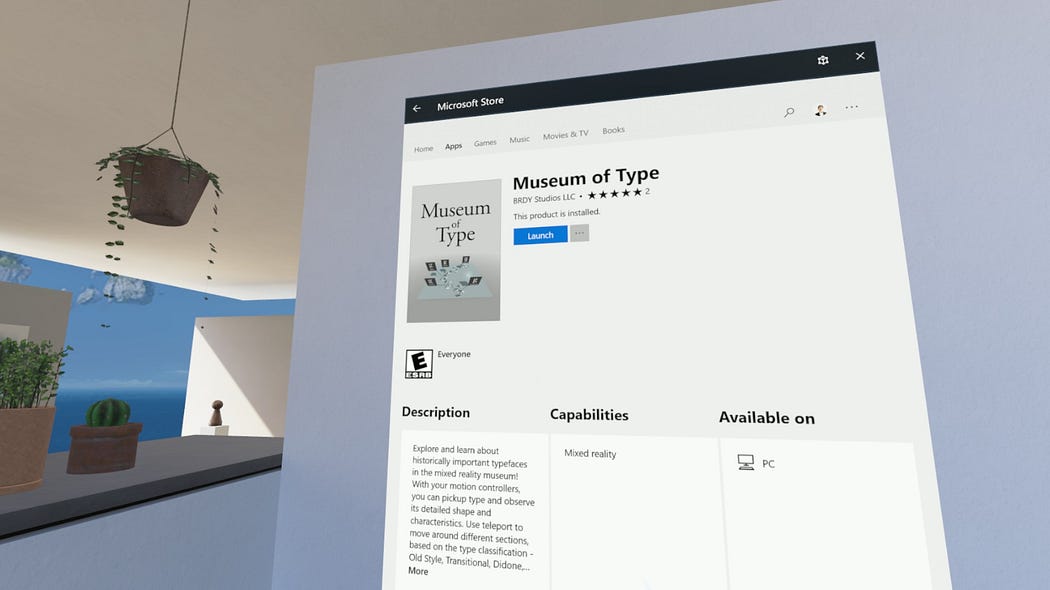
In Windows Mixed Reality, you can create a three-dimensional object which can be used as an app launcher. It could be a logo or 3D object that can represent your app. This object can be organized in the cliff house, just like other 3D objects. The 3D model asset should be exported as glTF 2.0(.glb) format. You can find detailed design and development guideline on this page. This page also introduces detailed steps and examples.

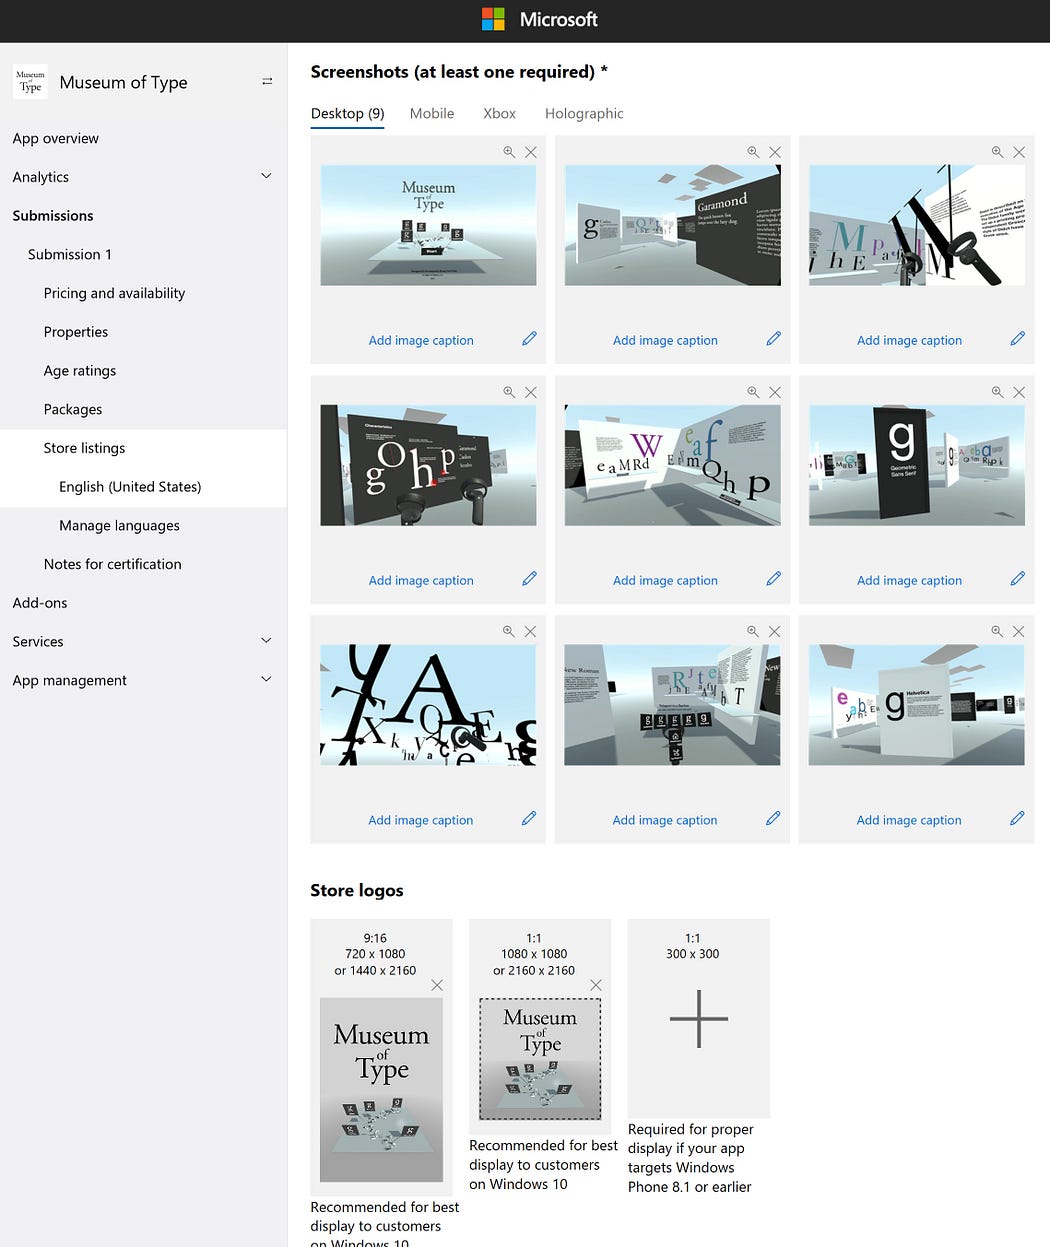
Publishing app to Microsoft Store
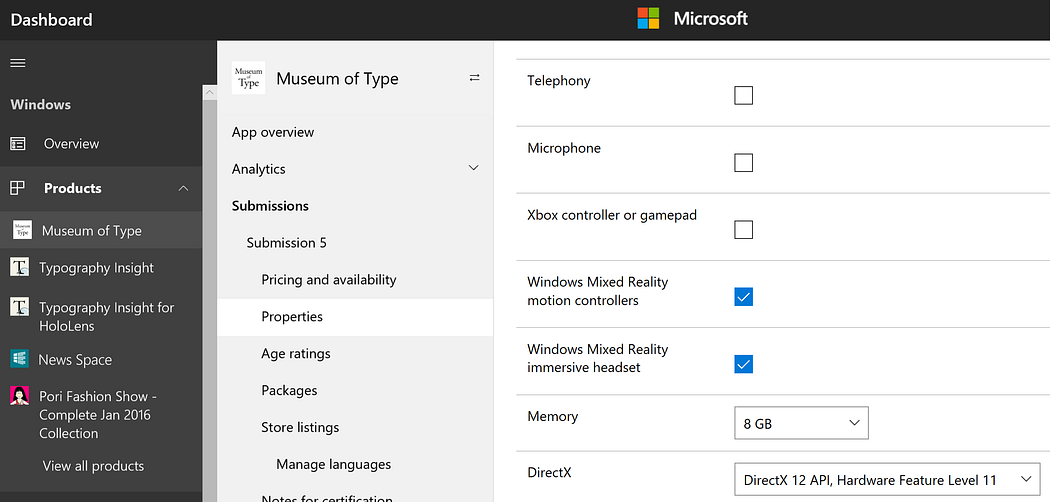
App submission process is similar to 2D Universal Windows Platform app. You just need to specify correct device type and input method: Windows Mixed Reality immersive headset and motion controllers.
Since you can include a video trailer, you can demonstrate important experience with a video capture. To capture a video, you can use video recording feature in Mixed Reality Portal. Simply click the ‘Video’ icon in the Start menu or say “Hey Cortana, start recording”. Since this voice command also works in your app experience, you can easily take a picture or start/stop video recording.
Other Stories
-

How to enable Passthrough for Mixed Reality – Meta Quest 3, Quest Pro, Quest 2
#Mixed Reality #Passthrough #Hand Tracking #MetaQuest #Quest3 #Quest2 #QuestPro To enable passthrough, follow these 3 steps: 1. Enable Passthrough in OVRCameraRig > OVR Manager Update Passthrough Support and Enable Passthrough 2. Add OVRPassthroughLayer script Add OVRPassthroughLayer component to the OVRCameraRig. Select Underlay to use the passthrough as a background. This will create augmented reality experience…
-
How AI Is Empowering Designers in Spatial Computing
AI has already created tremendous opportunities for designers working on traditional 2D applications and services. But what has excited me even more is how AI is fundamentally changing the way we design spatial computing experiences. The reason is simple: Spatial computing has always had a much higher barrier to entry. Unlike traditional 2D interaction design,…
-

Cosmic XR has won ‘Education Experience of the Year’ at The Polys 6th Annual Immersive Awards
Cosmic XR has won “Education Experience of the Year” at The Polys 6th Annual Immersive Awards today. The Polys, presented by the Academy of Immersive Arts & Sciences, recognize outstanding immersive experiences across XR. Cosmic XR is my solo passion project, combining my love for space, spatial interaction, and data visualization. I wanted to make…
-
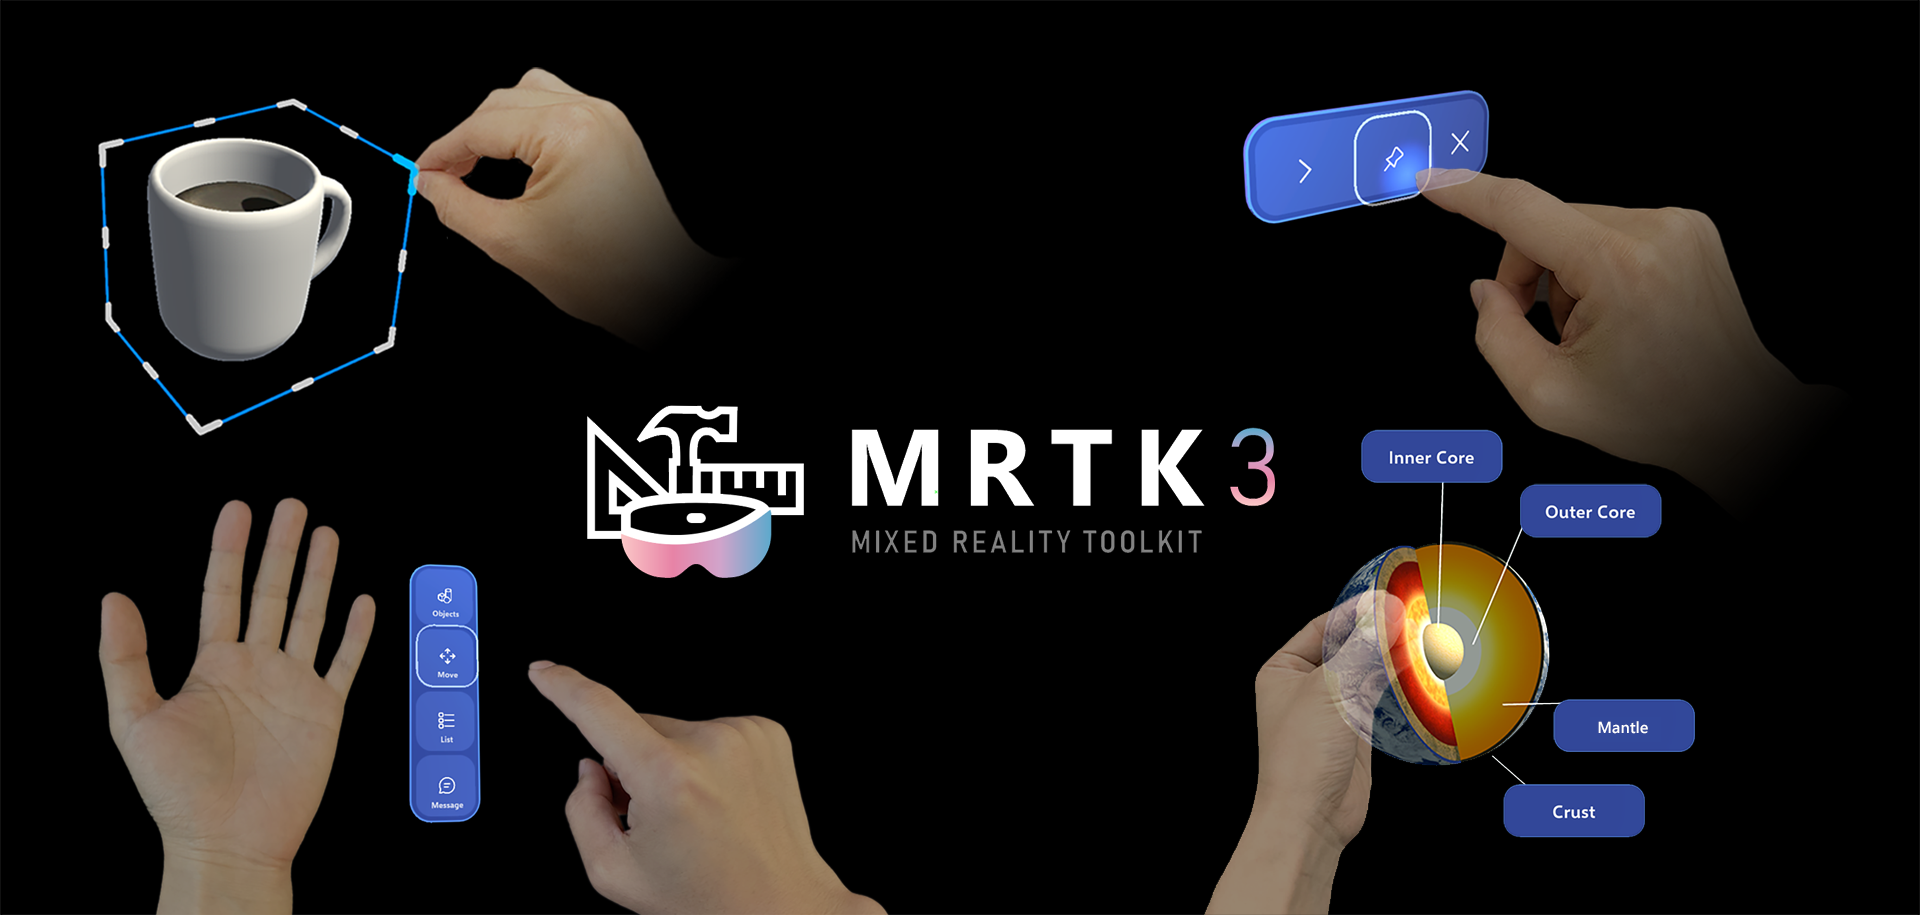
How to use Meta Quest 2/Quest Pro with MRTK3 Unity for Hand Interactions
With the support of OpenXR, it is now easy to use MRTK with Meta Quest devices. These are overall steps to set up the environment. If you use a PC, you can preview Unity’s game mode on the headset in real time which helps you iterate fast. Unfortunately, Mac does not support this live preview,…
-
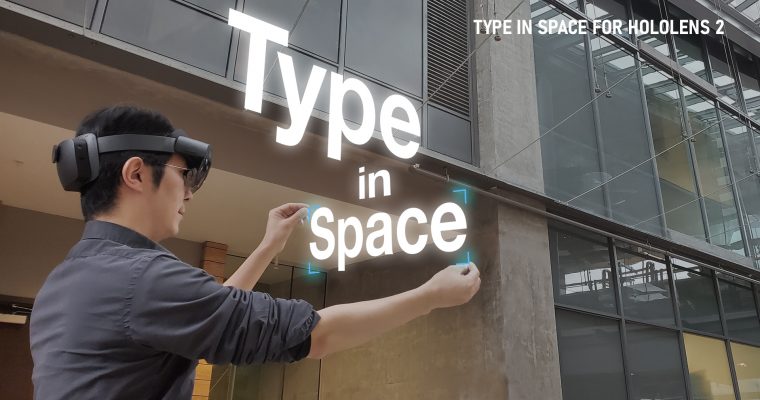
홀로렌즈2용 타입 인 스페이스 (Type In Space) 앱 디자인 스토리
Background As a designer passionate about typography and spatial computing, I’ve long been captivated by the idea of placing beautiful type into real-world space. With Microsoft HoloLens, you can anchor holographic objects in your physical environment — on tables, walls, or in mid-air — and walk around them just like real objects. My journey began…